Valus Ta'aurc: Difference between revisions
From Destinypedia, the Destiny wiki
(added symbols) |
No edit summary Tag: Mobile edit |
||
| (19 intermediate revisions by 8 users not shown) | |||
| Line 1: | Line 1: | ||
{{ | {{Image|New image for Aspect Ta'aurc needed now that Whisper is back}} | ||
{{about|the [[Cabal]] [[Colossus]]|the Royal Beast of the same name|Ta'aurc (Royal Beast)}} | {{about|the [[Cabal]] [[Colossus]]|the Royal Beast of the same name|Ta'aurc (Royal Beast)}} | ||
{{Tabbed infobox | {{Tabbed infobox | ||
| Line 12: | Line 12: | ||
|image= [[File:Ta'aurcGrimoire.jpg|300px]] | |image= [[File:Ta'aurcGrimoire.jpg|300px]] | ||
|species= [[Cabal]] | |species= [[Cabal]] | ||
|faction= [[Siege Dancers]] {{c|commander}} <br> [[Dust Giants]] | |faction= [[Sand Eaters]] {{C|formerly}} <br> [[Siege Dancers]] {{c|commander}} <br> [[Dust Giants]] | ||
|rank= [[Valus]] | |rank= [[Valus]] | ||
|class= [[Ultra]] [[Colossus]] | |class= [[Ultra]] [[Colossus]] | ||
| Line 18: | Line 18: | ||
|gender= Male | |gender= Male | ||
|weapon= {{icon|Solar}} [[Heavy Slug Thrower]] <br> {{icon|Solar}} Cabal Cluster Missiles | |weapon= {{icon|Solar}} [[Heavy Slug Thrower]] <br> {{icon|Solar}} Cabal Cluster Missiles | ||
|ability= Summon Cabal <br> High Durability <br> Initial Immunity <br> Quake | |ability= Summon Cabal <br> High Durability <br> Initial Immunity <br> {{Icon|Kinetic}} Quake | ||
}} | }} | ||
|title2= Aspect | |title2= Aspect | ||
| Line 30: | Line 30: | ||
|image= [[File:TakenTa'aurc.jpg|300px]] | |image= [[File:TakenTa'aurc.jpg|300px]] | ||
|species= [[Taken]] | |species= [[Taken]] | ||
|rank= [[Ultra]] | |rank= [[Ultra]] | ||
|class= [[Taken Centurion]] | |class= [[Taken Centurion]] | ||
| Line 41: | Line 40: | ||
|content3= | |content3= | ||
{{Boss infobox | {{Boss infobox | ||
|nameBG=# | |nameBG=#4E5A3D | ||
|BG=# | |BG=#4E5A3D | ||
|sectionBG=# | |sectionBG=#4E5A3D | ||
|lineBG=# | |lineBG=#4E5A3D | ||
|name= Valus Ta'aurc, Dares Champion | |name= Valus Ta'aurc, Dares Champion | ||
|image= [[File:DaresTa'aurc0.jpg|300px]] | |image= [[File:DaresTa'aurc0.jpg|300px]] | ||
| Line 58: | Line 57: | ||
{{Quote|The last sounds to reach their ears were the creak of tank tread and the battle-cry of Ta'aurc.|Grimoire description}} | {{Quote|The last sounds to reach their ears were the creak of tank tread and the battle-cry of Ta'aurc.|Grimoire description}} | ||
'''Valus Ta'aurc''' was the Fleet Commander of the [[Siege Dancers]], although he remained a member of the [[Dust Giants]]. From his [[Imperial Land Tank]], the [[Cerberus Vae III]], Ta'aurc was infamous for conquering more land than any other commander in the Cabal [[Exclusion Zone]] on [[Mars]], which encompasses the entire city of [[Freehold]] in their territory. | '''Valus Ta'aurc''' was the Fleet Commander of the [[Siege Dancers]], although he remained a member of the [[Dust Giants]]. From his [[Imperial Land Tank]], the ''[[Cerberus Vae III]]'', Ta'aurc was infamous for conquering more land than any other commander in the Cabal [[Exclusion Zone]] on [[Mars]], which encompasses the entire city of [[Freehold]] in their territory. | ||
==Biography== | ==Biography== | ||
{{Quote|Find the source! Rouse the [[Psion Flayer|Flayers]] and find the source!|Valus Ta'aurc after Rasputin's orbital bombardment}} | {{Quote|Find the source! Rouse the [[Psion Flayer|Flayers]] and find the source!|Valus Ta'aurc after Rasputin's orbital bombardment}} | ||
After the death of their former unnamed [[Primus]], Ta'aurc became the acting commander of the Siege Dancers.<ref name="Dunemarchers">'''Bungie (2017/8/9)''', ''[[Destiny 2]] | After the death of their former unnamed [[Primus]], Ta'aurc became the acting commander of the Siege Dancers.<ref name="Dunemarchers">'''Bungie (2017/8/9)''', ''[[Destiny 2]] - Item Description: [[Dunemarchers#Lore|Dunemarchers]]''</ref> Under his authority, Ta'aurc led the Cabal in on-going attrition to secure [[Meridian Bay]] against the [[Virgo Prohibition]] [[Vex]]. During a pitched battle against the machines, both sides suffered heavy casualties when an orbital bombardment directed by the [[Warmind]] [[Rasputin]] struck the battlefield. Outraged by the unexpected assault, Ta'aurc roared orders to his soldiers to have the [[Ice Reapers]] deployed and locate the entity behind the orbital strike.<ref>'''Bungie (2014/12/9)''', ''[[Destiny]]: [[The Dark Below]] - [[Grimoire]]:[[Grimoire:Allies/Rasputin#Ghost_Fragment:_Rasputin_2|Ghost Fragment: Rasputin 2]]''</ref> | ||
Having entered a war with the local Cabal, [[Commander Zavala]] issued a [[Fireteam]] of [[Guardian]]s to eliminate the [[Valus]] and break the Siege Dancers' grip on Freehold; After ambushing several lieutenants, the Guardians pressed upon the Siege Dancers' mobile headquarters stationed at the [[Valley of the Kings]]. After pushing through their forces, Ta'aurc engaged the invaders inside. Despite his efforts and Cabal reinforcements to fend off their assault, however, the Land Tank fell to the Lightbearers and Ta'aurc was killed in action; Rendering the Siege Dancers leaderless and the scout Legions on Mars having lost a major chain in their command.<ref>'''Bungie (2014/9/9)''', ''[[Destiny]] - [[Cerberus Vae III (strike)|Cerberus Vae III]]''</ref> | |||
===Resurrection=== | ===Resurrection=== | ||
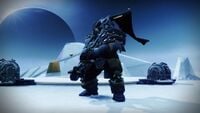
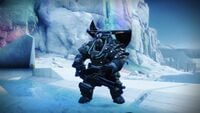
Five years after his death at the hands of the Guardians, Valus Ta'aurc was risen by the necromantic powers of the [[Worm God]] [[Xol, Will of the Thousands]], whose lingering will persisted amongst the [[Taken]] on [[Io]] following his own death. Ta'aurc was then Taken, and became '''Ta'aurc, Aspect of War'''.<ref>'''Bungie (2018/5/8)''', ''[[Destiny 2]]: [[Warmind (expansion)|Warmind]] | Five years after his death at the hands of the Guardians, Valus Ta'aurc was risen by the necromantic powers of the [[Worm God]] [[Xol, Will of the Thousands]], whose lingering will persisted amongst the [[Taken]] on [[Io]] following his own death. Ta'aurc was then Taken by Xol, and became '''Ta'aurc, Aspect of War'''. He would be seen occasionally on patrol of the [[Echo Mesa]] and later engaged [[The Guardian]] alongside [[Drevis, Aspect of Darkness]] and [[Urzok, Aspect of Hate]] in battle during their quest for the [[Whisper of the Worm]].<ref>'''Bungie (2018/5/8)''', ''[[Destiny 2]]: [[Warmind (expansion)|Warmind]] - [[The Whisper]]''</ref> | ||
==Gameplay== | ==Gameplay== | ||
| Line 76: | Line 75: | ||
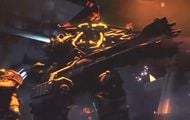
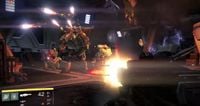
He is the final boss for the [[Cerberus Vae III (strike)|Cerberus Vae III]] [[Strike]], where the Guardians battle against him within his base of operations, an [[Imperial Land Tank]]. He is armed with a [[Heavy Slug Thrower]] and Rocket Pods, and is supported by [[Skyburners]] [[Legionary|Legionaries]], [[Phalanx]]es and [[Psion]]s. His weapon fires faster and has higher accuracy than those of standard Colossi, allowing him to suppress Guardians with ease, even at long range. He will continuously fire this weapon to prevent them from moving out of cover. On top of that, he can launch bigger barrages of missiles than a normal Colossus can (up to eleven), and is thus capable of swiftly destroying his targets. Getting too close to Ta'aurc will trigger his "Quake" ability, where he performs a ground stomp that creates a massive shockwave, which is, more often than not, an instant kill. | He is the final boss for the [[Cerberus Vae III (strike)|Cerberus Vae III]] [[Strike]], where the Guardians battle against him within his base of operations, an [[Imperial Land Tank]]. He is armed with a [[Heavy Slug Thrower]] and Rocket Pods, and is supported by [[Skyburners]] [[Legionary|Legionaries]], [[Phalanx]]es and [[Psion]]s. His weapon fires faster and has higher accuracy than those of standard Colossi, allowing him to suppress Guardians with ease, even at long range. He will continuously fire this weapon to prevent them from moving out of cover. On top of that, he can launch bigger barrages of missiles than a normal Colossus can (up to eleven), and is thus capable of swiftly destroying his targets. Getting too close to Ta'aurc will trigger his "Quake" ability, where he performs a ground stomp that creates a massive shockwave, which is, more often than not, an instant kill. | ||
When fighting Valus Ta'aurc, it's | When fighting Valus Ta'aurc, it's in the best interest to stay on the high ground as much as possible, that way you have easy access to cover and you have to force Ta'aurc and his legion to come to you and have no chance to use his ground slam. Valus Ta'aurc is stubborn and tends to keep his fire on a target even if they're behind cover. If someone wants to remove his lock on their teammate, a headshot with a sniper is the best, most reliable way to draw his attention. If Ta'aurc roars, get behind cover as that is his call for his missile barrage and it will guarantee a death if it's not blocked with cover, however, be aware that he can do up to three barrages in a row. A missile barrage is often also his announcement that he is moving to a new location. Valus Ta'aurc tends to have five locations. Back middle where he arrives, top right and left which is where the team should be stationed most of the fight unless he moves there, directly in the middle of the room, and front middle where the fireteam arrived in the room. Valus Ta'aurc moves often and tends to reach a spot only to instantly move to another unless he locks onto a Guardian. | ||
Valus Ta'aurc is infamous for his high health pool, making him a damage sponge even after his health nerf in ''[[The Taken King]]''. It's best to take the fight slow and clear out the ads that spawn on the higher levels from behind cover from the Valus to make sure that there is as little of a threat while fighting him as possible. If Valus Ta'aurc is nearing death, he will almost perpetually be using his missile barrage, however due to his stubbornness this can be used against him by drawing his attention, then | Valus Ta'aurc is infamous for his high health pool, making him a damage-sponge even after his health nerf in ''[[The Taken King]]''. It's best to take the fight slow and clear out the ads that spawn on the higher levels from behind cover from the Valus to make sure that there is as little of a threat while fighting him as possible. If Valus Ta'aurc is nearing death, he will almost perpetually be using his missile barrage, however due to his stubbornness this can be used against him by drawing his attention, then hiding behind cover while the missiles hit the terrain while the other teammates finish him off, however be aware he can often change targets mid missile barrage so be near cover just in case along with the fact that the missiles do splash damage, so being right next to the terrain the missiles are hitting is ill-advised. It's best to stay behind it, but a fair distance away just in case. | ||
===The Whisper=== | ===The Whisper=== | ||
He appeared on [[Io]] during the Taken Blight [[Public Event]], together with [[Urzok, the Hated|Urzok, Aspect of Hate]] and [[Drevis, Wolf Baroness|Drevis, Aspect of Darkness]], and needed to be killed | He appeared on [[Io]] during the Taken Blight [[Public Event]], together with [[Urzok, the Hated|Urzok, Aspect of Hate]] and [[Drevis, Wolf Baroness|Drevis, Aspect of Darkness]], and needed to be killed to start the quest for the [[Whisper of the Worm]]. He also returned as one of the final bosses of the quest, and killing him and all other enemies in the room rewarded the player with the [[Whisper of the Worm]]. | ||
===Dares of Eternity=== | ===Dares of Eternity=== | ||
Valus Ta'aurc appears as one of three final bosses in Dares of Eternity. He is in a shorefront arena, similar | Valus Ta'aurc appears as one of the three final bosses in Dares of Eternity. He is in a shorefront arena, similar to the arena where [[Dominus Ghaul]] was originally fought, fused with the region of The Silent Cartographer from Halo: Combat Evolved on the far left side of the arena. After Valus Ta'aurc appears, he will fight with his normal abilities, moving up and down the upper section of the arena, until a third of his health is depleted. At that point, he will activate an immunity shield powered by Cabal generators, and summon 12 of [[Xûr's Siegebringer]]s. Once all the glowing enemies are defeated, a [[Thresher]] will appear to bombard the players. Destroying the gunship will make it drop a Dares Core, which must be thrown at the generators to call an orbital bombardment upon them, destroying them. With his shield deactivated, the Dares Champion will resume combat as normal, summoning [[Commander of Eternity]] [[Colossus|Colossi]] and [[Gladiator]]s in addition to his normal reinforcements, and moving around the arena more. Defeating Valus Ta'urc will complete the encounter and possibly the session of Dares. | ||
==Gallery== | ==Gallery== | ||
| Line 119: | Line 116: | ||
==Trivia== | ==Trivia== | ||
*Zavala's introduction to the Strike mission where Ta'aurc is fought, "Whether we wanted it or not, we've stepped into a war with the [[Cabal]] on [[Mars]]," has also become a popular meme within the community as a copypasta. In Dares of Eternity, Xur repeats this line | *Zavala's introduction to the Strike mission where Ta'aurc is fought, "Whether we wanted it or not, we've stepped into a war with the [[Cabal]] on [[Mars]]," has also become a popular meme within the community as a copypasta. | ||
**In [[Dares of Eternity]], [[Xur]] repeats this line (though slightly altered) during the intro to the Ta'aurc boss fight.{{Citation needed}} | |||
*Upon entering the room, Valus Ta'aurc is fully immune to all damage until the doors behind him are fully closed. | *Upon entering the room, Valus Ta'aurc is fully immune to all damage until the doors behind him are fully closed. | ||
**This was fixed in [[Rise of Iron]], but he still can occasionally be invulnerable for longer periods of time than usual even after the door is closed. | **This was fixed in [[Rise of Iron]], but he still can occasionally be invulnerable for longer periods of time than usual even after the door is closed. | ||
| Line 130: | Line 128: | ||
**''[[The Dark Below]]'' {{Mo}} | **''[[The Dark Below]]'' {{Mo}} | ||
**''[[The Taken King]]'' {{Mo}} | **''[[The Taken King]]'' {{Mo}} | ||
*''[[Destiny 2]] | *''[[Destiny 2]]: [[Warmind (expansion)|Warmind]]'' {{c|Aspect}} | ||
**''[[30th Anniversary Pack]]'' {{C|Dares Champion}} | **''[[30th Anniversary Pack]]'' {{C|Dares Champion}} | ||
**''[[Into the Light]]'' {{Nc}} | |||
==References== | ==References== | ||
Latest revision as of 09:44, January 21, 2025
Remove this template once the image(s) have been uploaded and applied.
| Valus Ta'aurc | |
|---|---|
| |
| Biographical information | |
|
Species: |
|
|
Faction: |
Sand Eaters (formerly) |
|
Rank: |
|
|
Class: |
|
|
Gender: |
Male |
| Combat information | |
|
Mission: |
|
|
Weapon(s): |
|
|
Abilities: |
|
| Ta'aurc, Aspect of War | |
|---|---|
| |
| Biographical information | |
|
Species: |
|
|
Rank: |
|
|
Class: |
|
|
Gender: |
Male |
| Combat information | |
|
Mission: |
|
|
Weapon(s): |
|
|
Abilities: |
|
| Valus Ta'aurc, Dares Champion | |
|---|---|
| |
| Biographical information | |
|
Species: |
|
|
Rank: |
|
|
Class: |
|
|
Gender: |
Male |
| Combat information | |
|
Mission: |
|
|
Weapon(s): |
|
|
Abilities: |
Summon Cabal |
- "The last sounds to reach their ears were the creak of tank tread and the battle-cry of Ta'aurc."
- — Grimoire description
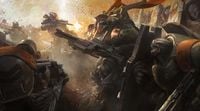
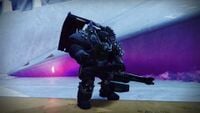
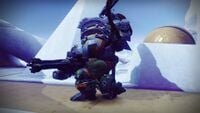
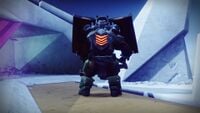
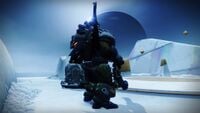
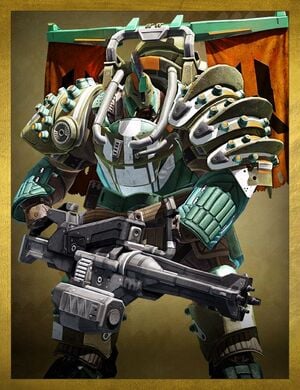
Valus Ta'aurc was the Fleet Commander of the Siege Dancers, although he remained a member of the Dust Giants. From his Imperial Land Tank, the Cerberus Vae III, Ta'aurc was infamous for conquering more land than any other commander in the Cabal Exclusion Zone on Mars, which encompasses the entire city of Freehold in their territory.
Biography[edit]
- "Find the source! Rouse the Flayers and find the source!"
- — Valus Ta'aurc after Rasputin's orbital bombardment
After the death of their former unnamed Primus, Ta'aurc became the acting commander of the Siege Dancers.[1] Under his authority, Ta'aurc led the Cabal in on-going attrition to secure Meridian Bay against the Virgo Prohibition Vex. During a pitched battle against the machines, both sides suffered heavy casualties when an orbital bombardment directed by the Warmind Rasputin struck the battlefield. Outraged by the unexpected assault, Ta'aurc roared orders to his soldiers to have the Ice Reapers deployed and locate the entity behind the orbital strike.[2]
Having entered a war with the local Cabal, Commander Zavala issued a Fireteam of Guardians to eliminate the Valus and break the Siege Dancers' grip on Freehold; After ambushing several lieutenants, the Guardians pressed upon the Siege Dancers' mobile headquarters stationed at the Valley of the Kings. After pushing through their forces, Ta'aurc engaged the invaders inside. Despite his efforts and Cabal reinforcements to fend off their assault, however, the Land Tank fell to the Lightbearers and Ta'aurc was killed in action; Rendering the Siege Dancers leaderless and the scout Legions on Mars having lost a major chain in their command.[3]
Resurrection[edit]
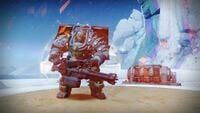
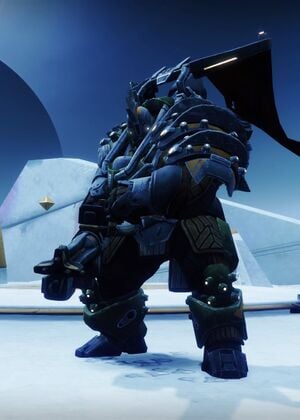
Five years after his death at the hands of the Guardians, Valus Ta'aurc was risen by the necromantic powers of the Worm God Xol, Will of the Thousands, whose lingering will persisted amongst the Taken on Io following his own death. Ta'aurc was then Taken by Xol, and became Ta'aurc, Aspect of War. He would be seen occasionally on patrol of the Echo Mesa and later engaged The Guardian alongside Drevis, Aspect of Darkness and Urzok, Aspect of Hate in battle during their quest for the Whisper of the Worm.[4]
Gameplay[edit]
- "Whether we wanted it or not, we've stepped into a war with the Cabal on Mars. So let's get to taking out their command, one by one. Valus Ta'aurc. From what I can gather he commands the Siege Dancers from an Imperial Land Tank outside of Rubicon. He's well protected, but with the right team, we can punch through those defenses, take this beast out, and break their grip on Freehold."
- — Commander Zavala
Cerberus Vae III[edit]
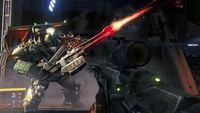
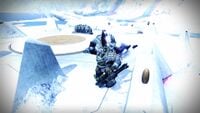
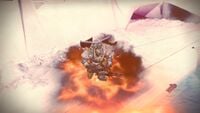
He is the final boss for the Cerberus Vae III Strike, where the Guardians battle against him within his base of operations, an Imperial Land Tank. He is armed with a Heavy Slug Thrower and Rocket Pods, and is supported by Skyburners Legionaries, Phalanxes and Psions. His weapon fires faster and has higher accuracy than those of standard Colossi, allowing him to suppress Guardians with ease, even at long range. He will continuously fire this weapon to prevent them from moving out of cover. On top of that, he can launch bigger barrages of missiles than a normal Colossus can (up to eleven), and is thus capable of swiftly destroying his targets. Getting too close to Ta'aurc will trigger his "Quake" ability, where he performs a ground stomp that creates a massive shockwave, which is, more often than not, an instant kill.
When fighting Valus Ta'aurc, it's in the best interest to stay on the high ground as much as possible, that way you have easy access to cover and you have to force Ta'aurc and his legion to come to you and have no chance to use his ground slam. Valus Ta'aurc is stubborn and tends to keep his fire on a target even if they're behind cover. If someone wants to remove his lock on their teammate, a headshot with a sniper is the best, most reliable way to draw his attention. If Ta'aurc roars, get behind cover as that is his call for his missile barrage and it will guarantee a death if it's not blocked with cover, however, be aware that he can do up to three barrages in a row. A missile barrage is often also his announcement that he is moving to a new location. Valus Ta'aurc tends to have five locations. Back middle where he arrives, top right and left which is where the team should be stationed most of the fight unless he moves there, directly in the middle of the room, and front middle where the fireteam arrived in the room. Valus Ta'aurc moves often and tends to reach a spot only to instantly move to another unless he locks onto a Guardian.
Valus Ta'aurc is infamous for his high health pool, making him a damage-sponge even after his health nerf in The Taken King. It's best to take the fight slow and clear out the ads that spawn on the higher levels from behind cover from the Valus to make sure that there is as little of a threat while fighting him as possible. If Valus Ta'aurc is nearing death, he will almost perpetually be using his missile barrage, however due to his stubbornness this can be used against him by drawing his attention, then hiding behind cover while the missiles hit the terrain while the other teammates finish him off, however be aware he can often change targets mid missile barrage so be near cover just in case along with the fact that the missiles do splash damage, so being right next to the terrain the missiles are hitting is ill-advised. It's best to stay behind it, but a fair distance away just in case.
The Whisper[edit]
He appeared on Io during the Taken Blight Public Event, together with Urzok, Aspect of Hate and Drevis, Aspect of Darkness, and needed to be killed to start the quest for the Whisper of the Worm. He also returned as one of the final bosses of the quest, and killing him and all other enemies in the room rewarded the player with the Whisper of the Worm.
Dares of Eternity[edit]
Valus Ta'aurc appears as one of the three final bosses in Dares of Eternity. He is in a shorefront arena, similar to the arena where Dominus Ghaul was originally fought, fused with the region of The Silent Cartographer from Halo: Combat Evolved on the far left side of the arena. After Valus Ta'aurc appears, he will fight with his normal abilities, moving up and down the upper section of the arena, until a third of his health is depleted. At that point, he will activate an immunity shield powered by Cabal generators, and summon 12 of Xûr's Siegebringers. Once all the glowing enemies are defeated, a Thresher will appear to bombard the players. Destroying the gunship will make it drop a Dares Core, which must be thrown at the generators to call an orbital bombardment upon them, destroying them. With his shield deactivated, the Dares Champion will resume combat as normal, summoning Commander of Eternity Colossi and Gladiators in addition to his normal reinforcements, and moving around the arena more. Defeating Valus Ta'urc will complete the encounter and possibly the session of Dares.
Gallery[edit]
Destiny
Destiny 2
Trivia[edit]
- Zavala's introduction to the Strike mission where Ta'aurc is fought, "Whether we wanted it or not, we've stepped into a war with the Cabal on Mars," has also become a popular meme within the community as a copypasta.
- In Dares of Eternity, Xur repeats this line (though slightly altered) during the intro to the Ta'aurc boss fight.[citation needed]
- Upon entering the room, Valus Ta'aurc is fully immune to all damage until the doors behind him are fully closed.
- This was fixed in Rise of Iron, but he still can occasionally be invulnerable for longer periods of time than usual even after the door is closed.
- When he returned in Destiny 2 as a Taken on Io, he appeared as a Centurion rather than a Colossus. This was most likely intentional as there are currently no Taken Colossi in the game.
- Ta'aurc, Dominus Ghaul and Val Ca'uor are the only known Cabal to be resurrected.
- Valus Ta'aurc's cluster missiles and his ground slam are both named Quake in his kill cam. It is unknown if this was intended, a bug or an oversight that was never patched.
List of appearances[edit]
- Destiny (First appearance)
- The Dark Below (Mentioned only)
- The Taken King (Mentioned only)
- Destiny 2: Warmind (Aspect)
- 30th Anniversary Pack (Dares Champion)
- Into the Light (Non-canon appearance)
References[edit]
- ^ Bungie (2017/8/9), Destiny 2 - Item Description: Dunemarchers
- ^ Bungie (2014/12/9), Destiny: The Dark Below - Grimoire:Ghost Fragment: Rasputin 2
- ^ Bungie (2014/9/9), Destiny - Cerberus Vae III
- ^ Bungie (2018/5/8), Destiny 2: Warmind - The Whisper


