Aye-I, Privateer: Difference between revisions
From Destinypedia, the Destiny wiki
Mrcroker 69 (talk | contribs) m (→Gameplay) |
No edit summary |
||
| (5 intermediate revisions by 3 users not shown) | |||
| Line 1: | Line 1: | ||
{{Boss infobox | {{Boss infobox | ||
|nameBG= #656565 | |nameBG=#656565 | ||
|BG= #656565 | |BG=#656565 | ||
|sectionBG= #656565 | |sectionBG=#656565 | ||
|lineBG= #656565 | |lineBG=#656565 | ||
|name= Aye-I, Privateer | |name= Aye-I, Privateer | ||
|image= {{Tabcontainer | |image= {{Tabcontainer | ||
| Line 15: | Line 15: | ||
|class= [[Heavy Shank]] | |class= [[Heavy Shank]] | ||
|mission= [[Ketchcrash]] | |mission= [[Ketchcrash]] | ||
|height= | |height= | ||
|mass= | |mass= | ||
|weapon= | |weapon= {{icon|Solar}} [[Wire Rifle]] <br> {{icon|Void}} Shank Turrets <br> {{icon|Arc}} Discharge | ||
|ability= Summon Fallen <br> High Durability <br> Midair Levitation <br> Rapid Flight <br> Teleportation <br> | |ability= Summon Fallen <br> High Durability <br> Midair Levitation <br> Rapid Flight <br> Teleportation <br> [[Servitor, Loyal to Aye-I|Loyal Servitor]] Shield <br> {{icon|Kinetic}} Shank Melee | ||
}} | }} | ||
'''Aye-I, Privateer''' | '''Aye-I, Privateer''' was an extremely powerful [[Fallen]] [[Heavy Shank]] and the leader of a crew of pirates hired by [[Eramis, Kell of Darkness|Eramis, the Shipstealer]], to assist her in hunting for the lost relics of [[Nezarec, Final God of Pain|Nezarec]] on behalf of the [[The Witness|Witness]]. It served as one of the final bosses of the now-unavailable [[Ketchcrash]] activity.<ref>'''Bungie (2022/8/23)''', ''[[Destiny 2]]: [[Season of Plunder]] - [[Ketchcrash]]''</ref> | ||
==Gameplay== | ==Gameplay== | ||
Aye-I is the first of the three weekly-rotating privateer bosses that appear in the Ketchcrash activity. After you have boarded the enemy [[Ketch]] and completed the first randomized encounter, you and your [[Fireteam]] will proceed to the Captain's Quarters, where the boss will be waiting for you. Aye-I will alternate between three different attack modes throughout the fight, much like [[S.A.B.E.R.-2]]. In its first mode, it will utilize a [[Solar]]-powered [[Wire Rifle]] turret, capable of hitting targets at long ranges. When you arrive at the quarters, the guards will begin firing at you almost immediately, while the boss will briefly hover above the throne before departing via teleportation. Players will then be required to move on to the next encounter. | Aye-I is the first of the three weekly-rotating privateer bosses that appear in the Ketchcrash activity. After you have boarded the enemy [[Ketch]] and completed the first randomized encounter, you and your [[Fireteam]] will proceed to the Captain's Quarters, where the boss will be waiting for you. Aye-I will alternate between three different attack modes throughout the fight, much like [[S.A.B.E.R.-2]]. In its first mode, it will utilize a [[Solar]]-powered [[Wire Rifle]] turret, capable of hitting targets at long ranges. When you arrive at the quarters, the guards will begin firing at you almost immediately, while the boss will briefly hover above the throne before departing via teleportation. Players will then be required to move on to the next encounter. | ||
Once you have finished the second encounter, you must head up to the deck of the ship. Interact with the terminal to commence the final confrontation, and Aye-I will descend onto the arena, now in its second attack mode, followed by large numbers of reinforcements. Having forgone its Wire Rifle turret, the Heavy Shank now arms itself with dual, charge-up gatling guns that rapidly fire blasts of [[Void]] energy. These weapons can drain a player's health very fast, but they can be easily avoided by keeping your distance and strafing to the side. The boss will also gain another attack in its second mode: a close-ranged concussive shockwave that can be used to knock its enemies back away from it, whilst causing significant damage to them. Aye-I will be backed up by large hordes of Fallen, consisting mostly of [[Shank]]s. After losing a third of its health, the boss will deploy an immunity shield before teleporting to the air space at the far end of the deck. [[Exploder Shank]]s will also start spawning in droves. In order to lower its defences, players must destroy all of the [[Servitor, Loyal to Aye-I|Loyal Servitors]] that appear alongside the boss to power the shield. After it becomes vulnerable again, Aye-I will remain in the air and strafe around the arena, rather than coming back down to the deck, whilst firing down at players with its Void turrets. Stronger reinforcements will also arrive to try and overwhelm the fireteam. Taking out another third of the Heavy Shank's health will cause it to regain its shield and teleport back to the far end before another wave of Servitors spawn to power it. Once they and the boss's defences have been neutralized again, it will enter its third and final mode. The plating on its front will be blasted off, exposing its [[Arc]] core. The Heavy Shank will then descend to the deck and begin charging any player who gains its attention, whilst emitting large bursts of Arc energy that cause serious amounts of damage. More Servitors will also join the fight and shield other nearby Fallen, and even their leader, which makes it important to eliminate it as fast as possible. Once Aye-I has been destroyed, the mission will be complete, allowing you and your teammates to claim your [[Loot]] from the end-of-mission chest. | Once you have finished the second encounter, you must head up to the deck of the ship. Interact with the terminal to commence the final confrontation, and Aye-I will descend onto the arena, now in its second attack mode, followed by large numbers of reinforcements. Having forgone its Wire Rifle turret, the Heavy Shank now arms itself with dual, charge-up gatling guns that rapidly fire blasts of [[Void]] energy. These weapons can drain a player's health very fast, but they can be easily avoided by keeping your distance and strafing to the side. The boss will also gain another attack in its second mode: a close-ranged concussive shockwave that can be used to knock its enemies back away from it, whilst causing significant damage to them. Aye-I will be backed up by large hordes of Fallen, consisting mostly of [[Shank]]s. | ||
After losing a third of its health, the boss will deploy an immunity shield before teleporting to the air space at the far end of the deck. [[Exploder Shank]]s will also start spawning in droves. In order to lower its defences, players must destroy all of the [[Servitor, Loyal to Aye-I|Loyal Servitors]] that appear alongside the boss to power the shield. After it becomes vulnerable again, Aye-I will remain in the air and strafe around the arena, rather than coming back down to the deck, whilst firing down at players with its Void turrets. Stronger reinforcements will also arrive to try and overwhelm the fireteam. Taking out another third of the Heavy Shank's health will cause it to regain its shield and teleport back to the far end before another wave of Servitors spawn to power it. | |||
Once they and the boss's defences have been neutralized again, it will enter its third and final mode. The plating on its front will be blasted off, exposing its [[Arc]] core. The Heavy Shank will then descend to the deck and begin charging any player who gains its attention, whilst emitting large bursts of Arc energy that cause serious amounts of damage. More Servitors will also join the fight and shield other nearby Fallen, and even their leader, which makes it important to eliminate it as fast as possible. Once Aye-I has been destroyed, the mission will be complete, allowing you and your teammates to claim your [[Loot]] from the end-of-mission chest. | |||
When fighting the boss on Master difficulty, two [[Champion]]s—either [[Overload Captain]]s and/or [[Barrier Servitor]]s—will spawn whenever Aye-I enters its shield phase. | |||
==Gallery== | ==Gallery== | ||
Latest revision as of 09:00, August 6, 2023
| Aye-I, Privateer | |
|---|---|
| Biographical information | |
|
Species: |
|
|
Rank: |
|
|
Class: |
|
| Combat information | |
|
Mission: |
|
|
Weapon(s): |
|
|
Abilities: |
Summon Fallen |
Aye-I, Privateer was an extremely powerful Fallen Heavy Shank and the leader of a crew of pirates hired by Eramis, the Shipstealer, to assist her in hunting for the lost relics of Nezarec on behalf of the Witness. It served as one of the final bosses of the now-unavailable Ketchcrash activity.[1]
Gameplay[edit]
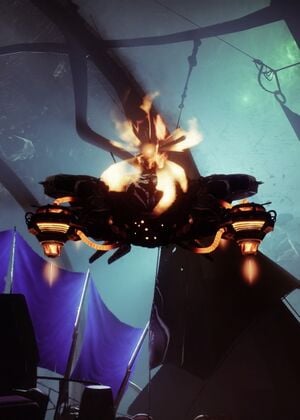
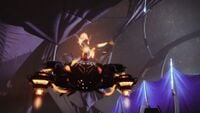
Aye-I is the first of the three weekly-rotating privateer bosses that appear in the Ketchcrash activity. After you have boarded the enemy Ketch and completed the first randomized encounter, you and your Fireteam will proceed to the Captain's Quarters, where the boss will be waiting for you. Aye-I will alternate between three different attack modes throughout the fight, much like S.A.B.E.R.-2. In its first mode, it will utilize a Solar-powered Wire Rifle turret, capable of hitting targets at long ranges. When you arrive at the quarters, the guards will begin firing at you almost immediately, while the boss will briefly hover above the throne before departing via teleportation. Players will then be required to move on to the next encounter.
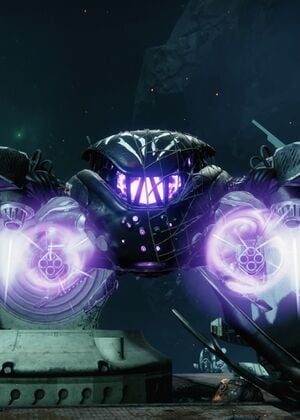
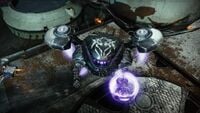
Once you have finished the second encounter, you must head up to the deck of the ship. Interact with the terminal to commence the final confrontation, and Aye-I will descend onto the arena, now in its second attack mode, followed by large numbers of reinforcements. Having forgone its Wire Rifle turret, the Heavy Shank now arms itself with dual, charge-up gatling guns that rapidly fire blasts of Void energy. These weapons can drain a player's health very fast, but they can be easily avoided by keeping your distance and strafing to the side. The boss will also gain another attack in its second mode: a close-ranged concussive shockwave that can be used to knock its enemies back away from it, whilst causing significant damage to them. Aye-I will be backed up by large hordes of Fallen, consisting mostly of Shanks.
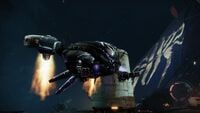
After losing a third of its health, the boss will deploy an immunity shield before teleporting to the air space at the far end of the deck. Exploder Shanks will also start spawning in droves. In order to lower its defences, players must destroy all of the Loyal Servitors that appear alongside the boss to power the shield. After it becomes vulnerable again, Aye-I will remain in the air and strafe around the arena, rather than coming back down to the deck, whilst firing down at players with its Void turrets. Stronger reinforcements will also arrive to try and overwhelm the fireteam. Taking out another third of the Heavy Shank's health will cause it to regain its shield and teleport back to the far end before another wave of Servitors spawn to power it.
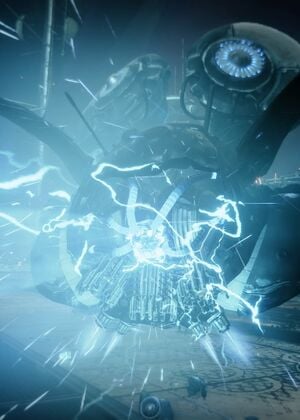
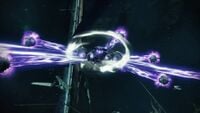
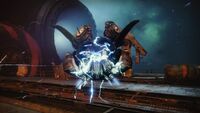
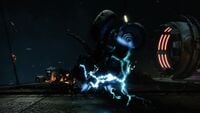
Once they and the boss's defences have been neutralized again, it will enter its third and final mode. The plating on its front will be blasted off, exposing its Arc core. The Heavy Shank will then descend to the deck and begin charging any player who gains its attention, whilst emitting large bursts of Arc energy that cause serious amounts of damage. More Servitors will also join the fight and shield other nearby Fallen, and even their leader, which makes it important to eliminate it as fast as possible. Once Aye-I has been destroyed, the mission will be complete, allowing you and your teammates to claim your Loot from the end-of-mission chest.
When fighting the boss on Master difficulty, two Champions—either Overload Captains and/or Barrier Servitors—will spawn whenever Aye-I enters its shield phase.
Gallery[edit]
Trivia[edit]
- The name "Aye-I" is a play on "aye aye:" an idiomatic expression of compliance, used by sailors to acknowledge orders from a superior; or of surprise and amusement. An Aye-aye is also the name of a species of rare, nocturnal Madagascan primate related to lemurs.
- Aye-I is the first Heavy Shank to be seen with ability to alternate between different forms since the original model, S.A.B.E.R.-2.
List of appearances[edit]
- Destiny 2
- Season of Plunder (First appearance)
References[edit]
- ^ Bungie (2022/8/23), Destiny 2: Season of Plunder - Ketchcrash
