Gambit: Difference between revisions
From Destinypedia, the Destiny wiki
No edit summary |
|||
| (48 intermediate revisions by 11 users not shown) | |||
| Line 2: | Line 2: | ||
|variant= | |variant= | ||
|image= [[File:Gambit Wallpaper Logo.png]] | |image= [[File:Gambit Wallpaper Logo.png]] | ||
| | |domain(s)= | ||
| | |type= Recreational competition, training (High Risk & Reward) | ||
| | |functions= Train [[Guardian]]s for the Second Collapse and help [[The Drifter (character)|The Drifter]] gain motes. | ||
| | |othernames= | ||
| | |conflicts= [[Vanguard]] disapproves | ||
| | |leadership= [[Drifter]] | ||
| | |notable= | ||
}} | }} | ||
'''Gambit''' is a player vs. player vs. environment game mode in ''[[Destiny 2]]'', introduced in the ''[[Forsaken]]'' expansion. Like the [[Crucible]], weapons and armor can be acquired by completing matches, which can be used in the rest of the game. Likewise, gear received elsewhere in the game can be used in Gambit. [[ | '''Gambit''' is a player vs. player vs. environment game mode in ''[[Destiny 2]]'', introduced in the ''[[Forsaken]]'' expansion. Like the [[Crucible]], weapons and armor can be acquired by completing matches, which can be used in the rest of the game. Likewise, gear received elsewhere in the game can be used in Gambit. The [[Drifter]] is the Gambit vendor. | ||
==Overview== | ==Overview== | ||
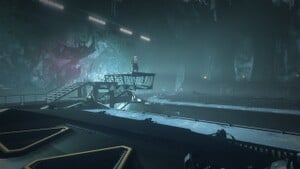
Two teams of four [[Guardian]]s each are placed into two identical arenas, after a brief break across from each other aboard the Drifter's ship, where the teams can discuss strategy and interact with their opponents. Players compete to kill enemies to collect [[Mote of Dark|Motes of Dark]], which are deposited at a [[Bank (Gambit)|Bank]] in the centre of the arena.<ref name = "NewExpansion">[https://www.kotaku.com.au/2018/06/destiny-2s-next-expansion-is-changing-a-lot/ '''Kotaku''' - ''Destiny 2's Next Expansion Is Changing A Lot'']</ref> Up to fifteen Motes can be held at a time, | [[File:Drifters_Ship.jpg|thumb|300px|right|The Drifter's Ship pre-match.]] | ||
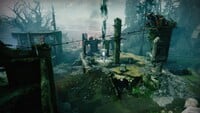
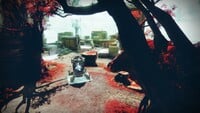
Two teams of four [[Guardian]]s each are placed into two identical arenas, after a brief break across from each other aboard the Drifter's ship, where the teams can discuss strategy and interact with their opponents. Players compete to kill enemies to collect [[Mote of Dark|Motes of Dark]], which are deposited at a [[Bank (Gambit)|Bank]] in the centre of the arena.<ref name = "NewExpansion">[https://www.kotaku.com.au/2018/06/destiny-2s-next-expansion-is-changing-a-lot/ '''Kotaku''' - ''Destiny 2's Next Expansion Is Changing A Lot'']</ref> Up to fifteen Motes can be held at a time, with half of these dropped if the player dies. | |||
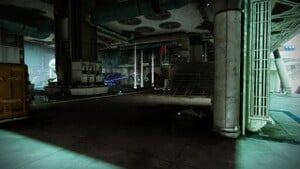
[[File:GambitPre2.jpg|300px|right|thumb|Motes Of Darkness]] | |||
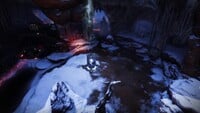
Depositing at least five, ten, or fifteen Motes will spawn a [[Taken]] enemy, dubbed a Blocker, on the other team's Bank which they must kill to continue depositing Motes. These Blockers are a [[Ravenous Taken Goblin]] with at least five Motes, a [[Ravenous Taken Phalanx]] with at least ten Motes, and a [[Major]] [[Taken Knight]] with a {{Icon|Stasis}} [[Stasis Boomer]] at fifteen Motes. Allowing two blockers to exist at the same time will institute a drain effect on the bank of the blocked team, taking one mote per second that two or more blockers exist. This introduces a layer of strategy to depositing your teams motes. | |||
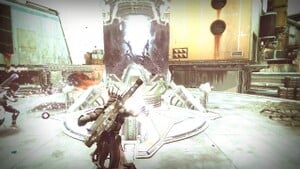
[[File:Gambit4.jpg|300px|right|thumb|Banking Motes]] | |||
On occasion, [[High-Value Target]]s will appear, which are minibosses differentiated by a white sparkling aura that drop a large amount of Motes on damage and death, usually enough for a player to nearly fill their Mote inventory. Should a team be trailing greatly behind the opposing team, catch-up targets will appear for them, which are Elite enemies with the same aura as high-value targets that drop more Motes than regular enemies, but not as much as actual high-value targets. | |||
At 40 and 80 Motes deposited, a portal will open up which allows one player to invade the other team's area to hinder their progress by denying Motes.<ref name = "Gambit"/> The Invader will have an overshield, be friendly to the opponents' enemies, and be able to see the locations of every opposing player, at the cost of being announced and glowing red for easy visibility to the opposing team. Popular invasion and counter-invasion tactics include the use of [[Super]]s, long-range weapons such as [[sniper rifle]]s, and heavy weapons such as [[machine gun]]s like [[Xenophage]]. Invaders will return to their team once a timer runs out, they eliminate the entire enemy team, or they are killed. Killing an Invader drops 3 motes, or all the motes they were carrying. An Invader can collect the motes of players they kill, and bring them back to their own arena. | |||
When the bank is full (100 motes), the second phase of Gambit will begin. The [[Primeval]], giant [[Ultra]] Taken, will be summoned in their arena, alongside a plethora of Taken minions, while two [[Primeval Envoy]]s will spawn at one of the Fronts. <ref name = "Gambit">[https://www.destinythegame.com/au/en/gambit '''Destiny the Game''' - ''Gambit'']</ref> The opposing team's invasion portal will begin to activate periodically.<ref name = "Ingame">'''Bungie (2018/9/4)''', ''[[Destiny 2]]: [[Forsaken]], Playstation 4, Activision Blizzard''</ref> At this point, the goal of the game is to kill the Primeval before the other team is able to kill their own. Killing the Primeval envoys as soon as possible will remove the invulnerability shield from the Primeval, enabling damage. Invasions now serve the purpose of healing the opposing team's Primeval upon killing a Guardian, to set back their progress towards winning the round. If neither Primeval is killed when the match timer expires, the team whose Primeval has less health wins the match. | |||
===Gambit Labs=== | |||
Occasionally, a Gambit Labs mode with experimental rules is made available. These alternate rules have included making it so depositing Motes opens the opposing team's portal, and making it so the Invader drains the opposing team's bank as long as they are in their arena.<ref>'''Bungie (2022/2/17)''' - [https://www.bungie.net/en/News/Article/51091 ''THIS WEEK AT BUNGIE'']</ref> | |||
===Legacy Rules=== | |||
Prior to the ''[[Beyond Light]]'' expansion, Gambit consisted of multiple rounds, with 75 motes being required to summon a primeval. The second round of a Gambit match plays identically to the first, with increased enemy difficulty featuring more Elite enemies. If the winning team wins this round, the match ends. Should both teams win only one round, the Sudden Death round is activated, which skips right to the Primeval phase of the match, and all abilities, including Supers, charge significantly quicker.<ref name="Ingame"/> At this point in time, the [[Blocker]]s were different. | |||
A more intense mode of Gambit was known as [[Gambit Prime]], which was a single round match requiring 100 motes banked with increased enemy difficulty and new ways to assist the team.<ref name = "JokersWild">'''Bungie (2019/3/5)''', ''[[Destiny 2]]: [[Season of the Drifter]], Playstation 4, Activision Blizzard''</ref> | |||
With the release of ''[[Season of the Hunt]]'', Gambit and Gambit Prime were merged into one mode. Matches were made one round, with 100 motes needed to summon Primevals. Blockers are able to drain the opposing team's bank, and banking ten motes summons an Elite [[Taken Phalanx]] instead of a Captain. [[Kell's Grave]] and [[Cathedral of Scars]] were also removed, leaving only 4 maps left. | |||
==Current Format== | |||
[[File:Gambit_23.png|200px|right]] | |||
As of Season 16, a series of changes have been made to Gambit. Freelance Gambit, requiring all players to be in a 1-Guardian Fireteam, is now an option at all times. Heavy ammo economy has been reworked slightly- high-value targets now drop heavy ammo bricks, and after successfully clearing each wave, a Heavy Ammo Crate spawns in a set location at the Front that has just been cleared. Invaders no longer have the ability to see how many motes opposing players are carrying, and cannot see player nametags when aiming down sights. | |||
Additionally, during the Primeval phase, the Primeval is fully invulnerable to all incoming damage while Primeval Envoys are on the field. Envoys now spawn at Fronts like enemy waves and must be killed both to generate the Primeval Slayer buff and to remove the Primeval's invulnerable shield. Periodically, new Envoys will spawn, health-locking the Primeval and forcing players to hunt down the Envoys before Primeval DPS can continue. | |||
==List of maps== | ==List of maps== | ||
| Line 32: | Line 49: | ||
{| class="wikitable" | {| class="wikitable" | ||
|- | |- | ||
! Map !! Location !! Expansion !! PlayStation Exclusive !! ''Destiny'' Reprisal | ! Map !! Location !! Expansion !! PlayStation Exclusive !! ''Destiny'' Reprisal !! Current Status | ||
|- | |- | ||
| [[Emerald Coast]] || [[European Dead Zone]], [[Earth]] || [[Forsaken]] || No || Original | | [[Emerald Coast]] || [[European Dead Zone]], [[Earth]] || [[Forsaken]] || No || Original || Active | ||
|- | |- | ||
| [[Legion's Folly]] || [[Arcadian Valley]], [[Nessus]] || [[Forsaken]] || No || Original | | [[Legion's Folly]] || [[Arcadian Valley]], [[Nessus]] || [[Forsaken]] || No || Original || Active | ||
|- | |- | ||
| [[Kell's Grave]] || [[Tangled Shore]], [[Reef]] || [[Forsaken]] || No || Original | | [[Kell's Grave]] || [[Tangled Shore]], [[Reef]] || [[Forsaken]] || No || Original || Vaulted | ||
|- | |- | ||
| [[Cathedral of Scars]] || [[Dreaming City]], [[Reef]] || [[Forsaken]] || No || Original | | [[Cathedral of Scars]] || [[Dreaming City]], [[Reef]] || [[Forsaken]] || No || Original || Active (Unvaulted) | ||
|- | |- | ||
| [[Deep Six]] || [[New Pacific Arcology]], [[Titan (moon)|Titan]], Moon of [[Saturn]] || [[ | | [[Deep Six]] || [[New Pacific Arcology]], [[Titan (moon)|Titan]], Moon of [[Saturn]] || [[Season of the Drifter]] || No || Original || Active | ||
|- | |- | ||
| [[New Arcadia]] || [[Hellas Basin]], [[Mars]] || [[ | | [[New Arcadia]] || [[Hellas Basin]], [[Mars]] || [[Season of the Drifter]] || No || Original || Active | ||
|} | |} | ||
==Rewards== | |||
These weapons and armor can be obtained randomly by completing matches of Gambit and rank-up packages. They also can be focused at [[The Drifter (character)|The Drifter]] for the price of a Gambit Engram, Legendary Shards, and [[File:Glimmer icon.png|10px|None]] Glimmer. | |||
*Weapons | |||
**[[Crowd Pleaser]] - Legendary {{icon|Void}} Heavy [[Grenade Launcher]] | |||
**[[Bottom Dollar]] - Legendary {{icon|Void}} [[Hand Cannon]] | |||
**[[Trinary System]] - Legendary {{icon|Solar}} [[Fusion Rifle]] | |||
**[[Borrowed Time]] - Legendary {{icon|Solar}} [[Submachine Gun]] | |||
**[[Servant Leader]] - Legendary {{icon|Kinetic}} [[Scout Rifle]] | |||
**[[Herod-C]] - Legendary {{icon|Stasis}} [[Auto Rifle]] | |||
**[[Dead Weight]] - Legendary {{icon|Arc}} [[Shotgun]] | |||
**[[Yesteryear]] - Legendary {{icon|Void}} [[Pulse Rifle]] | |||
**[[Albruna-D]] - Legendary {{icon|Arc}} [[Sniper Rifle]] | |||
**[[Trust]] - Legendary {{icon|Solar}} [[Hand Cannon]] | |||
**[[Laser Painter]] - Legendary {{icon|Strand}} [[Linear Fusion Rifle]] | |||
**[[Qua Xaphan V]] - Legendary {{icon|Void}} [[Machine Gun]] | |||
*Armor | |||
**[[Viperidax Set (Warlock)]] {{Icon|Warlock}} | |||
**[[Viperidax Set (Titan)]] {{Icon|Titan}} | |||
**[[Viperidax Set (Hunter)]] {{Icon|Hunter}} | |||
*Legacy Armor | |||
**[[Calamity Rig Armor |Calamity Rig Set (Warlock)]] {{Icon|Warlock}} | |||
**[[Calamity Rig Armor |Calamity Rig Set (Titan)]] {{Icon|Titan}} | |||
**[[Calamity Rig Armor |Calamity Rig Set (Hunter)]] {{Icon|Hunter}} | |||
**[[Ancient Apocalypse Armor (Warlock)]] {{Icon|Warlock}} | |||
**[[Ancient Apocalypse Armor (Titan)]] {{Icon|Titan}} | |||
**[[Ancient Apocalypse Armor (Hunter)]] {{Icon|Hunter}} | |||
==Trivia== | |||
*With the release of [[The Final Shape]] and [[Episode: Echoes]], the [[Lucent Brood]] and [[Shadow Legion]] were added into the rotation of enemies on the maps Emerald Coast and Legion's Folly. | |||
**Additionally, Cathedral of Scars was unvaulted as well, making the total number of active maps now 5. | |||
==Gallery== | |||
<gallery> | |||
File:DrifterPreMatch.jpg|thumb|The Drifter during the pre-match cutscene. | |||
File:Drifters_Ship.jpg|thumb|The Drifter's Ship pre-match. | |||
File:Emerald_Coast_2.jpg|thumb|Emerald Coast | |||
File:New Arcadia_2.jpg|thumb|New Arcadia | |||
File:Legions_folly_2.jpg|thumb|Legion's Folly | |||
File:Deep_Six_2.jpg|thumb|Deep Six | |||
File:Primeval_Captain.png|thumb|Primeval Captain | |||
File:Primeval_Centurion.png|thumb|Primeval Centurion | |||
File:Primeval_Knight.png|thumb|Primeval Knight | |||
File:Primeval_Ogre.png|thumb|Primeval Ogre | |||
</gallery> | |||
==List of appearances== | ==List of appearances== | ||
*''[[Destiny 2]] | *''[[Destiny 2]]: [[Forsaken]]'' {{1st}} | ||
**''[[Season of the Drifter]]'' | |||
*''[[The Hidden Dossier]]'' {{Mo}} | |||
==References== | ==References== | ||
| Line 58: | Line 121: | ||
[[Category:Activities]] | [[Category:Activities]] | ||
[[Category:Gambit]] | [[Category:Gambit|*]] | ||
Latest revision as of 14:18, September 14, 2024
| Gambit | |
|---|---|
| |
| Overview | |
|
Type: |
Recreational competition, training (High Risk & Reward) |
|
Functions: |
Train Guardians for the Second Collapse and help The Drifter gain motes. |
|
Engagements: |
Vanguard disapproves |
|
Leadership: |
|
Gambit is a player vs. player vs. environment game mode in Destiny 2, introduced in the Forsaken expansion. Like the Crucible, weapons and armor can be acquired by completing matches, which can be used in the rest of the game. Likewise, gear received elsewhere in the game can be used in Gambit. The Drifter is the Gambit vendor.
Overview[edit]
Two teams of four Guardians each are placed into two identical arenas, after a brief break across from each other aboard the Drifter's ship, where the teams can discuss strategy and interact with their opponents. Players compete to kill enemies to collect Motes of Dark, which are deposited at a Bank in the centre of the arena.[1] Up to fifteen Motes can be held at a time, with half of these dropped if the player dies.
Depositing at least five, ten, or fifteen Motes will spawn a Taken enemy, dubbed a Blocker, on the other team's Bank which they must kill to continue depositing Motes. These Blockers are a Ravenous Taken Goblin with at least five Motes, a Ravenous Taken Phalanx with at least ten Motes, and a Major Taken Knight with a ![]() Stasis Boomer at fifteen Motes. Allowing two blockers to exist at the same time will institute a drain effect on the bank of the blocked team, taking one mote per second that two or more blockers exist. This introduces a layer of strategy to depositing your teams motes.
Stasis Boomer at fifteen Motes. Allowing two blockers to exist at the same time will institute a drain effect on the bank of the blocked team, taking one mote per second that two or more blockers exist. This introduces a layer of strategy to depositing your teams motes.
On occasion, High-Value Targets will appear, which are minibosses differentiated by a white sparkling aura that drop a large amount of Motes on damage and death, usually enough for a player to nearly fill their Mote inventory. Should a team be trailing greatly behind the opposing team, catch-up targets will appear for them, which are Elite enemies with the same aura as high-value targets that drop more Motes than regular enemies, but not as much as actual high-value targets.
At 40 and 80 Motes deposited, a portal will open up which allows one player to invade the other team's area to hinder their progress by denying Motes.[2] The Invader will have an overshield, be friendly to the opponents' enemies, and be able to see the locations of every opposing player, at the cost of being announced and glowing red for easy visibility to the opposing team. Popular invasion and counter-invasion tactics include the use of Supers, long-range weapons such as sniper rifles, and heavy weapons such as machine guns like Xenophage. Invaders will return to their team once a timer runs out, they eliminate the entire enemy team, or they are killed. Killing an Invader drops 3 motes, or all the motes they were carrying. An Invader can collect the motes of players they kill, and bring them back to their own arena.
When the bank is full (100 motes), the second phase of Gambit will begin. The Primeval, giant Ultra Taken, will be summoned in their arena, alongside a plethora of Taken minions, while two Primeval Envoys will spawn at one of the Fronts. [2] The opposing team's invasion portal will begin to activate periodically.[3] At this point, the goal of the game is to kill the Primeval before the other team is able to kill their own. Killing the Primeval envoys as soon as possible will remove the invulnerability shield from the Primeval, enabling damage. Invasions now serve the purpose of healing the opposing team's Primeval upon killing a Guardian, to set back their progress towards winning the round. If neither Primeval is killed when the match timer expires, the team whose Primeval has less health wins the match.
Gambit Labs[edit]
Occasionally, a Gambit Labs mode with experimental rules is made available. These alternate rules have included making it so depositing Motes opens the opposing team's portal, and making it so the Invader drains the opposing team's bank as long as they are in their arena.[4]
Legacy Rules[edit]
Prior to the Beyond Light expansion, Gambit consisted of multiple rounds, with 75 motes being required to summon a primeval. The second round of a Gambit match plays identically to the first, with increased enemy difficulty featuring more Elite enemies. If the winning team wins this round, the match ends. Should both teams win only one round, the Sudden Death round is activated, which skips right to the Primeval phase of the match, and all abilities, including Supers, charge significantly quicker.[3] At this point in time, the Blockers were different.
A more intense mode of Gambit was known as Gambit Prime, which was a single round match requiring 100 motes banked with increased enemy difficulty and new ways to assist the team.[5]
With the release of Season of the Hunt, Gambit and Gambit Prime were merged into one mode. Matches were made one round, with 100 motes needed to summon Primevals. Blockers are able to drain the opposing team's bank, and banking ten motes summons an Elite Taken Phalanx instead of a Captain. Kell's Grave and Cathedral of Scars were also removed, leaving only 4 maps left.
Current Format[edit]
As of Season 16, a series of changes have been made to Gambit. Freelance Gambit, requiring all players to be in a 1-Guardian Fireteam, is now an option at all times. Heavy ammo economy has been reworked slightly- high-value targets now drop heavy ammo bricks, and after successfully clearing each wave, a Heavy Ammo Crate spawns in a set location at the Front that has just been cleared. Invaders no longer have the ability to see how many motes opposing players are carrying, and cannot see player nametags when aiming down sights.
Additionally, during the Primeval phase, the Primeval is fully invulnerable to all incoming damage while Primeval Envoys are on the field. Envoys now spawn at Fronts like enemy waves and must be killed both to generate the Primeval Slayer buff and to remove the Primeval's invulnerable shield. Periodically, new Envoys will spawn, health-locking the Primeval and forcing players to hunt down the Envoys before Primeval DPS can continue.
List of maps[edit]
Destiny 2[edit]
| Map | Location | Expansion | PlayStation Exclusive | Destiny Reprisal | Current Status |
|---|---|---|---|---|---|
| Emerald Coast | European Dead Zone, Earth | Forsaken | No | Original | Active |
| Legion's Folly | Arcadian Valley, Nessus | Forsaken | No | Original | Active |
| Kell's Grave | Tangled Shore, Reef | Forsaken | No | Original | Vaulted |
| Cathedral of Scars | Dreaming City, Reef | Forsaken | No | Original | Active (Unvaulted) |
| Deep Six | New Pacific Arcology, Titan, Moon of Saturn | Season of the Drifter | No | Original | Active |
| New Arcadia | Hellas Basin, Mars | Season of the Drifter | No | Original | Active |
Rewards[edit]
These weapons and armor can be obtained randomly by completing matches of Gambit and rank-up packages. They also can be focused at The Drifter for the price of a Gambit Engram, Legendary Shards, and ![]() Glimmer.
Glimmer.
- Weapons
- Crowd Pleaser - Legendary
 Heavy Grenade Launcher
 - Bottom Dollar - Legendary
 Hand Cannon
 - Trinary System - Legendary
 Fusion Rifle
 - Borrowed Time - Legendary
 Submachine Gun
 - Servant Leader - Legendary
 Scout Rifle
 - Herod-C - Legendary
 Auto Rifle
 - Dead Weight - Legendary
 Shotgun
 - Yesteryear - Legendary
 Pulse Rifle
 - Albruna-D - Legendary
 Sniper Rifle
 - Trust - Legendary
 Hand Cannon
 - Laser Painter - Legendary
 Linear Fusion Rifle
 - Qua Xaphan V - Legendary
 Machine Gun
- Crowd Pleaser - Legendary
- Armor
- Legacy Armor
Trivia[edit]
- With the release of The Final Shape and Episode: Echoes, the Lucent Brood and Shadow Legion were added into the rotation of enemies on the maps Emerald Coast and Legion's Folly.
- Additionally, Cathedral of Scars was unvaulted as well, making the total number of active maps now 5.
Gallery[edit]
List of appearances[edit]
- Destiny 2: Forsaken (First appearance)
- The Hidden Dossier (Mentioned only)
References[edit]
- ^ Kotaku - Destiny 2's Next Expansion Is Changing A Lot
- ^ a b Destiny the Game - Gambit
- ^ a b Bungie (2018/9/4), Destiny 2: Forsaken, Playstation 4, Activision Blizzard
- ^ Bungie (2022/2/17) - THIS WEEK AT BUNGIE
- ^ Bungie (2019/3/5), Destiny 2: Season of the Drifter, Playstation 4, Activision Blizzard
