This article has new content coming soon and may not be complete, confirmed, or correct. Please update it as soon as any relevant and accurate material is available. Editors must cite sources for all contributions to this article. Edits that do not follow this standard will be reverted without notice. For more information, see the Citation policy.
| Onslaught: Salvation | |
|---|---|

| |
|
Game: |
|
|
Campaign: |
|
|
Player(s): |
1-3 |
|
Recommended Power Level: |
1960 (Playlist) |
|
Location: |
Widow's Court, European Dead Zone |
|
Enemy faction(s): |
|
|
Hostile race(s): |
|
Onslaught: Salvation is a variant of the Onslaught activity introduced with Episode: Revenant.
Overview
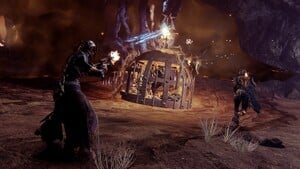
Onslaught: Salvation is a wave-based defense activity where players fight against the forces of the Scorn, Shadow Legion and Dread sent by Fikrul. Players must defend and repair the ADU against waves of combatants, which are ten waves to a set. If the ADU is destroyed, the activity ends. Players can earn an in-game currency called Scrap by scoring and be used to purchase and upgrade defenses at the start of every set and after every 3rd and 6th wave within that set. The playlist version has players complete one set while the Normal and Legend versions have five sets of escalating difficulty. The Extinguish modifier activates by default on Legend, or after completing Wave 30 on Normal. While playing the 50 wave version, some non-Champion combatants will have a random Bane that must be dealt with in unique ways (i.e. a combatant with a Meteor bane will unleash a solar seeker when damaged.)
Gameplay
Once the activity starts, players must defeat enemies to set up the ADU. Once the ADU is set up, players can spend scrap on mountable turrets and air strike terminals in addition to the existing defenses from the original variant of Onslaught. These defenses can be upgraded after completing certain waves. Combatants, especially Saboteurs and Champions, will attempt to occupy the area surrounding the ADU and cause as much damage to it. They can also drop ADU batteries which can be picked up and thrown at either the ADU or any defenses in need of repair, granting a bump of recovery to them. Players can enhance specific mods from the Slayer Baron Apothecary Satchel Seasonal Artifact by activating the Volatile Tonics associated with those specific perks from their Tonic Capsule while playing this activity.
Bonus Objective Wave
On every 2nd, 5th, and 8th wave in a set, a bonus objective can be completed. They include collecting items dropped by combatants, capturing a Scorn totem, throwing batteries at the ADU, running through energy beams, defeating a Champion within the time limit, or completing the wave within a time limit. If the bonus objective is completed, a Heavy ammo crate will spawn near the ADU, and players can earn bonus tonic ingredients if they have completed one of the major fieldwork assignments from Eido.
Augment Wave
On every 3rd and 9th wave in a set, an augment wave begins. Demolitionists, Ether-Shielded Bulwarks, Grim Harbingers, their shielded variants, a horde of Husks, or an Enlightened Subjugator will be summoned. Demolitionists behave identically those found on the original variant of Onslaught. If a Grim Harbinger is active, it will summon its Grim backups until it is defeated; if their shielded variant or an Ether-Shielded Bulwark are active, players must find an Ether cannon nearby and remove their immunity shield using it. Defeating these enemies will drop 2 ADU batteries instead of 1 ADU battery dropped by Saboteurs and Champions.
Eliksni Prisoner Wave
On every 6th wave in a set, a one-way teleporter to a Revenant Nest will activate near the ADU, allowing players to free Eliksni hostages. Players must destroy a Revenant Totem on top of the cage to free the Eliksni hostages and summon a Revenant Baron to stop them. Once both Revenant Barons are defeated and their associated Revenant Totems destroyed, players must also defeat a Nest Keeper to be allowed to leave the Revenant Nest. Doing so will activate a one-way teleporter to exit the Revenant Nest, completing the wave.
Boss Wave
On every 10th wave in a set, a one-way teleport to a Revenant Nest will reactivate. Players will traverse a cave ending in a rally flag and a barrier up ahead. The boss wave begins after players leave the cave containing the rally flag. While the boss wave is active, players can complete an optional objective that will help them defeat the boss faster. These objectives include destroying Revenant Totems, running through energy beams, or using Ether cannons to defeat the Grim Harbingers and grant them the Ether Boost buff, which recharges your melee, grenade, and class abilities faster. Defeating the boss will spawn a reward chest containing seasonal weapons and tonic ingredients, and activate a one-way exit teleporter to begin the next set of waves unless the playlist version was selected, which will complete the activity after Wave 10. Completing Wave 50 will spawn an additional reward chest and complete the activity. Additional rewards that one can obtain are influenced by the Enriching Tonics that are active within their Tonic Capsule.
Heat Wave
In rare instances after completing a boss wave, a bonus heat wave can be triggered. During the heat wave, multiple Enlightened Omens and Enlightened Harbingers will endlessly appear, and a 1-minute timer begins. The heat wave is over when the timer expires, and the players will be rewarded tonic ingredients for each Subjugator slain.
Unique Enemies
Bosses
Appearance
- Destiny 2: Episode: Revenant (First appearance)
References
