Spoilers — Please keep the spoiler policy in mind while editing the wiki.
Citations — Please cite your sources when adding information to the wiki! Use our handy guide for assistance.
Black Fleet: Difference between revisions
From Destinypedia, the Destiny wiki
m (→References) |
(Really doesn’t need a citation.) Tag: Mobile edit |
||
| (23 intermediate revisions by 4 users not shown) | |||
| Line 1: | Line 1: | ||
{{Race infobox | {{Race infobox | ||
|name= Black Fleet | |name= Black Fleet | ||
| Line 5: | Line 4: | ||
|BG=black | |BG=black | ||
|sectionBG=black | |sectionBG=black | ||
|othernames= Pyramids <br> | |othernames= Pyramids <br> The Darkness <br> Black Triangle <ref name="SL">'''Bungie (2018/9/4)''', ''[[Destiny 2]]: [[Forsaken]] - [[Sleepless#Lore|Sleepless]]''</ref> <br> The Deep Black <br> Phantom Ship <ref name="CIII">'''Bungie (2018/9/4)''', ''[[Destiny 2]]: [[Forsaken]] - [[Lore:Marasenna|Marasenna]]: [[Lore:Marasenna#Cosmogyre_III|Cosmogyre III]]''</ref> <br> Final True Shape <br> The Masters <br> Dark Omen <br> Shape of Shapes <br> Pyramid Fleet | ||
|image= [[File:PyramidsofSol.png|400px]] | |image= [[File:PyramidsofSol.png|400px]] | ||
|focalworld(s)= Extragalactic space <br> Sol System <br> [[Ascendant Realm]] <br> [[Earth]] | |focalworld(s)= Extragalactic space <br> Sol System <br> [[Ascendant Realm]] <br> [[Earth]] <br> [[Moon]] <br> [[Fundament]] <br> [[Io]] <br> [[Mars]] <br> [[Titan (moon)|Titan]] <br> [[Mercury]] <br> [[Europa]] <br> [[Court of Savathûn]] <br> [[Neptune]] | ||
|goals= Enforce the will of the [[Witness]] throughout the universe <br> Undo [[The Traveler|the Traveler]]'s work, by corrupting the worlds it terraformed with Darkness | |goals= Enforce the will of the [[Witness]] throughout the universe <br> Undo [[The Traveler|the Traveler]]'s work, by corrupting the worlds it terraformed with Darkness | ||
|distinctions= Terraforming abilities <br> Control of gravity <br> [[Nightmare]] creation <br> Structural Metamorphosis | |distinctions= Terraforming abilities <br> Control of gravity <br> [[Nightmare]] creation <br> Structural Metamorphosis | ||
| Line 21: | Line 20: | ||
The Black Fleet was once thought by the people of the Last City to be synonymous with the Darkness itself, who knew it only as a malevolent force that had swept through the Sol System and brought about the Collapse. In reality, it is a fleet of vessels commanded by the Witness and its Disciples, who wielded the Darkness as a weapon against humanity and other civilizations as part of their eons-long crusade to find and subdue the Traveler.<ref name="Journey">[https://guides.gamepressure.com/destiny/guide.asp?ID=26797 '''Game Pressure''': ''[[A Guardian Rises]]'']</ref> | The Black Fleet was once thought by the people of the Last City to be synonymous with the Darkness itself, who knew it only as a malevolent force that had swept through the Sol System and brought about the Collapse. In reality, it is a fleet of vessels commanded by the Witness and its Disciples, who wielded the Darkness as a weapon against humanity and other civilizations as part of their eons-long crusade to find and subdue the Traveler.<ref name="Journey">[https://guides.gamepressure.com/destiny/guide.asp?ID=26797 '''Game Pressure''': ''[[A Guardian Rises]]'']</ref> | ||
The Black Fleet has existed for billions of years, and appears to have traveled far and wide across the universe since the Witness first set out to find the Traveler. Various ancient records describe Pyramids or other artifacts of the Black Fleet being left behind on the Qugu homeworld of Seht and a planet in or near the system of the Eliksni homeworld of Riis<ref>'''Bungie (2024/10/8)''', ''[[Destiny 2]]: [[Episode: Revenant]] - [[Lore]]:[[Lore:The Garden-Way|The Garden-Way]]: [[Lore:The Garden-Way#Monsters|Monsters]]''</ref>, suggesting that the Fleet passed through these locations at some point in the distant past. An artifact of the Fleet was also discovered on Earth's moon during the Golden Age, having either been left behind or sent there remotely by the Fleet sometime between the formation of the Moon and the arrival of the Traveler in the Sol System. | |||
Following the Black Fleet's second arrival in the Sol System, several artifacts originating from the Black Fleet were encountered on [[Europa]], including [[Stasis Lock]]s, Cruxes of Darkness, [[Splinter of Darkness|Splinters of Darkness]] and the [[Ziggurat]]. Following [[Mars]]' reappearance in the Sol System after having vanished during the Pyramids' arrival, another artifact of the Black Fleet known as the [[Relic]] was found to have appeared on a cliffside overlooking Mars' [[Cradle]]. | |||
==History== | ==History== | ||
===The Ancient Past=== | ===The Ancient Past=== | ||
According to the creature known as [[Ahsa]], the [[Pyramids]] were constructed by the species that gave rise to the [[ | According to the creature known as [[Ahsa]], the [[Pyramids]] were constructed by the [[Precursors (Species)|Precursor]] species that gave rise to the [[The Witness|Witness]], and were later used by the Witness when it left its home world in pursuit of the Traveler.<ref name="Origin">[https://www.youtube.com/watch?v=Z0CKckjryVI'''YouTube''' - ''Destiny 2: Season of the Deep - The Witness's Origins Cinematic'']</ref> Over time, the Witness would recruit [[Disciples of the Witness|Disciples]] from various species, including [[Rhulk, Disciple of the Witness|Rhulk]] and [[Nezarec, Final God of Pain|Nezarec]], each of whom would be granted their own Pyramid. | ||
At some point, a Pyramid came to rest on the surface of [[Seht]], the ancestral homeworld of the [[Qugu]]. This Pyramid became covered in stone and dirt, causing it to resemble a natural landform; it would later be revered by the Qugu as a holy site, which they referred to simply as "the Mountain." During the Hive's invasion of the [[Se'Tar]] system, [[Savathûn, the Witch Queen]] reactivated the Pyramid using her flagship, causing it to rise from its buried resting place and join her forces as they laid waste to the Qugu. This Pyramid would later be destroyed by the last remnants of the [[Seht Armada]] under the command of Warden [[Te'Qal]].<ref>'''(2024/6/4)''',''[[Destiny 2]]: [[Episode: Echoes]] - [[Lore]]:[[Lore:Dynasty|Dyanasty]], [[Lore:Dynasty#Chapter 2 - To Split the Sky|Chapter 2 - To Split the Sky]]''</ref><ref>'''(2024/6/4)''',''[[Destiny 2]]: [[Episode: Echoes]] - [[Lore]]:[[Lore:Dynasty|Dyanasty]], [[Lore:Dynasty#Chapter 3 - The Cry that Echoes|Chapter 3 - The Cry that Echoes]]''</ref> | |||
Another [[The Sunken Pyramid|Pyramid]] commanded by [[Rhulk, Disciple of the Witness|Rhulk]] would be sent to Savathûn's [[Throne World]] on the orders of the Witness, to keep an eye on the treacherous Hive God (and also possibly as a punishment for Rhulk's past failures as a Disciple).{{Citation needed}} Rhulk and his Pyramid would remain in Savathûn's Throne World for countless eons afterwards, until Savathûn was eventually reborn in the Light and neutralized the Pyramid, causing it to sink into the swamps of her Throne World.{{Citation needed}} | |||
At some point between the formation of Earth's Moon and the arrival of the Traveler in the Sol System, a [[Anomaly (artifact)|spherical Darkness-imbued artifact]] became embedded beneath the Moon's [[Mare Cognitum|Ocean of Storms]] under unknown circumstances. Centuries after its discovery during the late Golden Age, Eris Morn inferred that the artifact had been sent to or left on the Moon by the Black Fleet.<ref name="K1 Journal, Eris's Letter">'''[[Kuang Xuan's Logbook]]''', "[[Kuang Xuan's Logbook#Eris's Letter|Eris's Letter]]"</ref> | |||
===The Whirlwind=== | |||
During the Golden Age of the Eliksni on [[Riis]], a young Eliksni named [[Haaksis]] became lost while piloting a stolen scout-ship and discovered an abandoned "fortress-city" on an airless world, either within or nearby Riis' solar system. During Haaksis' exploration of the city, he found a "ship like a blade" sitting at its center, and recovered a spherical artifact which caused him to hear voices in his mind. The artifact helped Haaksis find his way home, but continued whispering to him about the pointless struggle of life and an impending doom that would befall the Eliksni afterwards. Haaksis later became a Baron of the House of Rain, and attempted to rid himself of the artifact and its whispers by casting it into a river; however, the artifact was swallowed by a local predator known as a river-catcher, which became corrupted by Darkness and began stalking and killing Haaksis' people. When the scribe [[Eido]] of [[House of Light|House Light]] read about Haaksis' story in the memoirs of [[Irrha]], apprentice to the [[Slayer Baron]] [[Kiiraskes]], she inferred that the artifact was of the same kind as the [[Unknown Artifact|mysterious artifact]] given to the Young Wolf by the Witness during the former's exploration of the [[Lunar Pyramid]]<ref>'''Bungie (2024/10/8)''', ''[[Destiny 2]]: [[Episode: Revenant]] - [[Lore]]:[[Lore:The Garden-Way|The Garden-Way]]: [[Lore:The Garden-Way#5. Monsters|5. Monsters]]''</ref>. This would appear to indicate that the Black Fleet had previously passed through Riis' solar system, or a system nearby, at some point in the past. | |||
Sometime after the events recorded in Irrha's memoirs, the Black Fleet and Oryx's Hive arrived in Riis' solar system, causing the Traveler to flee and allowing the Hive and Black Fleet to lay waste to the Eliksni's civilization. The resulting cataclysm later became known in Eliksni history as the [[Whirlwind]].{{Citation needed}} | |||
===The Golden Age=== | ===The Golden Age=== | ||
{{References|section}} | |||
Towards the end of the late Golden Age, [[Clovis Bray (corporation)|Clovis Bray]] and [[Aeronautics of China]] launched a joint venture called [[K1]] to determine the source of extra-spatial transmissions originating from beneath the surface of the [[Moon]]. Underneath the [[Mare Cognitum|Ocean of Storms]], the research team uncovered the [[Anomaly (artifact)|artifact]] left by the Black Fleet, which they believed to be communicating with the [[Traveler|Traveler's]] origin. Unfortunately, exposure to the artifact caused the crew to experience insomnia, hallucinations, and psychosis, prompting Clovis Bray to have the artifact sealed in a sophisticated [[The Anomaly|containment system]]. [[Kuang Xuan]], the project commander of the K1 mission, subsequently turned to one of their sites' antennae to intercept the artifact's transmissions, and put the project on lockdown. The team would stay isolated on the Moon for a time until the [[Collapse]], during which they were slaughtered by the sudden appearance of the [[Hive]]. | |||
Before the | Before the Collapse, [[Clovis Bray I]] led an expedition to the [[Jupiter|Jovian]] moon [[Europa]], which he had received visions of from the K1 Anomaly. He and his team uncovered a large statue of a veiled, humanoid female figure, which Clovis believed to be the source of the power he called "[[Darkness|Clarity]]" associated with the K1 artifact. He dubbed the statue "[[Clarity Control]]", and began utilizing it to convert Vex radiolarian fluid into a substance he called "[[Alkahest]]," which proved instrumental in the creation of [[Exo]]s. It is believed that the statue was sent to Europa by the Black Fleet around two decades prior. | ||
===The Collapse=== | ===The Collapse=== | ||
During the | During the Collapse, the Black Fleet invaded the [[Sol System]] in force, laying waste to the worlds and colonies of the system as they descended upon the [[The Traveler|Traveler]] and [[Humanity]], nearly wiping out all of humankind in the process. It was only thanks to the counterattack of the Traveler, and the interference of Savathûn, that humanity was able to survive and have some of their people be resurrected as [[Guardian]]s, so that hope would still exist for the Solar System in their fight against the Darkness.<ref>'''Bungie (2022/2/22)''', ''[[Destiny 2]]: [[The Witch Queen]] - [[Parasitic Pilgrimage]]''</ref> A single Pyramid belonging to the Disciple Nezarec was left behind on the Moon, where it would remain undiscovered for centuries.{{Citation needed}} | ||
===Red War=== | ===Red War=== | ||
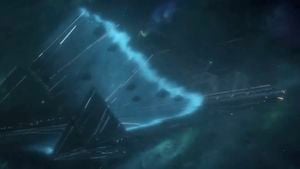
[[File:The Darkness.jpg|thumb|300px|The Pyramids reacting to the Traveler's wave of Light]] | [[File:The Darkness.jpg|thumb|300px|The Pyramids reacting to the Traveler's wave of Light]] | ||
After the death of [[Dominus Ghaul]] at the hands of [[The Guardian]], the | After the death of [[Dominus Ghaul]] at the hands of the [[The Guardian|Guardian]], the Traveler reawakened and emitted a pulse of Light which spread throughout the Sol System, and eventually into the outer reaches of the Milky Way. This pulse eventually reached the Pyramids as they lay dormant in intergalactic space, and as the pulse washed over the fleet, they reactivated and began moving ''en masse'' toward the Sol System.<ref>'''Bungie (2017/8/9)''', ''[[Destiny 2]] - [[Chosen]]''</ref> | ||
===Nightmares on Luna=== | ===Nightmares on Luna=== | ||
Nezarec's abandoned Pyramid was eventually discovered by the Hive beneath the surface of Earth's Moon, but they were unsuccessful in their attempts to awaken its power.{{Citation needed}} It was reactivated by [[Eris Morn]] when she made physical contact with it, causing it to unleash [[Nightmare]]s created from the Darkness to haunt her and other beings throughout the Sol System.<ref>'''Bungie (2019/10/1)''', ''[[Destiny 2]]: [[Shadowkeep]] - [[A Mysterious Disturbance]]''</ref> | |||
Multiple Pyramids | Multiple Pyramids were seen in the background when the Guardian receives a vision of the [[Black Garden]] from the [[Unknown Artifact]] found within the Pyramid on Luna.<ref>'''Bungie (2019/10/1)''', ''[[Destiny 2]]: [[Shadowkeep]] - [[Beyond (mission)|Beyond]]''</ref> Later, a Guardian [[Garden of Salvation|excursion]] into the Garden revealed that the [[Sol Divisive]] Vex had been communing with a [[Pyramid Scale]] protecting a veiled statue, seemingly resulting in the creation of two strange, warped Axis Minds known as the [[Consecrated Mind, Sol Inherent|Consecrated Mind]] and [[Sanctified Mind, Sol Inherent|Sanctified Mind]].<ref>'''Bungie (2019/10/1)''', ''[[Destiny 2]]: [[Shadowkeep]] - [[Garden of Salvation]]''</ref> | ||
===The Darkness Descends=== | ===The Darkness Descends=== | ||
Around the time of the [[The Almighty|Almighty | Around the time of [[Amtec]]'s attempt to crash the [[The Almighty|Almighty]] into [[The Last City]], the Black Fleet had finally reached the outer reaches of the Sol System. [[Rasputin]] detected the presence of the Fleet beyond the Heliopause, and directed Osiris to investigate an "anomalous signal" when the former Warlock Vanguard visited the Warmind to question his allegiance to humanity. Upon taking his ship to the site of the anomaly in the Kuiper-Oort Expanse, Osiris discovered a vast "maw" of Darkness shrouding a Pyramid, which began interfering with Sagira while beckoning Osiris to approach. Donning an EVA suit, Osiris left Sagira behind in his ship to investigate the anomaly more closely, and discovered a [[Seed of Silver Wings|metallic seed]] within its depths. Immediately afterwards, he found himself aboard his ship once more, with Sagira behaving as though Osiris had changed his mind about leaving. Still holding the seed in his hand, Osiris set a course back to the inner Solar System, with the shadow of the Pyramid looming over his vessel as he departed.<ref>'''Bungie (2020/3/10)''', ''[[Weblore]]:[[Weblore:Season of the Worthy|Season of the Worthy]] - [[Weblore#What Gives Me Pause|What Gives Me Pause]]''</ref> | ||
Over the following weeks, Rasputin monitored the Black Fleet as its Pyramids approached the inner Solar System, plotting their course on monitors within his [[Seraph Bunker]]s and sharing the information he gathered with the [[Vanguard]]. Starting from an initial force of one lead Pyramid accompanied by seventeen smaller ones, as the Fleet passed through the Kuiper belt the number of vessels increased to thirty-two, followed by seven more as the fleet approached [[Neptune]]. The following week, the number increased to forty-three as the Fleet began to make its way towards the inner planets, while the lead Pyramid held position above Neptune. The Fleet next set its sights on [[Uranus]], now numbering forty-nine Pyramids in total, and began moving toward [[Saturn]]. By the time the Fleet had claimed the outer Solar System, a total of fifty-four vessels had been detected.{{Citation needed}} | |||
Unbeknownst to Rasputin, however, another Pyramid had broken | Unbeknownst to Rasputin, however, another Pyramid had broken away from the main Fleet and descended upon the inner system undetected. By the time of the Almighty's destruction, this Pyramid had reached Jupiter and made its way towards [[Io]] along with an escort fleet of Pyramid Scales.<ref>'''Bungie (2020/3/10)''', ''[[Destiny 2]]: [[Season of the Worthy]] - [https://youtu.be/2lCOjueWHgs?t=215 Closing in]''</ref> | ||
===Arrival=== | ===Arrival=== | ||
[[File:Io Pyramids.jpg|335px|thumb|[[Pyramid Scale]]s touch down on Io.]] | [[File:Io Pyramids.jpg|335px|thumb|[[Pyramid Scale]]s touch down on Io.]] | ||
{{Quote|You bring weapons. You will not need them. We offer only truth.|The Witness through [[The Ghost]].}} | {{Quote|You bring weapons. You will not need them. We offer only truth.|The Witness through [[The Ghost]].}} | ||
Several days after the Almighty's destruction, the Pyramids had [[Arrival of the Black Fleet|spread throughout the system]]. Alarmingly, many of these Pyramids appeared on worlds that were nowhere near where Rasputin had detected them. It is unknown if these vessels had broken off from the main fleet or if they were new ones who arrived in the system undetected. The first of these Pyramids made its way to Io. In a similar fashion to the attack on the Almighty, [[Anastasia Bray|Ana Bray]] deployed satellites against the Pyramid in hopes that it would be destroyed. However, the Pyramid remained undamaged and continued its approach on the Jovian moon, also managing to disable the [[Warmind]] and render the [[Warsat]] Network entirely useless.<ref name="ASO">'''Bungie (2020/6/9)''', ''[[Destiny 2]]: [[Season of Arrivals]] - [[A Shadow Overhead]]''</ref> | |||
After the Warmind fell, the [[Pyramid (Io)|Io Pyramid]] touched down near the [[The Cradle|Cradle]] and began deploying its Pyramid Scales in the [[Echo Mesa]] nearby. Eris Morn departed for it as soon as it arrived, leading to [[Zavala]] tasking the Guardian to investigate the Pyramid and retrieve Eris. As the Guardian approached the vessel, the Darkness possessed their Ghost and brought them closer to the Pyramid. However, the Guardian was pulled into the [[Ascendant Realm]] by Savathûn. After fighting through numerous Taken and Hive, the Guardian finds Eris in the center of the Cradle, where a [[Tree of Silver Wings]], spawned by the Traveler's Light, was situated inside.<ref name="ASO"/> Over the week, the Pyramid continued to corrupt Io, deploying Pyramid Scales and infesting the planet with Darkness. The Drifter dispatched a special Bank device to collect Energy of the Darkness, while at the same time having Guardians fight off an arms race with the [[Cabal]] and the Vex, along with Savathûn's Taken forces.<ref name="Contact">'''Bungie (2020/6/9)''', ''[[Destiny 2]]: [[Season of Arrivals]] - [[Contact]]''</ref> | |||
After the Warmind fell, the [[Pyramid (Io)|Io Pyramid]] touched down near the [[Cradle]] and began deploying its Pyramid Scales in the [[Echo Mesa]] nearby. Eris Morn departed for it as soon as it arrived, | |||
Almost a month after the arrival of the first Pyramid, three more touched down on Titan, Mars, and [[Mercury]]. The [[Pyramid (Titan)|Titan Pyramid]] was the first to start deploying its Pyramid Scales, scuttling the Hive and Fallen in the [[New Pacific Arcology]] in an arms race to claim Darkness seeping in blooms from the alien vessels. From the depths of the Pyramid back on Io, a large force of Pyramid Scales was sent out to survey Io's surface, to presumably prepare it for terraforming. | Almost a month after the arrival of the first Pyramid, three more touched down on Titan, Mars, and [[Mercury]]. The [[Pyramid (Titan)|Titan Pyramid]] was the first to start deploying its Pyramid Scales, scuttling the Hive and Fallen in the [[New Pacific Arcology]] in an arms race to claim Darkness seeping in blooms from the alien vessels.<ref name="Contact"/> From the depths of the Pyramid back on Io, a large force of Pyramid Scales was sent out to survey Io's surface, to presumably prepare it for terraforming. | ||
Following the crippling of Rasputin, Zavala ordered the evacuation of the four worlds that had come under threat from the Pyramids. The Young Wolf aided Zavala in making the final preparations, completing a list of objectives for each destination according to the needs of [[Sloane]], [[Asher Mir|Asher]], [[Vance|Brother Vance]], and Ana Bray. Instead of evacuating, Vance and Asher entered the [[Infinite Forest]] and [[Pyramidion]] respectively, and Sloane chose to hold the line against the Hive and the Pyramid that had arrived on Titan. The Young Wolf assisted Ana in her attempt to salvage what was left of Rasputin, which resulted in his remains being placed in a specialized [[Engram]]. With what remains of Rasputin's mind preserved, Ana would make her final preparations before departing Mars.<ref>'''Bungie (2020/6/9)''', ''[[Destiny 2]]: [[Season of Arrivals]] - [[Exodus: Preparation]]''</ref><ref>'''Bungie (2020/6/9)''', ''[[Destiny 2]]: [[Season of Arrivals]] - [[Exodus: Evacuation]]''</ref> | |||
A short while after | In the following weeks, Guardians were pulled into the Ascendant Realm, reminiscent of the [[Court of Oryx]] on the [[Dreadnaught]], this time encountering [[Nokris]], who had survived his defeat on Mars and become Savathun's supplicant. After Nokris was defeated by the Guardian once more, the Witness finalized its message, teleporting them into a room within a Pyramid which depicted each of the races of the Sol System surrounding a Pyramid, with a shadow falling over statues of the Fallen. The Witness told the Guardian of an ''"ancient power"'' on Europa and invited them to go and find it.<ref>'''Bungie (2020/6/9)''', ''[[Destiny 2]]: [[Season of Arrivals]] - [[Interference]]''</ref> A short while after this final message, the Witness cloaked Mars, Mercury, Titan and Io in shadow, moving them to another plane of existence and rendering them inaccessible. In response, the Traveler started to pulsate with Light and began healing the wounds it had sustained when it had liberated itself from Ghaul's cage.<ref>'''YouTube''': ''[https://www.youtube.com/watch?v=t9EFvcmLaXA Destiny 2: Season of Arrivals - End of Season Cinematic]''</ref> | ||
===The Call to Europa=== | ===The Call to Europa=== | ||
{{References|section}} | |||
{{Quote|The Light believes you thankless. Nothing more than a soldier asked again and again to do its bidding.<br>So we want to thank you. With [[Stasis|a gift]]. To help you finally take control.|The Witness to [[The Guardian|the Guardian]]}} | {{Quote|The Light believes you thankless. Nothing more than a soldier asked again and again to do its bidding.<br>So we want to thank you. With [[Stasis|a gift]]. To help you finally take control.|The Witness to [[The Guardian|the Guardian]]}} | ||
After the healing | After the Traveler finished healing itself, the Young Wolf arrived on Europa to find a Pyramid, along with a new Fallen House led by [[Eramis, Kell of Darkness]] whose members wielded [[Stasis|dark powers]] originating from the Pyramid. | ||
As the Young Wolf assisted [[Variks, the Loyal|Variks]] in fixing the communication relays on top of his safehouse, Ghost detected a dark presence, which he identified as being the same group of entities that had spoken through him on Luna (later revealed to be the Witness). As soon as Ghost fixed the final relay, a [[Crux of Darkness]] appeared and dispersed the blizzard surrounding the facility. Speaking through Ghost once again, the Witness encouraged the Guardian to approach the Pyramid, all the while flattering the Guardian and stating that they wished to give them a gift. Upon arriving, The Pyramid sent out a [[Ziggurat]]. | |||
After the Guardian defeated Eramis, she reached out towards the Pyramid as she was frozen in a crystalline Stasis prison. Later on, once the Guardian attuned themselves to the power of Stasis, they were teleported to a veiled statue inside the Pyramid, which allowed them to finally gain complete access to their Stasis powers. | |||
Mara Sov would | It would also be during this time that the Darkness would seek out Savathûn to punish her for her attempted interference, forcing the Witch Queen into hiding. [[Mara Sov]] would also reemerge, having deployed her forces and fleets against the Black Fleet, without success; she would later divulge that during her absence following the events that took place in the Dreaming City, she did battle with the Witness, which she described as "a voice in the Darkness". Ada-1 also marshaled the assets of the Black Armory against the Pyramids, but even her unique weapons would prove useless against the Pyramids. | ||
===No More Pieces Left To Place=== | ===No More Pieces Left To Place=== | ||
{{quote|We have seen enough.|The Witness}} | {{quote|We have seen enough.|The Witness}} | ||
After having been shrouded in Darkness for some time following the arrival of the Pyramids, Mars suddenly reappeared, with large swaths of its surface bordered by curtains of eerie green light; the regions within these borders appeared to be temporally displaced, showing objects and buildings within as they had looked during the Golden Age. There was also a [[Relic (Mars)|new structure]] built into the cliffs overlooking Mars' Cradle, bearing the same architectural hallmarks as the Pyramids.{{Citation needed}} | |||
In the pursuit of uncovering the truth of Savathûn's Throne World, the Young Wolf found themselves once more on Europa, this time at the [[The Communion|base of the Europan Pyramid itself]]. Fighting through hordes of [[Imperial Deserter|Cabal deserters]] under the command of [[Valus Dralgur, the Exiled]], the Young Wolf entered the Pyramid, where they discovered what appeared to be a city of structures, grander and more elaborate than what was able to be seen within the Lunar Pyramid. After purging the deserters from the Pyramid, the Guardian communed with the Darkness, gaining the ability of [[Deepsight]]<ref>'''Bungie (2022/2/22)''', ''[[Destiny 2]]: [[The Witch Queen]] - [[The Communion]]''</ref>. | |||
In the pursuit of uncovering the truth of Savathûn's Throne World, the Young Wolf found themselves once more on Europa, this time at the [[The Communion|base of the Pyramid itself]]. Fighting through hordes of [[Imperial Deserter|Cabal deserters]] under the command of [[Valus Dralgur, the Exiled | |||
A [[Sunken Pyramid]] was later discovered within [[Savathûn's Throne World]]. A fireteam of Guardians [[Vow of the Disciple|ventured inside]], finding | A [[The Sunken Pyramid|sunken Pyramid]] was later discovered within [[Court of Savathûn|Savathûn's Throne World]]. A fireteam of Guardians [[Vow of the Disciple|ventured inside]], finding Rhulk, Disciple of the Witness, who had been imprisoned within. Similarly to the Europan Pyramid, the Throne World Pyramid was immense in scale, housing many structures within. After overcoming many trials and obstacles, the fireteam faced Rhulk in combat and defeated him.<ref>'''Bungie (2022/2/22)''', ''[[Destiny 2]]: [[The Witch Queen]] - [[Vow of the Disciple]]''</ref> | ||
After the defeat of Rhulk, the Young Wolf would find themselves having to regularly travel [[Preservation|back into the Pyramid]], needing to clear out the Scorn as they attempted to further harness the Darkness. | After the defeat of Rhulk, the Young Wolf would find themselves having to regularly travel [[Preservation|back into the Pyramid]], needing to clear out the Scorn as they attempted to further harness the Darkness.<ref>'''Bungie (2022/2/22)''', ''[[Destiny 2]]: [[The Witch Queen]] - [[Preservation]]''</ref> | ||
===The March On Neomuna=== | ===The March On Neomuna=== | ||
{{Quote|Disciple. You know what must be done.|The Witness after communing with the Traveler}} | {{Quote|Disciple. You know what must be done.|The Witness after communing with the Traveler}} | ||
[[File:Lightfall Intro Battle.png|350px|thumb|The Coalition defends the Traveler from the Black Fleet.]] | [[File:Lightfall Intro Battle.png|350px|thumb|The Coalition defends the Traveler from the Black Fleet.]] | ||
After Rasputin's final sacrifice to prevent [[Eramis]] from using the Warsat Network on the Traveler, the Black Fleet finally advanced on the Traveler and began their assault on the defending forces of the Coalition, effortlessly destroying any craft that came too close with waves of Resonant energy. The Traveler responded to the attack with a massive beam of [[Light]], which struck the lead Pyramid containing the Witness and created blooms of paracausal flora. However, the Witness itself was unaffected | After Rasputin's final sacrifice to prevent [[Eramis]] from using the Warsat Network on the Traveler,<ref>'''Bungie (2022/12/6)''', ''[[Destiny 2]]: [[Season of the Seraph]] - [https://youtu.be/Bf72Fazd3Ck?t=424 Ascent]''</ref> the Black Fleet finally advanced on the Traveler and began their assault on the defending forces of the Coalition, effortlessly destroying any craft that came too close with waves of Resonant energy. The Traveler responded to the attack with a massive beam of [[Light]], which struck the lead Pyramid containing the Witness and created blooms of paracausal flora. However, the Witness itself was unaffected and floated out from its Pyramid to meet the Traveler face-to-face. Eight Pyramids followed it and took up a formation around the Traveler resembling an eight-pointed star, and halted the Traveler's attack by striking it with a concerted Resonant energy surge.<ref>'''Bungie (2023/2/28)''', ''[[Destiny 2]]: [[Lightfall]] - [https://youtu.be/7BLYLVaZVQ0?t=109 Witness Arrival]''</ref> | ||
After the Witness succeeded in creating a link between the | After the Witness succeeded in creating a link between the Traveler and the [[The Veil|Veil]] using the Guardian's [[Ghost]], it opened a triangular portal on the surface of the Traveler. Some of the Pyramids would enter the portal, seemingly dissolving into purplish mists of energy as they did so, followed by the Witness itself.<ref>'''Bungie (2023/2/28)''', ''[[Destiny 2]]: [[Lightfall]] - [https://youtu.be/7BLYLVaZVQ0?t=1242 Calus Defeat]''</ref><ref>'''Bungie (2023/2/28)''', ''[[Destiny 2]]: [[Lightfall]] - [https://youtu.be/7BLYLVaZVQ0?t=1360 Witness Portal]''</ref> Some of the remaining Pyramids would be left behind by the Witness' later [[Onslaught|assaults]] against the Last City and its territories.<ref>'''Bungie (2024/4/9)''', ''[[Destiny 2]]: [[Into the Light]] - [[Onslaught]]''</ref> | ||
===Fall of the Witness=== | ===Fall of the Witness=== | ||
{{expand-section}} | {{expand-section|[[The Final Shape]]}} | ||
Following the destruction of the Witness within the [[The Pale Heart|Pale Heart]], the remaining forces of the Black Fleet would fall under the command of stragglers like [[Yirix]] and [[Fikrul, the Fanatic]], the former the acting leader within the [[Shadow Legion]]<ref name="Yirix"/> and the latter using an Echo to command them.<ref name="Revenant"/> | Following the destruction of the Witness within the [[The Pale Heart|Pale Heart]], the remaining forces of the Black Fleet would fall under the command of stragglers like [[Yirix]] and [[Fikrul, the Fanatic]], the former the acting leader within the [[Shadow Legion]]<ref name="Yirix"/> and the latter using an Echo to command them.<ref name="Revenant"/> | ||
| Line 199: | Line 208: | ||
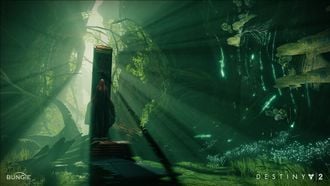
[[File:GardenofSalvation3.jpg|thumb|330px|A veiled figure found in the Black Garden.]] | [[File:GardenofSalvation3.jpg|thumb|330px|A veiled figure found in the Black Garden.]] | ||
The [[Guardian]]s' explorations of the [[Pyramid]]s, as well as the [[Black Garden]] and the [[Deep Stone Crypt]] on [[Europa]], revealed a motif that appeared to be representative of, or at least associated with, the Darkness: statues of humanoid, veiled figures. All of these statues are identical in shape, have seemingly feminine features, and are posed with faces turned upward and arms slightly outspread. They are primarily used as communicators for the Witness, however on some occasions | The [[Guardian]]s' explorations of the [[Pyramid]]s, as well as the [[Black Garden]] and the [[Deep Stone Crypt (location)|Deep Stone Crypt]] on [[Europa]], revealed a motif that appeared to be representative of, or at least associated with, the Darkness: statues of humanoid, veiled figures. All of these statues are identical in shape, have seemingly feminine features, and are posed with faces turned upward and arms slightly outspread. They are primarily used as communicators for the Witness, however on some occasions, they have been used by [[Xivu Arath, God of War|its]] [[Audience|servants]].<ref name="Deep Dive">'''Bungie (2023/5/22)''', ''[[Destiny 2]]: [[Season of the Deep]] - [[Deep Dive]]''</ref> It was eventually revealed that these statues are representations of members of the Witness' species as they prepared to form the Witness by merging their consciousnesses using the Veil, some of the [[Penitent|dissenting]] minds of the Witness who rejected its philosophy would use these statues to communicate with the Guardians.<ref>'''Bungie (2024/6/4)''', ''[[Destiny 2]]: [[The Final Shape]] - [[Dissent]]''</ref> | ||
During the late Golden Age, [[Clovis Bray I]] discovered one of these veiled statues beneath the surface of [[Europa]] which he named "[[Clarity Control]]". This statue was the source of Darkness, which Clovis referred to as "Clarity," and played an integral role in the production of Exos. Although seemingly made of obsidian stone like most of the other figures, this figure differs from the others in that it lacks any surrounding structures, instead floating freely in midair, and | During the late Golden Age, [[Clovis Bray I]] discovered one of these veiled statues beneath the surface of [[Europa]] which he named "[[Clarity Control]]". This statue was the source of Darkness, which Clovis referred to as "Clarity," and played an integral role in the production of Exos.{{Citation needed}} Although seemingly made of obsidian stone like most of the other figures, this figure differs from the others in that it lacks any surrounding structures, instead floating freely in midair, and moving very slightly as if breathing. Clovis described the figure as "an entity from beyond our own dimension," suggesting it may be more than a mere statue.<ref name="DSC">'''Bungie (2020/11/10)''', ''[[Destiny 2]]: [[Beyond Light]] - [[Deep Stone Crypt (raid)|Deep Stone Crypt]]''</ref> | ||
==Gallery== | ==Gallery== | ||
Latest revision as of 12:46, December 12, 2024
| Black Fleet | |
|---|---|
| |
| Overview | |
|
Other name(s): |
Pyramids |
|
Focal world(s): |
Extragalactic space |
|
Goals: |
Enforce the will of the Witness throughout the universe |
|
Distinctions: |
Terraforming abilities |
|
Notable individual(s): |
Essence |
- "We are not your friend.
We are not your enemy.
We are your... salvation." - — The Witness
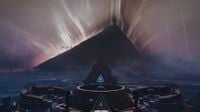
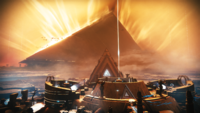
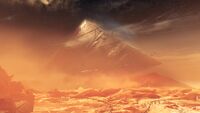
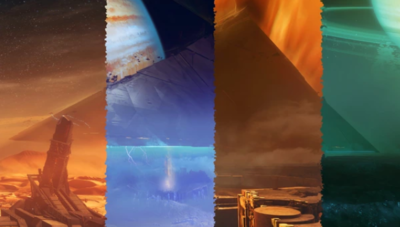
The Black Fleet is an armada of massive Darkness-imbued tetrahedral vessels, known as Pyramids. It was commanded by the entity known as the Witness and its Disciples, who pursued the Traveler for eons to subdue it and bring about the Final Shape. The Fleet is collectively responsible for the cataclysmic destruction of countless civilizations uplifted by the Traveler, with the Whirlwind of Riis and the Collapse of Earth being two of the most recent examples.
Following the defeat of the Witness and its Disciples, the Pyramids and their technology left in the Sol System would be operated by the remaining forces of the Witness[3] along with wielders of the Echoes.[4]
Overview[edit]
The Black Fleet was once thought by the people of the Last City to be synonymous with the Darkness itself, who knew it only as a malevolent force that had swept through the Sol System and brought about the Collapse. In reality, it is a fleet of vessels commanded by the Witness and its Disciples, who wielded the Darkness as a weapon against humanity and other civilizations as part of their eons-long crusade to find and subdue the Traveler.[5]
The Black Fleet has existed for billions of years, and appears to have traveled far and wide across the universe since the Witness first set out to find the Traveler. Various ancient records describe Pyramids or other artifacts of the Black Fleet being left behind on the Qugu homeworld of Seht and a planet in or near the system of the Eliksni homeworld of Riis[6], suggesting that the Fleet passed through these locations at some point in the distant past. An artifact of the Fleet was also discovered on Earth's moon during the Golden Age, having either been left behind or sent there remotely by the Fleet sometime between the formation of the Moon and the arrival of the Traveler in the Sol System.
Following the Black Fleet's second arrival in the Sol System, several artifacts originating from the Black Fleet were encountered on Europa, including Stasis Locks, Cruxes of Darkness, Splinters of Darkness and the Ziggurat. Following Mars' reappearance in the Sol System after having vanished during the Pyramids' arrival, another artifact of the Black Fleet known as the Relic was found to have appeared on a cliffside overlooking Mars' Cradle.
History[edit]
The Ancient Past[edit]
According to the creature known as Ahsa, the Pyramids were constructed by the Precursor species that gave rise to the Witness, and were later used by the Witness when it left its home world in pursuit of the Traveler.[7] Over time, the Witness would recruit Disciples from various species, including Rhulk and Nezarec, each of whom would be granted their own Pyramid.
At some point, a Pyramid came to rest on the surface of Seht, the ancestral homeworld of the Qugu. This Pyramid became covered in stone and dirt, causing it to resemble a natural landform; it would later be revered by the Qugu as a holy site, which they referred to simply as "the Mountain." During the Hive's invasion of the Se'Tar system, Savathûn, the Witch Queen reactivated the Pyramid using her flagship, causing it to rise from its buried resting place and join her forces as they laid waste to the Qugu. This Pyramid would later be destroyed by the last remnants of the Seht Armada under the command of Warden Te'Qal.[8][9]
Another Pyramid commanded by Rhulk would be sent to Savathûn's Throne World on the orders of the Witness, to keep an eye on the treacherous Hive God (and also possibly as a punishment for Rhulk's past failures as a Disciple).[citation needed] Rhulk and his Pyramid would remain in Savathûn's Throne World for countless eons afterwards, until Savathûn was eventually reborn in the Light and neutralized the Pyramid, causing it to sink into the swamps of her Throne World.[citation needed]
At some point between the formation of Earth's Moon and the arrival of the Traveler in the Sol System, a spherical Darkness-imbued artifact became embedded beneath the Moon's Ocean of Storms under unknown circumstances. Centuries after its discovery during the late Golden Age, Eris Morn inferred that the artifact had been sent to or left on the Moon by the Black Fleet.[10]
The Whirlwind[edit]
During the Golden Age of the Eliksni on Riis, a young Eliksni named Haaksis became lost while piloting a stolen scout-ship and discovered an abandoned "fortress-city" on an airless world, either within or nearby Riis' solar system. During Haaksis' exploration of the city, he found a "ship like a blade" sitting at its center, and recovered a spherical artifact which caused him to hear voices in his mind. The artifact helped Haaksis find his way home, but continued whispering to him about the pointless struggle of life and an impending doom that would befall the Eliksni afterwards. Haaksis later became a Baron of the House of Rain, and attempted to rid himself of the artifact and its whispers by casting it into a river; however, the artifact was swallowed by a local predator known as a river-catcher, which became corrupted by Darkness and began stalking and killing Haaksis' people. When the scribe Eido of House Light read about Haaksis' story in the memoirs of Irrha, apprentice to the Slayer Baron Kiiraskes, she inferred that the artifact was of the same kind as the mysterious artifact given to the Young Wolf by the Witness during the former's exploration of the Lunar Pyramid[11]. This would appear to indicate that the Black Fleet had previously passed through Riis' solar system, or a system nearby, at some point in the past.
Sometime after the events recorded in Irrha's memoirs, the Black Fleet and Oryx's Hive arrived in Riis' solar system, causing the Traveler to flee and allowing the Hive and Black Fleet to lay waste to the Eliksni's civilization. The resulting cataclysm later became known in Eliksni history as the Whirlwind.[citation needed]
The Golden Age[edit]
For more information, see the citation policy.
Towards the end of the late Golden Age, Clovis Bray and Aeronautics of China launched a joint venture called K1 to determine the source of extra-spatial transmissions originating from beneath the surface of the Moon. Underneath the Ocean of Storms, the research team uncovered the artifact left by the Black Fleet, which they believed to be communicating with the Traveler's origin. Unfortunately, exposure to the artifact caused the crew to experience insomnia, hallucinations, and psychosis, prompting Clovis Bray to have the artifact sealed in a sophisticated containment system. Kuang Xuan, the project commander of the K1 mission, subsequently turned to one of their sites' antennae to intercept the artifact's transmissions, and put the project on lockdown. The team would stay isolated on the Moon for a time until the Collapse, during which they were slaughtered by the sudden appearance of the Hive.
Before the Collapse, Clovis Bray I led an expedition to the Jovian moon Europa, which he had received visions of from the K1 Anomaly. He and his team uncovered a large statue of a veiled, humanoid female figure, which Clovis believed to be the source of the power he called "Clarity" associated with the K1 artifact. He dubbed the statue "Clarity Control", and began utilizing it to convert Vex radiolarian fluid into a substance he called "Alkahest," which proved instrumental in the creation of Exos. It is believed that the statue was sent to Europa by the Black Fleet around two decades prior.
The Collapse[edit]
During the Collapse, the Black Fleet invaded the Sol System in force, laying waste to the worlds and colonies of the system as they descended upon the Traveler and Humanity, nearly wiping out all of humankind in the process. It was only thanks to the counterattack of the Traveler, and the interference of Savathûn, that humanity was able to survive and have some of their people be resurrected as Guardians, so that hope would still exist for the Solar System in their fight against the Darkness.[12] A single Pyramid belonging to the Disciple Nezarec was left behind on the Moon, where it would remain undiscovered for centuries.[citation needed]
Red War[edit]
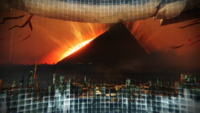
After the death of Dominus Ghaul at the hands of the Guardian, the Traveler reawakened and emitted a pulse of Light which spread throughout the Sol System, and eventually into the outer reaches of the Milky Way. This pulse eventually reached the Pyramids as they lay dormant in intergalactic space, and as the pulse washed over the fleet, they reactivated and began moving en masse toward the Sol System.[13]
Nightmares on Luna[edit]
Nezarec's abandoned Pyramid was eventually discovered by the Hive beneath the surface of Earth's Moon, but they were unsuccessful in their attempts to awaken its power.[citation needed] It was reactivated by Eris Morn when she made physical contact with it, causing it to unleash Nightmares created from the Darkness to haunt her and other beings throughout the Sol System.[14]
Multiple Pyramids were seen in the background when the Guardian receives a vision of the Black Garden from the Unknown Artifact found within the Pyramid on Luna.[15] Later, a Guardian excursion into the Garden revealed that the Sol Divisive Vex had been communing with a Pyramid Scale protecting a veiled statue, seemingly resulting in the creation of two strange, warped Axis Minds known as the Consecrated Mind and Sanctified Mind.[16]
The Darkness Descends[edit]
Around the time of Amtec's attempt to crash the Almighty into The Last City, the Black Fleet had finally reached the outer reaches of the Sol System. Rasputin detected the presence of the Fleet beyond the Heliopause, and directed Osiris to investigate an "anomalous signal" when the former Warlock Vanguard visited the Warmind to question his allegiance to humanity. Upon taking his ship to the site of the anomaly in the Kuiper-Oort Expanse, Osiris discovered a vast "maw" of Darkness shrouding a Pyramid, which began interfering with Sagira while beckoning Osiris to approach. Donning an EVA suit, Osiris left Sagira behind in his ship to investigate the anomaly more closely, and discovered a metallic seed within its depths. Immediately afterwards, he found himself aboard his ship once more, with Sagira behaving as though Osiris had changed his mind about leaving. Still holding the seed in his hand, Osiris set a course back to the inner Solar System, with the shadow of the Pyramid looming over his vessel as he departed.[17]
Over the following weeks, Rasputin monitored the Black Fleet as its Pyramids approached the inner Solar System, plotting their course on monitors within his Seraph Bunkers and sharing the information he gathered with the Vanguard. Starting from an initial force of one lead Pyramid accompanied by seventeen smaller ones, as the Fleet passed through the Kuiper belt the number of vessels increased to thirty-two, followed by seven more as the fleet approached Neptune. The following week, the number increased to forty-three as the Fleet began to make its way towards the inner planets, while the lead Pyramid held position above Neptune. The Fleet next set its sights on Uranus, now numbering forty-nine Pyramids in total, and began moving toward Saturn. By the time the Fleet had claimed the outer Solar System, a total of fifty-four vessels had been detected.[citation needed]
Unbeknownst to Rasputin, however, another Pyramid had broken away from the main Fleet and descended upon the inner system undetected. By the time of the Almighty's destruction, this Pyramid had reached Jupiter and made its way towards Io along with an escort fleet of Pyramid Scales.[18]
Arrival[edit]
- "You bring weapons. You will not need them. We offer only truth."
- — The Witness through The Ghost.
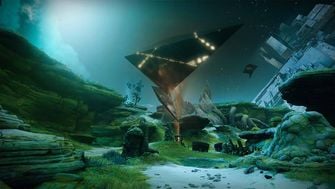
Several days after the Almighty's destruction, the Pyramids had spread throughout the system. Alarmingly, many of these Pyramids appeared on worlds that were nowhere near where Rasputin had detected them. It is unknown if these vessels had broken off from the main fleet or if they were new ones who arrived in the system undetected. The first of these Pyramids made its way to Io. In a similar fashion to the attack on the Almighty, Ana Bray deployed satellites against the Pyramid in hopes that it would be destroyed. However, the Pyramid remained undamaged and continued its approach on the Jovian moon, also managing to disable the Warmind and render the Warsat Network entirely useless.[19]
After the Warmind fell, the Io Pyramid touched down near the Cradle and began deploying its Pyramid Scales in the Echo Mesa nearby. Eris Morn departed for it as soon as it arrived, leading to Zavala tasking the Guardian to investigate the Pyramid and retrieve Eris. As the Guardian approached the vessel, the Darkness possessed their Ghost and brought them closer to the Pyramid. However, the Guardian was pulled into the Ascendant Realm by Savathûn. After fighting through numerous Taken and Hive, the Guardian finds Eris in the center of the Cradle, where a Tree of Silver Wings, spawned by the Traveler's Light, was situated inside.[19] Over the week, the Pyramid continued to corrupt Io, deploying Pyramid Scales and infesting the planet with Darkness. The Drifter dispatched a special Bank device to collect Energy of the Darkness, while at the same time having Guardians fight off an arms race with the Cabal and the Vex, along with Savathûn's Taken forces.[20]
Almost a month after the arrival of the first Pyramid, three more touched down on Titan, Mars, and Mercury. The Titan Pyramid was the first to start deploying its Pyramid Scales, scuttling the Hive and Fallen in the New Pacific Arcology in an arms race to claim Darkness seeping in blooms from the alien vessels.[20] From the depths of the Pyramid back on Io, a large force of Pyramid Scales was sent out to survey Io's surface, to presumably prepare it for terraforming.
Following the crippling of Rasputin, Zavala ordered the evacuation of the four worlds that had come under threat from the Pyramids. The Young Wolf aided Zavala in making the final preparations, completing a list of objectives for each destination according to the needs of Sloane, Asher, Brother Vance, and Ana Bray. Instead of evacuating, Vance and Asher entered the Infinite Forest and Pyramidion respectively, and Sloane chose to hold the line against the Hive and the Pyramid that had arrived on Titan. The Young Wolf assisted Ana in her attempt to salvage what was left of Rasputin, which resulted in his remains being placed in a specialized Engram. With what remains of Rasputin's mind preserved, Ana would make her final preparations before departing Mars.[21][22]
In the following weeks, Guardians were pulled into the Ascendant Realm, reminiscent of the Court of Oryx on the Dreadnaught, this time encountering Nokris, who had survived his defeat on Mars and become Savathun's supplicant. After Nokris was defeated by the Guardian once more, the Witness finalized its message, teleporting them into a room within a Pyramid which depicted each of the races of the Sol System surrounding a Pyramid, with a shadow falling over statues of the Fallen. The Witness told the Guardian of an "ancient power" on Europa and invited them to go and find it.[23] A short while after this final message, the Witness cloaked Mars, Mercury, Titan and Io in shadow, moving them to another plane of existence and rendering them inaccessible. In response, the Traveler started to pulsate with Light and began healing the wounds it had sustained when it had liberated itself from Ghaul's cage.[24]
The Call to Europa[edit]
For more information, see the citation policy.
- "The Light believes you thankless. Nothing more than a soldier asked again and again to do its bidding.
So we want to thank you. With a gift. To help you finally take control." - — The Witness to the Guardian
After the Traveler finished healing itself, the Young Wolf arrived on Europa to find a Pyramid, along with a new Fallen House led by Eramis, Kell of Darkness whose members wielded dark powers originating from the Pyramid.
As the Young Wolf assisted Variks in fixing the communication relays on top of his safehouse, Ghost detected a dark presence, which he identified as being the same group of entities that had spoken through him on Luna (later revealed to be the Witness). As soon as Ghost fixed the final relay, a Crux of Darkness appeared and dispersed the blizzard surrounding the facility. Speaking through Ghost once again, the Witness encouraged the Guardian to approach the Pyramid, all the while flattering the Guardian and stating that they wished to give them a gift. Upon arriving, The Pyramid sent out a Ziggurat.
After the Guardian defeated Eramis, she reached out towards the Pyramid as she was frozen in a crystalline Stasis prison. Later on, once the Guardian attuned themselves to the power of Stasis, they were teleported to a veiled statue inside the Pyramid, which allowed them to finally gain complete access to their Stasis powers.
It would also be during this time that the Darkness would seek out Savathûn to punish her for her attempted interference, forcing the Witch Queen into hiding. Mara Sov would also reemerge, having deployed her forces and fleets against the Black Fleet, without success; she would later divulge that during her absence following the events that took place in the Dreaming City, she did battle with the Witness, which she described as "a voice in the Darkness". Ada-1 also marshaled the assets of the Black Armory against the Pyramids, but even her unique weapons would prove useless against the Pyramids.
No More Pieces Left To Place[edit]
- "We have seen enough."
- — The Witness
After having been shrouded in Darkness for some time following the arrival of the Pyramids, Mars suddenly reappeared, with large swaths of its surface bordered by curtains of eerie green light; the regions within these borders appeared to be temporally displaced, showing objects and buildings within as they had looked during the Golden Age. There was also a new structure built into the cliffs overlooking Mars' Cradle, bearing the same architectural hallmarks as the Pyramids.[citation needed]
In the pursuit of uncovering the truth of Savathûn's Throne World, the Young Wolf found themselves once more on Europa, this time at the base of the Europan Pyramid itself. Fighting through hordes of Cabal deserters under the command of Valus Dralgur, the Exiled, the Young Wolf entered the Pyramid, where they discovered what appeared to be a city of structures, grander and more elaborate than what was able to be seen within the Lunar Pyramid. After purging the deserters from the Pyramid, the Guardian communed with the Darkness, gaining the ability of Deepsight[25].
A sunken Pyramid was later discovered within Savathûn's Throne World. A fireteam of Guardians ventured inside, finding Rhulk, Disciple of the Witness, who had been imprisoned within. Similarly to the Europan Pyramid, the Throne World Pyramid was immense in scale, housing many structures within. After overcoming many trials and obstacles, the fireteam faced Rhulk in combat and defeated him.[26]
After the defeat of Rhulk, the Young Wolf would find themselves having to regularly travel back into the Pyramid, needing to clear out the Scorn as they attempted to further harness the Darkness.[27]
The March On Neomuna[edit]
- "Disciple. You know what must be done."
- — The Witness after communing with the Traveler
After Rasputin's final sacrifice to prevent Eramis from using the Warsat Network on the Traveler,[28] the Black Fleet finally advanced on the Traveler and began their assault on the defending forces of the Coalition, effortlessly destroying any craft that came too close with waves of Resonant energy. The Traveler responded to the attack with a massive beam of Light, which struck the lead Pyramid containing the Witness and created blooms of paracausal flora. However, the Witness itself was unaffected and floated out from its Pyramid to meet the Traveler face-to-face. Eight Pyramids followed it and took up a formation around the Traveler resembling an eight-pointed star, and halted the Traveler's attack by striking it with a concerted Resonant energy surge.[29]
After the Witness succeeded in creating a link between the Traveler and the Veil using the Guardian's Ghost, it opened a triangular portal on the surface of the Traveler. Some of the Pyramids would enter the portal, seemingly dissolving into purplish mists of energy as they did so, followed by the Witness itself.[30][31] Some of the remaining Pyramids would be left behind by the Witness' later assaults against the Last City and its territories.[32]
Fall of the Witness[edit]
- This section needs expansion. You can help Destinypedia by expanding it with information from The Final Shape.
Following the destruction of the Witness within the Pale Heart, the remaining forces of the Black Fleet would fall under the command of stragglers like Yirix and Fikrul, the Fanatic, the former the acting leader within the Shadow Legion[3] and the latter using an Echo to command them.[4]
Leadership[edit]
Known Vessels[edit]
- Essence (Flagship)
- The Lunar Pyramid
- The Ionian Pyramid
- The Mercurian Pyramid
- The Martian Pyramid
- The Titanian Pyramid
- The Europan Pyramid
- The Sunken Pyramid
- The Drowned Pyramid
- Typhon Imperator
Technology[edit]
Guardian's Arsenal[edit]
|
Veiled Figures[edit]
The Guardians' explorations of the Pyramids, as well as the Black Garden and the Deep Stone Crypt on Europa, revealed a motif that appeared to be representative of, or at least associated with, the Darkness: statues of humanoid, veiled figures. All of these statues are identical in shape, have seemingly feminine features, and are posed with faces turned upward and arms slightly outspread. They are primarily used as communicators for the Witness, however on some occasions, they have been used by its servants.[33] It was eventually revealed that these statues are representations of members of the Witness' species as they prepared to form the Witness by merging their consciousnesses using the Veil, some of the dissenting minds of the Witness who rejected its philosophy would use these statues to communicate with the Guardians.[34]
During the late Golden Age, Clovis Bray I discovered one of these veiled statues beneath the surface of Europa which he named "Clarity Control". This statue was the source of Darkness, which Clovis referred to as "Clarity," and played an integral role in the production of Exos.[citation needed] Although seemingly made of obsidian stone like most of the other figures, this figure differs from the others in that it lacks any surrounding structures, instead floating freely in midair, and moving very slightly as if breathing. Clovis described the figure as "an entity from beyond our own dimension," suggesting it may be more than a mere statue.[35]
Gallery[edit]
Trivia[edit]
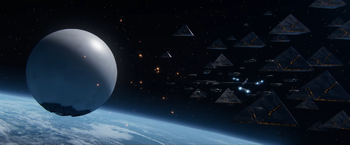
- The ending cutscene of the Red War campaign shows a single massive Pyramid in the center of a fleet of smaller Pyramids. It was later depicted by Mara Sov's hologram of the Pyramid fleet in the Queen's Court, which also shows a massive Pyramid amid smaller ships.
- The tetrahedral forms of the Pyramids allude to the philosophy of the Darkness; just as the Darkness seeks to reduce the universe to a maximally simplified state, tetrahedrons are the simplest possible three-dimensional shape. Also of note is that the Pyramids appear to have faces representing the three archetypal triangles: regular, isosceles and right.
- The Pyramid on Luna can be seen from the peak of the Scarlet Keep, through the gate that Hashladûn comes through (you may also need to jump to catch a glimpse).
- When the player encounters the Pyramid on Luna there are two pieces of dialogue that their Ghost can say, dependent on whether the player has completed the final Invitation of the Nine where the Pyramids were briefly pictured. If it has not been completed, Ghost will say that he does not recognize the ship, but if the player has completed it he will say that he does recognize the Pyramid and notes the impossibility of it being there.
- Ghost Quote 1: "What... is that? I've never seen anything like it."
- Ghost Quote 2: "That's... one of those Pyramids. It can't be. That should not be here."
- Early in Season of the Worthy, it was revealed that the Pyramid fleet had already reached the Kuiper Belt and made contact with Osiris. The fleet attempted to take control of Sagira in the same fashion that the Pyramid of Luna did to the Guardian's Ghost.[citation needed]
- The total time it took for the Darkness to arrive in the solar system was 1,007 days. That is the time between the release of Destiny 2 on the 6th of September 2017 and the start of Season of Arrivals on the 9th of June 2020.
- Though the tetrahedron shape of the Pyramids has remained consistent with their appearance in both concept art as well as the ending cutscene for the Red War campaign, the ships that are featured within Season of Arrivals are far more sleek and feature less prominent segmented sections. The most likely reason for this change was a redesign, however this cannot be confirmed.
- A possible inspiration for the Pyramid ships is Arthur C. Clarke's short story, "The Sentinel." In Clarke's short story, an ancient alien structure was left upon Earth's Moon, described as being "made of a polished mineral, is tetrahedral in shape, and is surrounded by a spherical forcefield."[36]
- Various artifacts associated with the Black Fleet recall the forms and colors of game pieces or tokens; for example, the Relic in the Enclave on Mars has a section that resembles a tic-tac-toe game, and the Dark City is filled with sculptures and blocks of black-and-white stone which recall the forms of chess pieces. These may thematically allude to the Darkness' view of the universe as a "game" to be won.
- In The Final Shape, it is revealed that the Precursor statues in the Pale Heart contain the dissenting minds that were cut out from the collective of the Witness after opposing its ideals of a Final Shape. However, whether they apply to the entirety of the veiled statues in the Black Fleet remains largely unclear and up to speculation.
List of appearances[edit]
- Destiny (First mentioned)
- Cabal Booklet (Mentioned only)
- Destiny 2 (First appearance)
- Forsaken (Mentioned only)
- Season of the Forge (Mentioned only)
- Season of the Drifter (Mentioned only)
- Season of Opulence (Mentioned only)
- Shadowkeep
- Season of the Undying (Mentioned only)
- Season of Dawn (Mentioned only)
- Season of the Worthy
- Season of Arrivals
- Beyond Light
- Season of the Hunt (Mentioned only)
- Season of the Chosen (Mentioned only)
- Season of the Splicer (Mentioned only)
- The Witch Queen
- Season of the Risen
- Season of the Haunted
- Season of Plunder (Mentioned only)
- Season of the Seraph
- Lightfall
- Season of Defiance (Mentioned only)
- Season of the Deep
- Into the Light
- The Final Shape (Mentioned only)
- Episode: Echoes (Mentioned only)
- Forsaken (Mentioned only)
- Kuang Xuan's Logbook (Mentioned only)
- The Hidden Dossier (Mentioned only)
- Bitter (Mentioned only)
- Entelechy (Mentioned only)
References[edit]
- ^ Bungie (2018/9/4), Destiny 2: Forsaken - Sleepless
- ^ Bungie (2018/9/4), Destiny 2: Forsaken - Marasenna: Cosmogyre III
- ^ Jump up to: a b Bungie (2024/10/8), Destiny 2: Episode: Echoes - Encore
- ^ Jump up to: a b Bungie (2024/10/8), Destiny 2: Episode: Revenant - Onslaught: Salvation
- ^ Game Pressure: A Guardian Rises
- ^ Bungie (2024/10/8), Destiny 2: Episode: Revenant - Lore:The Garden-Way: Monsters
- ^ YouTube - Destiny 2: Season of the Deep - The Witness's Origins Cinematic
- ^ (2024/6/4),Destiny 2: Episode: Echoes - Lore:Dyanasty, Chapter 2 - To Split the Sky
- ^ (2024/6/4),Destiny 2: Episode: Echoes - Lore:Dyanasty, Chapter 3 - The Cry that Echoes
- ^ Kuang Xuan's Logbook, "Eris's Letter"
- ^ Bungie (2024/10/8), Destiny 2: Episode: Revenant - Lore:The Garden-Way: 5. Monsters
- ^ Bungie (2022/2/22), Destiny 2: The Witch Queen - Parasitic Pilgrimage
- ^ Bungie (2017/8/9), Destiny 2 - Chosen
- ^ Bungie (2019/10/1), Destiny 2: Shadowkeep - A Mysterious Disturbance
- ^ Bungie (2019/10/1), Destiny 2: Shadowkeep - Beyond
- ^ Bungie (2019/10/1), Destiny 2: Shadowkeep - Garden of Salvation
- ^ Bungie (2020/3/10), Weblore:Season of the Worthy - What Gives Me Pause
- ^ Bungie (2020/3/10), Destiny 2: Season of the Worthy - Closing in
- ^ Jump up to: a b Bungie (2020/6/9), Destiny 2: Season of Arrivals - A Shadow Overhead
- ^ Jump up to: a b Bungie (2020/6/9), Destiny 2: Season of Arrivals - Contact
- ^ Bungie (2020/6/9), Destiny 2: Season of Arrivals - Exodus: Preparation
- ^ Bungie (2020/6/9), Destiny 2: Season of Arrivals - Exodus: Evacuation
- ^ Bungie (2020/6/9), Destiny 2: Season of Arrivals - Interference
- ^ YouTube: Destiny 2: Season of Arrivals - End of Season Cinematic
- ^ Bungie (2022/2/22), Destiny 2: The Witch Queen - The Communion
- ^ Bungie (2022/2/22), Destiny 2: The Witch Queen - Vow of the Disciple
- ^ Bungie (2022/2/22), Destiny 2: The Witch Queen - Preservation
- ^ Bungie (2022/12/6), Destiny 2: Season of the Seraph - Ascent
- ^ Bungie (2023/2/28), Destiny 2: Lightfall - Witness Arrival
- ^ Bungie (2023/2/28), Destiny 2: Lightfall - Calus Defeat
- ^ Bungie (2023/2/28), Destiny 2: Lightfall - Witness Portal
- ^ Bungie (2024/4/9), Destiny 2: Into the Light - Onslaught
- ^ Bungie (2023/5/22), Destiny 2: Season of the Deep - Deep Dive
- ^ Bungie (2024/6/4), Destiny 2: The Final Shape - Dissent
- ^ Bungie (2020/11/10), Destiny 2: Beyond Light - Deep Stone Crypt
- ^ Wikipedia - The Sentinel (Short Story)
| ||||||||||||||||||||
| ||||||||||||||

