Grasp of Avarice
From Destinypedia, the Destiny wiki
 This article is a stub. You can help Destinypedia by expanding it.
| “ | A cautionary tale for adventurers willing to trade their humanity for riches. | ” |
|
Prev: |
|
|
Next: |
|
| Grasp of Avarice | |
|---|---|
| |
|
Game: |
|
|
Player(s): |
1-3 |
|
Recommended Power Level: |
1600 |
|
Location: |
|
|
Objective(s): |
TBA |
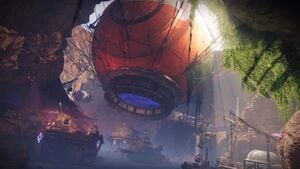
Grasp of Avarice is a Dungeon that was added to Destiny 2 in the Bungie 30th Anniversary Pack where a team of Guardians discover the secrets of the infamous Loot cave located in the Skywatch of the Cosmodrome, and discover a story of a group of Guardians that were tainted by greed.
Walkthrough
Skywatch
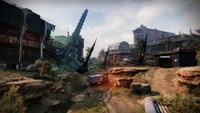
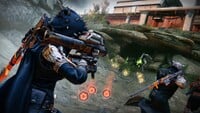
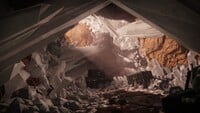
To begin, Guardians will find themselves landing in the Skywatch of the Cosmodrome, facing towards the crashed Hive Seeder. Fallen and Hive forces will be fighting at the location of the classic Loot Cave. Guardians should eliminate all enemies here to cause drops of engrams. Upon picking up an engram, Guardians won't be festooned with item drops, but instead accrue stacks of Burdened by Riches. This is accompanied by a timer that will kill you upon hitting 0, but will reset to maximum upon picking up another engram. Keep killing the Hive that spawn inside and above the Loot Cave to obtain more engrams, building up your stacks. To progress, Guardians must stand next to the crystal contained within the Loot Cave of yore, which will drain stacks from them, causing the crystal to grow. 50 stacks must be deposited to continue onward.
Take note that whenever a Guardian reaches 10 stacks of Burdened by Riches, their Super will instantly recharge. This will come in handy during the dungeon ahead. If not picked up, the engrams will eventually explode, damaging anything nearby.
Once 50 have been deposited, the floor will collapse and Guardians can proceed deeper into the Grasp of Avarice.
Note that if you do not yet have the Gjallarhorn Catalyst, a Reaver Vandal will spawn that when enough damage is done to it, drops a Cursed Engram. Pick up the Engram and go to the chest in the corner to obtain the first part of the catalyst
Rusted Gangplank
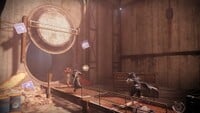
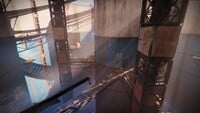
This section is unlike any other dungeon in Destiny 2 so far, as it involves a lot of trial-and-error to discover the path forward that won't kill you, or you can refer to a guide like this to ensure survival. Many switches and pressure pads will exist, and activating the wrong one can lead to instant death via a spike trap.
Keep progressing through this section, eliminating the Hive enemies you encounter. Eventually you'll come to a room with a large circular doorway that is closed, with two doorways on the right-hand side of the room. Open the right-hand door of the two, and when inside, hop over the pressure plate on the floor to reach the console on the other side. Activate this console, jump over the pressure pad on the way out of the room, and you'll see that the circular doorway has rolled open. Proceed through this pipe to a room with a bottomless pit. Jumping onto the midsection of this room will place you on panels that will fall away when touched. You need to stand on this, allow it to go down, and then use your jump ability to reach another console beneath. It's advised to land on the left-hand panel as once it falls, it won't block the way to the console. The right-hand one can prove an obstacle once it falls.
Once the console is activated, jump to the far platform to the right, then hop back onto the falling panels, then back to the first room through the pipe. Once back here, look at the walls to find air conditioning units and other sticking out pseudo-platforms. Use these to climb up to the top, where you'll find more pipes have opened up. Find the pipe with sunlight pouring through a grate at the top, step on the pressure pad and the way forward will open.
You'll find more pseudo-platforms to climb on the walls in this room. Keep going higher, avoiding the pressure plate, as it'll spring a spike trap on you. Once to the top, you'll need to cross a floor of falling panels to continue on. Once at the end of the path, you'll find a console with a diagram of the next area. Pull the lever to flip the doorway open.
In this next room, you'll find doorways that flip in the same way as the one you opened to reach here. Your objective is to jump to these rooms, go inside, avoid spike trap pressure plates and the groups of Thrall and Cursed Thrall, hit another lever, then go back outside to find the next room, and repeat. Watch out for Shrieker spawns. Once in the last room on the left, you'll need to jump up to reach a room with another lever. Flipping this will open a large doorway at one end of the main room, which you'll find contains some Hive units. Jump over to this room, kill the Hive and flip the lever you find at the far end of the room. This then opens the doorway at the opposite end from here, containing more Hive units. Progress to this room, eliminate the Hive, and use the doorway on the right-hand side to continue. The left-hand doorway is a spike trap.
Next you'll be in a large circular room, containing some warring Hive and Fallen. Kill them, and jump to the right hand side of the room from where you came in. You'll find another lever. Activate this, which will open the doorways marked three. Go there, eliminate the enemies, and activate the lever inside. This will open the doorways marked one. Move there, kill enemies, flip lever, opening up door two. Inside this room will be Fallen units. Kill them and you'll be granted a Scorch Cannon, which is used to open door four. Move there, shoot the Fallen battery with the cannon and keep the fire button held down to charge. After a couple of stages of charging, let go and the explosion will power up the battery, opening the doorway.
Take note that there is a secret chest discoverable in this four door section. It is located on a small platform on one of the vertical metal struts, facing towards the concrete wall.
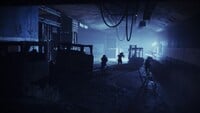
After opening door four, Guardians will find a long and intimidatingly lit staircase to proceed up. Foolishly rushing up this will lead to Guardians being reduced to mush by a large rolling barrel, which will fall down once enough distance has been made up the staircase. Use the crannies at the sides of the staircase to avoid being ran over. Proceed forward after avoiding this. You'll eventually come to what seems like a dead end, in a dark room. Look for the pile of boxes and crates leading to a vent, and enter this, following the path to reach the first boss fight.
Note that if you do not have the Gjallarhorn Catalyst, a Reaver Vandal will spawn. Deal enough damage to it and an engram will be dropped. Pick up the engram and go to the area to the next encounter. Instead of going to the encounter, turn right and go to the platform containing the chest. Open it and you will receive the second part of the catalyst.
Phry'zhia The Insatiable
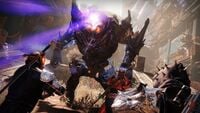
Guardians will see a large Hive Ogre and Acolytes fighting some Fallen units at the other side of a large gap. Plant a flag, rally and jump the gap to meet the first boss. Phry'zhia is an invincible Ogre that will stand in the middle of the room, lasering anyone it can see with its eye blast. The Hive enemies here will once again drop engrams to grant Burdened with Riches. You'll also note another crystal near the gap you jump to start the fight. There is also a Fallen unit possessing a Scorch Cannon. This is all a combination of what you've done so far. Kill the Fallen, grab the Scorch Cannon, and shoot the battery above the doorways on the left or right of the arena to charge up and open the doors. Bust in, kill the Hive, gather Riches and then head to the other side to open the door there to gather more Riches.
The Scorch Cannon can be dropped by attempting to change weapon, to allow the carrying player to keep its ammo for the next door, instead of using it to kill Hive. Be aware that dropping it for too long will cause it to despawn, meaning another set of Fallen will spawn to provide another.
Periodically, waves of Thrall will spawn near the crystal, so take care of these however you see fit.
Once you have 40 stacks, deposit them into the crystal and once it fills up, a message stating "Phry'zhia, the Insatiable Succumbs to Temptation" will appear on-screen. This indicates damage can now be dealt to the Ogre. If you have a Warlock, you can place a Well of Radiance at the crystal and damage the boss from this spot. If not, you can travel to the higher section on the right hand side of the room and safely perform damage from there. During the damagable phase, Phry'zhia will no longer be bound to standing in the middle, and may get intimidatingly close to you. However, don't fear, as it has a limit on how far it can travel. Once enough time has passed, Phry'zhia will calm down and resume its invincible station in the middle of the arena. Re-gather Riches, deposit and damage Phry'zhia until they are dead.
Sparrow Section
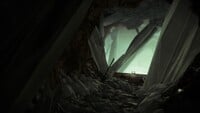
After Phry'zhia is defeated, continue onward through a door in the wall. Follow this path forward to large room with two levers. Hit the one on the left to open the door in front of you, beginning the sparrow section. For this section, you must disable four mines, all while Fallen are attacking you. There are pads you can drive over to extend the timer, but if you fail to reach and disable a mine in time, it explodes, resetting the encounter. Once this is done, you will be inside a crystal skull. There is a secret chest inside the skulls eye.
Shield Shutdown
In this section, you must fire four servitors at the different "shield cores". To accomplish this, first look through the room for enemies/a white shielded Servitor. Then, making use of the scorch cannons that you get from the Vandals, launch yourself to the area with the enemies. Once there, kill the fallen, which drop Cursed Engrams. Those Engrams, like the ones previously found in the dungeon, can be siphoned into an Icon of Excess. Once 20 Engrams are placed in the Icon, the Servitor's white shield is removed and the Servitor can be killed. Once this occurs, push the body of the servitor to the launcher, aim it towards the shield part closest to you, then fire it. If you do not do this in the time limit, the encounter will wipe and you will start again. Repeat this three more times until the shield is down, then go to the middle area and ascend to the final encounter.
Note that if you do not yet have the Gjallarhorn Catalyst, you can find it in this room. First, finish the encounter, then go to the middle. It will have the only turn-able launcher. Point it at the waterfall area, and launch yourself there. Once there, you will once again find the Reaver Vandal. It is recommended to have another Guardian to stay on the middle platform and use a separate Scorch Cannon to remotely activate the launcher. Once you are launched, quickly go on top of the room nearest the Cannon. Open the chest and you will receive the Gjallarhorn Catalyst.
Wilhelm's Hoard
Bosses
- Phry'zhia, the Insatiable
- Fallen Shield
- R-M80, Loyal to Avarokk
- Grisprax, Bosun of Avarokk
- Captain Avarokk, the Covetous
Unique enemies
Rewards
- Armor
- Twisting Echo Suit (Hunter)
- Descending Echo Suit (Titan)
- Corrupting Echo Suit (Warlock)
- Weapons
- 1000-Yard Stare - Legendary
 Sniper Rifle
 - Eyasluna - Legendary
 Hand Cannon
 - Hero of Ages - Legendary
 Sword
Sword - Matador 64 - Legendary
 Shotgun
- 1000-Yard Stare - Legendary
Richest Dead Man Alive
Scattered throughout the dungeon are twelve messages in bottles that tell the story of Wilhelm-7, his ill-fated Fireteam's journey into the loot cave, and their subsequent descent into obsession, paranoia and insanity that ultimately resulted in their final deaths.
Bottle 1
- Wilhelm-7: It's the end of day 2, and I'm thinking that damn Vandal outsmarted us. When we chased him into the loot cave, I was sure he'd lead us right to the source of the treasure. But this just looks like... a regular cave. I haven't told the team we're lost, but Bismarck's getting suspicious. That Ghost is too clever for his own good. Not ready to turn back though. There's treasure here... there's got to be.
Bottle 2
- Wilhelm-7: It's day 4, and still nothing. No gold-plated engrams. No Exotic drops. Just more Fallen and Hive with their stupid Mos Ultimas and Scavenger Suits. I heard Bismarck talking to Pershing and Agadir when they thought I was asleep. He wants to turn back. But we can't. Not yet. The Exotics are just around the next corner. I can smell them.
Bottle 3
- Wilhelm-7: It's the end of day 6 and... we did it! We found the source of the loot! Broke into a chamber and it's wall-to-wall engrams, Glimmer piled to the ceiling! Top tier loot as far as the eye can see! We're gonna go as deep as we can. There must be even more ahead! We'll figure out how to split it all up later. Should be easy with so much of it.
Bottle 4
- Wilhelm-7: Day 10. We're deep in the cave system now, and each cavern's richer than the last. Deciding who gets what is tougher than I thought. Pershing shot Agadir over a mid-tier pulse rifle he already had! Agadir's Ghost came out hollering, and Pershing damn near shot him too before I stepped in. There are more engrams here than a body could ever need... but nobody wants to part with their cut.
Bottle 5
- Wilhelm-7: It's day 14, and Pershing's dead — permanently. Agadir went Golden Gun out of nowhere and shot his Ghost. Pershing tried to throw up a barrier after — hm, didn't do him any good without his Light. He died standing there like an idiot. Bismarck says we should go back to the surface, but I'll be damned if I'm gonna leave all this loot for those greedy Cryptarchs. At least there's a silver lining: Pershing had some nice gear. It's mine now.
Bottle 6
- Wilhelm-7: Day 18. I got Agadir hauling the loot like a pack mule, using a sled I made out of old Fallen armor. Problem is, the deeper we go, the better engrams I find. The sled's fit to burst, and Agadir's about to drop. I... better be careful not to overwork him... he got much weaker after I killed his Ghost.
Bottle 7
- Wilhelm-7: Day 22, and Agadir's gone. I caught him trying to steal from me — take what's mine. I pushed him down a sinkhole, about 30 meters, and dropped a grenade down after him, ha. It's quiet as a tomb now. Just me and all this loot... and Bismarck. He says we should leave. Says there's a curse. Says this place is changing me. I know he wants to come back later with some Cryptarchs and clean the place out. Heh... I'm not falling for his tricks.
Bottle 8
- Wilhelm-7: Day 30. Bismarck won't come out, so I've been hauling engrams alone. I dropped one, and chased it down a crack in the cave floor... right into another loot cave, even richer than the first! [cackles gleefully] Hey, Pershing! Just pulled a god roll of the shotgun you wanted! You hear me? Where'd you get off to... Ahh, to the victor go the spoilers, and nobody's more spoiled than me!
Bottle 9
- Wilhelm-7: Day 38, and I finally got rid of Bismarck. I knew he'd been plotting something, so... I... laid a trap for him: I shot myself! Ha, right in the meaty part of my leg. And when that little snoop compiled to see what the fuss was all about — BLAM! Heh... I put one right through his beady little iris. I... probably shoulda let him fix my leg first... eh, it'll be fine...
Bottle 10
- Wilhelm-7: Day 40. Uh... I forgot how much a body can bleed without a Ghost to stop it. Don't matter though. Ain't nothing more loot can't fix. Just one more cave... and a couple more Exotics... just a little further...
Bottle 11
- Wilhelm-7: Day, uh, can't count. My leg's burning, I — [gasps] no time to stop. Almost to the center. All the — all the loot in the galaxy, right here. Oh, just for me now. It's mine... it's all mine.
Bottle 12
- Wilhelm-7: Eh? What's that... I hear you, sneaking around... You — you're here to take... to take what's mine! DON'T YOU TOUCH NOTHIN'! IT'S ALL MINE —
Gallery
Trivia
- Grasp of Avarice is the first dungeon to feature the Fallen.
List of appearances
- Destiny 2: Season of the Lost (First appearance)
