European Dead Zone: Difference between revisions
From Destinypedia, the Destiny wiki
No edit summary |
m (→top: Removing template, removed: {{ExpansionSpeculation|Destiny|Destiny 2}}) |
||
| Line 1: | Line 1: | ||
{{New content|[[Destiny 2]]}} | {{New content|[[Destiny 2]]}} | ||
{{Location infobox | {{Location infobox | ||
|image = Dead Zone Thumb.jpg | |image = Dead Zone Thumb.jpg | ||
Revision as of 10:50, August 28, 2017
This article has new content coming soon from Destiny 2 and may not be complete, confirmed, or correct. Please update it as soon as any relevant and accurate material is available. Editors must cite sources for all contributions to this article. Edits that do not follow this standard will be reverted without notice. For more information, see the Citation policy.
| European Dead Zone | |
|---|---|
| Dead Zone Thumb.jpg | |
| Overview | |
|
Location: |
|
|
Hostile races: |
|
| Gameplay | |
|
Accessibility: |
Complete 2/3 of the Destiny 2 campaign |
|
Landing zones: |
|
- "European Dead Zone was ground-zero for a cataclysmic event that left a massive shard of The Traveler — the source of every Guardian's power and immortality — embedded in the vast landscape. For years, only wild vegetation and the remains of an abandoned city were evidence of our forgotten past. Now, the Red Legion are using the European Dead Zone as a staging ground for their war machine."
- — Website description
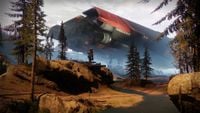
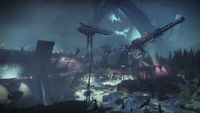
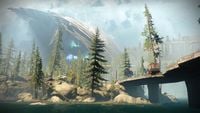
The European Dead Zone is a region on Earth.[1] It is filled with ancient, predominately pre-Golden Age ruins. The Fallen House of Devils was known to have a presence there before their disappearance, presumably due to the SIVA outbreak which resulted in the SIVA Crisis. The region contains a massive shard of the Traveler that is used by Guardians to restore their Light abilities. It is now a major warzone between all known enemy races of the Guardians.
Overview
The Red Legion began occupying the Zone after The Last City was invaded. Guardians will travel to the European Dead Zone in order to reclaim their powers from the Traveler's shard that is within the Zone. The region contains several Lost Sectors and Adventures to partake in. An unknown faction of Fallen are also active in the Dead Zone. The Taken also continue to linger within the region, remnants from the Taken War.[2] The Hive also lurk within the Dead Zone.
History
Following the invasion of The Last City, Dominus Ghaul deploys his forces to mobilize within the region, causing the region to become a major warzone between the Taken, Fallen, and Hive. Guardian forces have also fled to the Dead Zone in order to hide and recover from the invasion, establishing a new base of operations, The Farm.
Locations
- Memento (Crucible map)
- Widow's Court (Crucible map)
- The Farm (Social Space)
- Winding Cove (Landing Zone)
- The Gulch (Landing Zone)
- The Weep (Lost Sector)
- The Sludge
- Firebase Hades
- Sunken Isles
- The Tunnels
- The Pit (Lost Sector)
- Outskirts
- Scavenger's Den (Lost Sector)
- The Dark Forest
- Hallowed Grove (Lost Sector)
- Trostland (Landing Zone)
- Maevic Square
- Salt Mines
- Terminus East (Lost Sector)
- The Reservoir
- The Drain (Lost Sector)
- Widow's Walk (Lost Sector)
Adventures
- Dark Alliance
- Devrim Kay Adventure
- Reversing the Polarity
- Poor Reception
- Unsafe At Any Speed
- A Frame Job
- Getting Your Hands Dirty
- Stop and Go
- Anti-Anti Air
World Quests
- The Importance of Networking
Trivia
- In late 2013, the European Dead Zone was a major location planned for the Comet that would eventually become The Taken King. Along with Europa, the area was never completed and was later dropped from the expansion in March 2014 when Bungie decided to focus on the Dreadnaught.[3]
- The European Dead Zone is the largest playable space ever created by Bungie.
- The European Dead Zone has a significant amount of Lost Sectors and Adventures.
- The European Dead Zone houses the most amount of enemies so far: 4 altogether, which include Hive, Fallen, Cabal and Taken.
List of appearances
- Destiny (First mentioned)
- House of Wolves (First appearance)
- The Taken King
- Destiny 2
Gallery
References
| ||||||||||||||||||||


