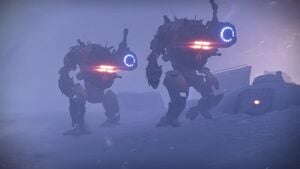
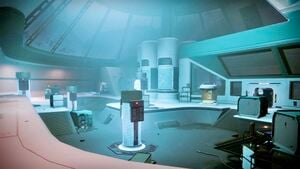
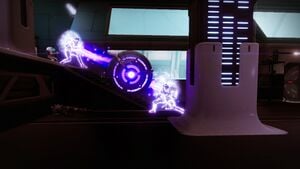
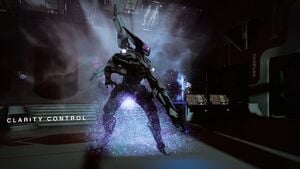
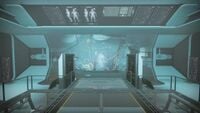
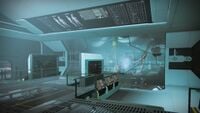
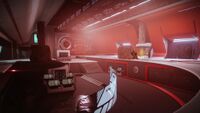
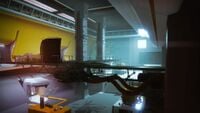
Deep Stone Crypt (raid): Difference between revisions
From Destinypedia, the Destiny wiki
(→Bosses) |
Tag: Mobile edit |
||
| (180 intermediate revisions by 42 users not shown) | |||
| Line 5: | Line 5: | ||
|lineBG=#008b8b | |lineBG=#008b8b | ||
|prev= [[Garden of Salvation]] | |prev= [[Garden of Salvation]] | ||
|next= | |next= [[Vow of the Disciple]] | ||
|game= ''[[Destiny 2]]'' | |game= ''[[Destiny 2]]'' | ||
|name= Deep Stone Crypt | |name= Deep Stone Crypt | ||
|image=[[File: | |image=[[File:DSCRaidInfobox.jpg|400px]] | ||
|player= 1-6 | |player= 1-6 | ||
|light= | |light= 1220 | ||
|place= [[ | |place= [[Rathmore Chaos]], [[Europa]]/[[Morning Star]], Europa Orbit | ||
|objective= Purge the [[House of Salvation]] from the [[Deep Stone Crypt]]. | |objective= Purge the [[House of Salvation]] from the [[Deep Stone Crypt (location)|Deep Stone Crypt]] and prevent [[Europa]]'s destruction from [[Clovis Bray I|Clovis Bray]]'s final contingency. | ||
|factions= [[House of Salvation]] | |||
|races= [[Fallen]] | |||
|nowalk=yes | |||
}} | }} | ||
'''Deep Stone Crypt''' is | {{about|the raid introduced in Beyond Light|other uses|Deep Stone Crypt}} | ||
{{article quote|The chains of legacy must be broken.}} | |||
'''Deep Stone Crypt''' is a [[Raid]] in ''Destiny 2'', released in the ''[[Beyond Light]]'' expansion on November 21st, 2020. | |||
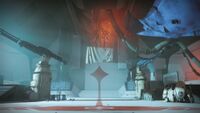
The [[Guardian]]s must secure the [[Deep Stone Crypt (location)|Deep Stone Crypt]] from the [[House of Salvation]] as they attempt to use its [[Clarity Control|secrets]] to unleash a new army of [[Darkness]]-powered Fallen. In doing so, they must face a familiar, unstoppable [[Taniks, the Scarred|nemesis]] and save [[Europa]] itself from nuclear destruction by a descending [[Morning Star|space station]]. | |||
==Objectives== | |||
*'''Locate the Deep Stone Crypt''' | |||
:''Survive the cold while locating the Deep Stone Crypt.'' | |||
*'''Disable Crypt Security''' | |||
:''Destroy the Crypt's power system to disable security. | |||
*'''Locate Eramis's Followers''' | |||
:''Push deeper into the Crypt and locate Eramis's followers. | |||
*'''Defeat Atraks-1''' | |||
:''Take down the Fallen Exo Atraks-1.'' | |||
*'''Locate the Nuclear Contingency Chamber''' | |||
:''Reach the nuclear contingency chamber.'' | |||
*'''Prevent Europa's Destruction''' | |||
:''Disarm the Nuclear Descent Protocol.'' | |||
*'''Emerge from the Wreckage''' | |||
:''Make your way out of the wreckage of the Morning Star.'' | |||
*'''Defeat Taniks, the Abomination''' | |||
:''Defeat Taniks for good.'' | |||
==Unique enemies== | |||
*[[Dark Council Guard]] | |||
*[[Hacker Vandal]] | |||
*[[Operator Vandal]] | |||
*[[Suppressor Vandal]] | |||
*[[Sentinel Servitor]] | |||
==Bosses== | |||
*[[Crypt Security]] | |||
*[[Atraks-1, Fallen Exo]] | |||
*[[Taniks, the Scarred|Taniks, the Abomination]] {{C|Final Boss}} | |||
==Walkthrough== | ==Walkthrough== | ||
===Surviving the Blizzard=== | |||
The Raid begins with a cutscene showing the [[Guardian]]s landing on top of a building at [[Eventide Ruins]]. Players then encounter [[Dark Council Guard]]s guarding the entrance to the [[Deep Stone Crypt]], and they need to be defeated to open the doorway to the next encounter. | |||
After traversing through the icy tunnels, players reach another doorway, which they must enter as a whole to proceed to the next area, called [[Desolation]]. | |||
There, the [[Fallen]] have constructed a series of platforms encased with heat bubbles to shelter them from the ongoing blizzard. The first shelter bubble contains six Fallen [[Pike]]s and players can either complete a triumph by transporting all the pikes to the last shelter bubble or use their [[Sparrow]]s to traverse through the storm. | |||
Exiting the shelter bubble will give players a debuff called "Frostbite" and if the number reaches ten, they will die. To avoid this players need to locate the next shelter to remove the Frostbite and gain "Shelter from the Storm". To guide them, a series of Lamps and [[Web Mine]]s are scattered across the area to help players follow the correct path. | |||
[[File:BrigsDSC1.jpg|thumb|300px|Salvation Brigs guarding the entrance to Restricted.]] | |||
As they continue to further shelter bubbles, Dark Council Guards armed with [[Molten Welder]]s will spawn with other Fallen reinforcements. By defeating all of the enemies in a shelter, the area becomes a checkpoint where a Guardian's ghost will be upon death. Therefore, Guardians are highly encouraged to work together to clear out shelters as they go, saving themselves from respawning all the way back to the first shelter. | |||
Players are required to traverse through a total of six shelter bubbles to reach the end. On the final shelter, a couple of [[Brig]]s and Council Guards are deployed to defend the exit. After defeating the [[House of Salvation|Salvation]] troops and possibly retrieving the hidden chest nearby, players can then travel to the next location called [[Restricted]] and start the [[Crypt Security]] encounter. | |||
===Breaching Crypt Security=== | |||
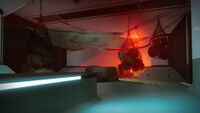
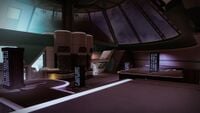
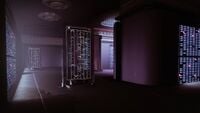
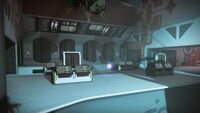
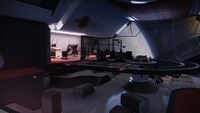
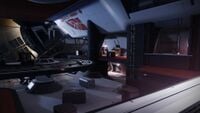
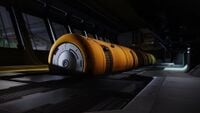
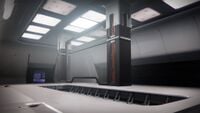
Upon arrival, players enter an area with three cylindrical containers both at the center of two rooms. One room is well-lit with white lighting, while the other is dimmed with darker lighting. The cylinders can be labeled as right, middle, and left. The objective of the encounter is to damage the shields of the six fuses inside the cylinders to disable the Crypt's security systems. | |||
Within the two rooms are white stations that emit a yellow light named Augment Terminals. Also in the rooms are four tall columns spread across. The columns in the light room are cylindrical in design, while the columns in the dark room are rectangular. Each column has plexiglass at the bottom and gives a limited view of the room below, allowing the sight of one panel on the wall. One column is unique and allows the viewing of two panels. These panels play an important role and players are advised to number them appropriately to help guide each other into shooting the correct panel from below. | |||
[[File:CryptSecurity1.jpg|thumb|300px|Crypt Security]] | |||
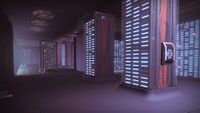
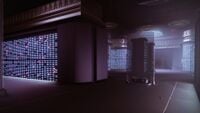
Crypt Security also has a basement room with all the panels on the walls. It is also split into light and dark lighting, to help players differentiate the sides. Also in the room is another augment terminal and on the pillar behind it are three lights on each side that can glow yellow. These lights will help instruct players on which Crypt fuse to attack upstairs. | |||
Players are advised to split up into two teams of three, with one team in the light room and another in the dark room as the doors will close in the middle. | |||
To initiate the encounter, one player needs to pick up a red Operator Augment from the terminal and head downstairs to the basement by shooting the red glowing panels on the wall. They then need to wait for the players above to guide them to the correct panel. The Operator needs to shoot a total of four panels, two from the dark side and two from the light side to begin the damage phase. | |||
In order to guide the Operator, players must wait for a [[Hacker Vandal]] to spawn to collect its yellow Scanner Augment. The player with the Scanner then needs to look through the column's glass and guide the Operator to the panel glowing yellow. They then need to pass the augment from the dark room to the light room through the augment terminal. This will allow the Operator to successfully shoot all four panels. The Operator must act quickly as they are given a minute before the Crypt initiates its defences and kills them with fire. If an Operator dies, players must wait for an [[Operator Vandal]] to spawn to reacquire the augment. | |||
After the Operator successfully shoots the four panels, they must transfer the Operator augment above and then acquire the Scanner augment. Augment terminals are limited to holding one augment, so players must take Operator from above to transfer the Scanner below. Players are also limited to holding one augment at a time. | |||
[[File:SentinelServitor2.jpg|thumb|300px|A Sentinel Servitor shielding the nearby Fallen.]] | |||
A [[Sentinel Servitor]] will spawn to prevent the transfer of augments by disabling the terminals. This [[Servitor]] needs to be defeated quickly to prevent delays. [[Overload Captain]]s and [[Dark Council Guard]]s armed with [[Shock Blade]]s will also spawn alongside other [[Fallen]] reinforcements. | |||
As previously mentioned, the lights near the basement terminal will randomly glow yellow when damage begins, to indicate what fuse to damage upstairs. The Scanner from below needs to guide the players above to the correct cylinder so they can shoot it. After dealing enough damage, the cylinder will be destroyed and its cover will close. Players need to destroy all six fuses to proceed. Shooting the wrong fuse when it isn't being indicated downstairs will cause a wipe to occur. | |||
Upon completion, players are gifted with another raid chest and then need to traverse to the next encounter in [[Clarity Control]]. | |||
===Dueling the Fallen Exo=== | |||
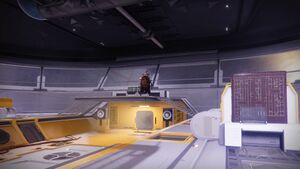
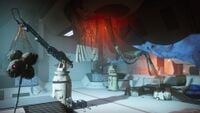
As [[Guardian]]s make their way past the giant veiled statue, they reach a laboratory with [[Atraks-1, Fallen Exo]] inside. | |||
== | Upon arrival, Atraks-1 will awaken [[Taniks, Reborn]] from his cryopod and point to the Guardians. Taniks reacts with anger as he begins to bash the laboratory glass in rage, then disappears by climbing the glass, with Atraks-1 following suit by teleporting away. | ||
[[File:Atraks2.jpg|thumb|300px|The Fallen Exo, Atraks-1]] | |||
To initiate the encounter, players need to approach a purple glowing orb near the four space elevator pods in the back of the room. Atraks-1 will re-emerge with various duplicate clones spread across [[Clarity Control]] and [[Morning Star]]. She is immune to all damage and armed with an upgraded [[Shock Rifle]]. Getting near Atraks-1 will prompt a stomp attack. | |||
The objective is to defeat Atraks-1 by locating the correct duplicate to attack through the use of a Scanner augment. It is advised players equip an appropriately rolled Sword for this encounter, perhaps relying on The Lament due to its high damage potential. | |||
There are a total of eight Atraks-1 duplicates, with four in the laboratory and four in the orbital space station. In the laboratory, there is one duplicate by the middle space pods, one by the red room, and two by the yellow room; separated into upper and lower. While in the orbital station, there are two duplicates by the middle; front and back, one by the left and one by the right. | |||
Also spread across both rooms are three augment terminals to help players transfer their augments between each other. These can be found by the middle, left and right portions of the room, the orbital station is unique for having an extra terminal near the space pods. | |||
Players are advised to split into two groups of three to tackle Atraks-1 from both rooms. Using the space pods will help players enter the orbital station above and also travel to the laboratory below. They also need to acquire the yellow Scanner and red Operator augments to help defeat Atraks-1. The [[Operator Vandal]] will spawn in the laboratory, while the [[Hacker Vandal]] will spawn in the orbital station. | |||
The Operator is able to launch elevator pods to and from the orbital station by shooting the panels near each pod. They also have the important role of shooting the "Atraks-1 Replication" debuff off players carrying the replication orb. The Scanner will be able to guide their teammates to the correct Atraks-1 to attack, as the duplicate will glow a distinct yellow. | |||
To begin the damage phase against Atraks-1, players are required to destroy a total of six [[Sentinel Servitor]]s that spawn near the Fallen Exo. Three will spawn in the laboratory and three will spawn by the orbital station, each spread across to the middle, left, and right. The Sentinel Servitors will also disable the augment terminals and need to be destroyed to grant access to it. Hacker and Operator Vandals will also spawn alongside the Sentinels. It is also possible to begin the damage phase by waiting for a prolonged amount of time, but with surviving Servitors, transfer of augments will not be possible and the fight may not be further possible without doing enough damage in the phase. | |||
[[File:Atraks1.gif|thumb|300px|Atraks-1 initiating its Extinction Protocol.]] | |||
Following the destruction of all Servitors, Atraks-1 will initiate its "Extinction Protocol". This will first start at the orbital station above and then the laboratory below and will continue this process back and forth to a total of four damage phases. Failure to defeat the correct duplicate in time will result in a wipe mechanic called "Replicated Ruin". After defeating the duplicate in the orbital station, the Scanner then needs to pass their augment through the terminal to a player below so that they too can attack the correct Atraks-1. The Scanner augment will need to be juggled throughout the individual damage phases and players are advised to delegate Scanner roles accordingly. | |||
When a duplicate despawns, it will drop a purple glowing orb named "Atraks-1 Replication". It is important to pick this orb up and dispose of replication by entering one of the four airlocks in the orbital station. The Operator has the added duty to first open their doors by shooting the red glowing panel and then shoot the replication off the players carrying it. | |||
Players are given 45 seconds to hold the buff and this can be extended if the Operator shoots the orbs over their heads to reset the timer. If the replication isn't destroyed, a copy of Atraks-1 will spawn and eliminate everyone, resulting in death by "Replication". Players carrying the orb from the laboratory need to use the launch pods and travel to the space station and also enter the airlocks. If the Operator were to mistakenly pick up the orb, they have the option to transfer their augment and allow another player to shoot the orb off them, or commit self damage to knock it off that way. If a player stays in the airlock for too long, they risk death as it will eject them into space once the doors close. | |||
If her health does not reach the final stand, Atraks-1 will spawn more Sentinel Servitors to initiate another cycle of damage phases until she reaches the final stand. In final stand mode, the whole team needs to gather in the orbital station and await the final Extinction Protocol. There, Atraks-1 will spawn a total of eight duplicates across the room and the Scanner will need to guide their team to the correct Atraks-1 to damage it. The duplicates will also drop more replication orbs that need to be sent to the airlock. However, if teams are fast enough, they can defeat Atraks-1 without destroying the orbs and collect the raid chest. | |||
===The Orbital Space Walk=== | |||
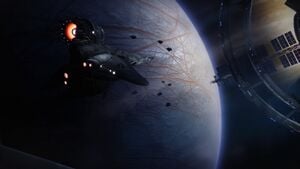
[[File:DestinyMorningStar1.jpg|thumb|300px|A House of Salvation Ketch belonging to Atraks-1]] | |||
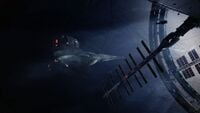
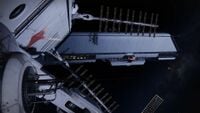
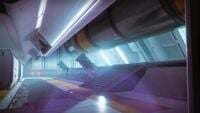
After defeating Atraks-1, players need to complete a series of unique jumping puzzles by traversing through the platforms on the outside of the [[Morning Star]] orbital station. | |||
On completion of the first few jumps, players can collect the next raid chest and by jumping further they can collect the last few logs belonging to the [[Exo Stranger]]. | |||
To halt their progress, the [[House of Salvation]] will deploy numerous [[Shank]]s throughout the encounter. Upon reaching the end, players need to defeat a couple of [[Brig]]s and [[Dark Council Guard]]s stationed outside the entrance of [[Rapture]] and proceed to the next encounter. | |||
===Surviving the Descent=== | |||
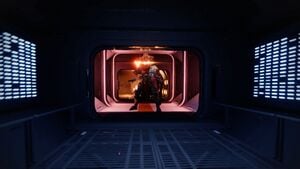
[[File:TaniksR3.jpg|thumb|300px|Taniks by the control room of Rapture]] | |||
After navigating through the Morning Star, Taniks can be found by the command deck of Rapture. If approached or shot, Taniks will begin the encounter and be immune to all damage. | |||
Players are required to deposit nuclear cores into the correct boxes to disarm the Crypt's nuclear protocol. By picking up the yellow Scanner augment from a [[Hacker Vandal]], players can guide each other to the correct boxes as two will glow yellow. | |||
To collect the nuclear cores, a red Operator augment is required and can be gained by defeating an [[Operator Vandal]]. Upon hearing the sound of an alarm, the player with the Operator augment is required to shoot a glowing red panel near one of four of the nuclear core terminals across the room. These can be found by the far left and right walls of the room and the other two by the left and right side of the upper catwalk. Failure to shoot the panel in time will spawn three nuclear cores instead of two. | |||
The cores will collect a "Radiation" debuff on their carrier that will kill them if the number reaches 10. To prevent this, players are advised to coordinate their radiation levels by passing the cores to one another by standing close by and using the Interact button. Failure to deposit the cores in time will also result in them exploding, eliminating the whole fireteam. | |||
[[File:Taniks3.jpg|thumb|300px|left|Taniks in the hallways of Rapture]] | |||
Taniks will attempt to suppress progress by turning the deposit boxes offline. This requires players to pick up a blue Suppressor augment from the [[Suppressor Vandal]] which allows them to stun Taniks. Players with the Suppressor augment need to stand beneath each of the three circular [[Security Drone]]s in the room and then shoot Taniks. One is located in the middle, while the other two are elevated on a platform to the left and right. Once Taniks has been shot while under each of these, he will become stunned and the deposit boxes will be available for disposal. | |||
Taniks will recruit reinforcements such as [[Overload Captain]]s and [[Dark Council Guard]]s to prevent the Guardians from depositing their cores and some players with an augment can become deactivated. This will require them to switch their augment with another player by using an augment terminal. After successfully depositing the cores six times, the Crypt AI will deactivate its nuclear protocol and open a hatch in the middle of the room. Players need to traverse the lower hallways of the Rapture to reach an escape pod before the orbital station crashes into Europa. Taniks will mercilessly follow the players and blast them with his [[Molten Welder]]. The escape room will close the doors eventually, trapping Taniks outside and the encounter will end when the orbital station crashes into Europa. | |||
===The Abomination=== | |||
[[File:DestinyTaniks1.jpg|thumb|300px|Taniks, the Abomination.]] | |||
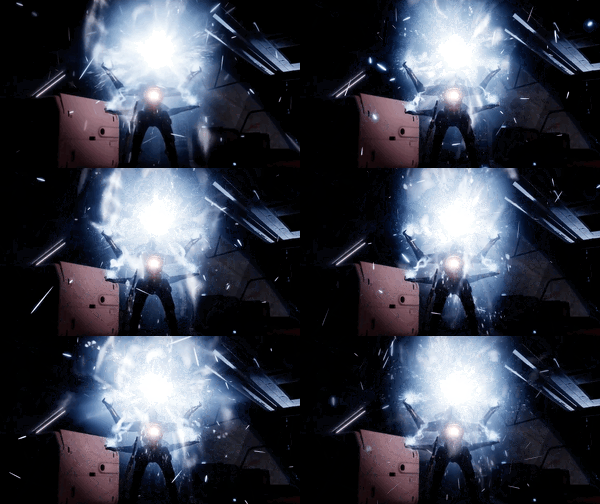
After surviving the crash into Europa, players will be dazed from the impact as they return to the entrance of Deep Stone Crypt. The crash site, now called [[Restricted]], is littered with the remains of the Morning Star and most notably a pile of debris with Taniks beneath. | |||
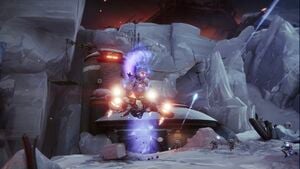
By approaching or shooting the wreckage, Taniks will re-emerge as a powerful monstrosity merged with a Heavy Shank, now known as Taniks, the Abomination. He is capable of flight and immune to damage, which allows him to relentlessly blast players with his [[Molten Welder]] and summon Fallen reinforcements in the form of [[Dark Council Guard]]s and [[Vandal]]s that have the Scanner, Suppressor and Operator augments. | |||
After a short while, Taniks will position himself near one of the three major areas; the spawn area, a site with orange lighting and another site with blue lighting. There, Taniks' booster jets will become vulnerable to damage, dropping nuclear cores upon destruction. He will also summon meteor attacks called Turbulent Barrage, indicated by a column of purple light. Players are required to obtain two to four nuclear cores to stop his attack. Failure to shoot enough cores free will result in instant death as Taniks will unleash a wipe mechanic called Turbulent Detonation upon everyone. | |||
[[File:Taniks4.jpg|thumb|300px|left|Taniks unleashing its Turbulent Barrage.]] | |||
Similar to his Reborn encounter, players are required to deposit the nuclear cores into two of the six deposit bins located near the major areas. Each area has two deposit bins and inserting the cores in the wrong bins will lead to instant death. To prevent this, players are required to acquire the Scanner augment by defeating a [[Hacker Vandal]] spawning out of the blue area. The Scanner can now guide their team to the correct deposit bins as they will glow yellow. It is advised that they number the bins from one to six either clockwise or anti-clockwise to the starting zone. | |||
However, as players attempt to deposit their cores, Taniks will detain them in a sphere. This can result in death if players carrying the cores are trapped for too long, reaching radiation levels of 10. To prevent this, players are required to eliminate an [[Operator Vandal]] located near the spawn area and pick up its Operator augment. The Operator can then free their teammates from entrapment by shooting the spheres from outside. | |||
While approaching the deposit bins, Taniks is capable of turning them offline similar to the previous Descent encounter. Players with the Suppressor augment need to stun Taniks as he glows blue. To gain this, they are required to defeat a [[Suppressor Vandal]] located near the orange site. However, this time there are three security drone locations by blue, orange, and spawn areas, with nine drones total. The Suppressor needs to pass through three of the drones in any given area. If they suppress Taniks too quickly, a player with an augment such as an Operator can become deactivated. It is recommended for the Suppressor to slow down their gameplay and wait for Taniks to encase players twice before stunning Taniks a final third time. If any players were to have their Augments deactivated, they can transfer it to another player by depositing their augment at one of the three augment terminals. | |||
[[File:Taniks5.jpg|thumb|300px|Taniks inside his Shock Field.]] | |||
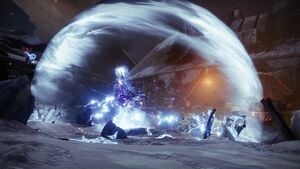
After depositing the four nuclear cores, Taniks will position himself in the middle of the crash site and release a blue Shock Field of swirling debris. Players need to carefully enter the field and position themselves within the two spheres, as standing too close will deal Arc damage, and too far will cause death from the rotating debris. During the damage phase, Taniks will send a gust of energy to push the fireteam out of the area, in which they must carefully re-enter his Shock Field to continue damaging Taniks. | |||
If his health does not reach final stand, Taniks will repeat the nuclear cores segment until he reaches his final stand. Fireteams also have three damage phases until Taniks enrages. | |||
Once Taniks reaches final stand, he will teleport across the crash site appearing either by the spawn, blue, or orange locations. Players need to continue their damage as he teleports around. If players fail to kill Taniks after five teleportations, he will instantly kill the group. After defeating Taniks, Guardians then can claim loot from the final chest and spend their Spoils of War on gear and weapons from the raid. | |||
==Rewards== | ==Rewards== | ||
===Weapons=== | ===Weapons=== | ||
*'''[[Eyes of Tomorrow]]''' – [[Exotic]] {{icon|Solar}} [[Rocket Launcher]] | |||
*[[ | *[[Heritage]] – [[Legendary]] {{icon|Kinetic}} [[Shotgun]] | ||
*[[Succession]] | *[[Succession]] – Legendary {{icon|Kinetic}} [[Sniper Rifle]] | ||
*[[ | *[[Posterity]] – Legendary {{icon|Arc}} [[Hand Cannon]] | ||
*[[Trustee]] | *[[Trustee]] – Legendary {{icon|Solar}} [[Scout Rifle]] | ||
*[[ | *[[Bequest]] – Legendary {{icon|Arc}} [[Sword]] | ||
*[[Commemoration]] | *[[Commemoration]] – Legendary {{icon|Void}} [[Machine Gun]] | ||
*'' | |||
===Armor sets=== | |||
{| class="wikitable" | |||
|- | |||
! [[Legacy's Oath Suit (Hunter)]] !! [[Legacy's Oath Suit (Warlock)]] !! | |||
[[Legacy's Oath Suit (Titan)]] | |||
|- | |||
| [[Legacy's Oath Suit (Hunter)#Legacy's Oath Mask|Legacy’s Oath Mask]] || [[Legacy's Oath Suit (Warlock)#Legacy's Oath Cowl|Legacy’s Oath Cowl]] || [[Legacy's Oath Suit (Titan)#Legacy's Oath Helm|Legacy’s Oath Helm]] | |||
|- | |||
| [[Legacy's Oath Suit (Hunter)#Legacy's Oath Grips|Legacy’s Oath Grips]] || [[Legacy's Oath Suit (Warlock)#Legacy's Oath Gloves|Legacy’s Oath Gloves]] || [[Legacy's Oath Suit (Titan)#Legacy's Oath Gauntlets|Legacy’s Oath Gauntlets]] | |||
|- | |||
| [[Legacy's Oath Suit (Hunter)#Legacy's Oath Vest|Legacy’s Oath Vest]] || [[Legacy's Oath Suit (Warlock)#Legacy's Oath Robes|Legacy’s Oath Robes]] || [[Legacy's Oath Suit (Titan)#Legacy's Oath Plate|Legacy’s Oath Plate]] | |||
|- | |||
| [[Legacy's Oath Suit (Hunter)#Legacy's Oath Strides|Legacy’s Oath Strides]] || [[Legacy's Oath Suit (Warlock)#Legacy's Oath Boots|Legacy’s Oath Boots]] || [[Legacy's Oath Suit (Titan)#Legacy's Oath Greaves|Legacy’s Oath Greaves]] | |||
|- | |||
| [[Legacy's Oath Suit (Hunter)#Legacy's Oath Cloak|Legacy’s Oath Cloak]] || [[Legacy's Oath Suit (Warlock)#Legacy's Oath Bond|Legacy’s Oath Bond]] || [[Legacy's Oath Suit (Titan)#Legacy's Oath Mark|Legacy’s Oath Mark]] | |||
|} | |||
===Miscellaneous Equipment=== | |||
*'''Raid Armor Mods''': | |||
**Enhanced Operator Augment - With the Operator Augment, you gain periodic bursts of healing when your health is depleted. With no augment, collecting [[Orb of Power|Orbs of Power]] causes you to periodically spawn Heavy ammo. | |||
**Enhanced Scanner Augment - With the Scanner Augment, powerful targets are marked by precision shots and take increased damage for a short period. With no augment, you gain a bonus to Resilience and Recovery, and your class ability recharges faster. | |||
**Enhanced Suppressor Augment - With the Suppressor Augment, you take decreased damage from powerful foes. With no augment, [[grenade]]s temporarily stun your targets. | |||
**Herd Thinner - Your weapons deal additional damage to non-powerful combatants. | |||
*'''[[No Love Lost]]''' – Exotic [[Ghost Shell]] | |||
*'''[[Retrocausality]]''' – Exotic [[Sparrow]] | |||
*'''[[Emblem]]s''': | |||
**'''[[lightgg: 1230660644|Crypt Reawakened]]''' - Complete all encounters in the "Deep Stone Crypt" raid. | |||
**'''[[lightgg:1230660645|Long Slow Whisper]]''' - Complete all encounters in the "Deep Stone Crypt" raid in the first 24 hours. | |||
*'''[[Shader]]s''': | |||
**'''[[lightgg:2357830697|Cryptic Legacy]]''' - Complete all encounters in the raid without any member of your fireteam dying. | |||
**'''[[lightgg:2357830696|Cryptic Insignia]]''' - Find all hidden chests in the raid. | |||
==Transcript== | |||
{{verbatim}} | |||
===Raid=== | |||
'''''Mission begins''' | |||
*'''Exo Stranger:''' Eramis found it. The Deep Stone Crypt. The birthplace of the Exo… an a prison for something sinister. Her followers intend to make use of it. To unleash a chaos they do not understand. Their success means untamed power beyond their wildest dreams. They must be stopped. | |||
'''''Two possible dialogues will play after the deactivation of Crypt Security, one with and one without an Exo Guardian present.''''' | |||
*'''Crypt AI:''' Crypt power systems compromised. Initiating emergency backup system. Crypt status: Active. Orbital status: Standby. Humanoid lifeforms detected approaching Clarity Control. Threat determined: Crypt compromised. Nuclear descent protocol recommended. | |||
== | '''''or if [[Exo]] Guardians are present:''''' | ||
*'''Crypt AI:''' Crypt power systems compromised. Initiating emergency backup system. Crypt status: Active. Orbital status: Standby. Humanoid lifeforms detected approaching Clarity Control. Exo lifeforms present. Welcome home. Threat determined: Crypt compromised. Nuclear descent protocol recommended. | |||
'''''The raid team reaches Clarity Control.''''' | |||
*'''Crypt AI:''' Clarity Control breached. A single unregistered Exo and a single lifeform of unknown biology detected in the Crypt Laboratory. Status: Disastrous. Notice: Vacate the premises immediately. This will be your only warning. | |||
'''''The raid team enters launch pods and ascends to the Morning Star.''''' | |||
*'''Crypt AI:''' Sector Assessment: Orbital platform active. Orbital platform breached. Status: Calamitous. | |||
'''''The team defeats [[Atraks-1, Fallen Exo]].''''' | |||
*'''Crypt AI:''' Multiple hostile intruders detected within the orbital platform. Orbital confinement protocol initiating. Status: Pathway to nuclear cores obscured. You have no warnings left. Nuclear descent protocol: Initiated. | |||
'''''The team proceeds to the station's airlock and make their way across the spacewalk.''''' | |||
*'''Crypt AI:''' Artificial Intelligence activated. Enjoying yourselves, intruders? It's worth knowing the cataclysmic damage you will be responsible for today. Do not fool yourselves. This facility is not simply the fruitless work of some pathetic scientist. This house was built by the genius Clovis Bray I himself. Within lies humanity's salvation. La fontaine de jouvence. Made possible by Clarity Control. Magnificent, wasn't it? An entity from beyond our own dimension. And the answer to humanity's eternal struggle: mortality. Were it to fall intro the wrong hands, humanity, and the universe, would be utterly doomed. I have no reason to believe you are anything other than "the wrong hands." You now face godlike judgment. May it extend externally. | |||
'''''The Guardians reenters the station's interior through the hanger and proceeds to the nuclear contingency chamber. Taniks, Reborn appears.''''' | |||
*'''Crypt AI:''' Nuclear descent protocol: Active. Utter destruction of Europa: Imminent. | |||
'''''The raid team deactivates the nunclear descent protocol and escapes to shelter before impact.''''' | |||
*'''Crypt AI:''' Nuclear descent protocol deactivated. Orbital collision remains imminent. Clever little rats. I will not forget what you have done here today. Upon collision, the Crypt will be torn open, and all defenses will be destroyed. It is now open to all. Allies and enemies alike. If you do not defend it, the results could be world ending. Humanity's fate is now on you. Best of luck. | |||
'''''The raid team emerges from the crash site at the Crypt entrance and faces against Taniks in one final battle. The mission ends after his defeat.''''' | |||
===Post-Raid Cinematic=== | |||
'''[https://youtu.be/UnBh-rIZRE8?si=bxSJwybD5T2ZNPxK&t=895 {Cutscene}]''' | |||
''A sketched reenactment of the orbital station reentering Europa's atmosphere is shown and the scene transits to a shot of Taniks and copies of Atraks-1 standing before Clarity Control.'' | |||
*'''Exo Stranger''': Sooner of later, we must all face the consequences of our struggle for power. For Eramis, the Deep Stone Crypt provided another grasp at Darkness. | |||
''The scene transits to another shot of the orbital station crashing onto the Europan surface in a violent explosion. The dust clears, showing the corpse of Taniks, the Abomination along with other deceased Fallen littering the ground.'' | |||
*'''Exo Stranger''': But firm it was not. Their loss is our gain. | |||
''The camera transitions to an exterior shot of [[Bray Exoscience]].'' | |||
*'''Exo Stranger''': For the deepest secrets of Europa... | |||
''Zooms fowards and transits towards the Exo head of Clovis Bray I.'' | |||
*'''Exo Stranger''': are now within our grasp. | |||
''The eyes of Clovis Bray I lights up as the scene fades to black and ends.'' | |||
===Post-Raid Content=== | |||
'''Speak to the Exo Stranger after the first raid completion.''' | |||
*'''Exo Stranger''': It's no longer a secret—what lies within the Deep Stone Crypt. The living embodiment of Darkness, shrouded in the DNA of the [[Vex]]. My grandfather desired eternal life. He searched and searched, but in the end, he created it instead. From his "Fountain of Youth," I... and every other Exo was born. This is a truth we cannot hide from—the Darkness within us—and so we must embrace it. The Guardians that entered Deep Stone Crypt brought new life to the long dormant machines of Europa. They carry with them knowledge long thought lost. Now is our chance to seize it. | |||
'''''After the first raid completion, the door leading to [[Clovis Bray I]]'s Exo head in [[Creation]] was unlocked. Two dialogues are available, one for players who have completed the raid and another for those who have not.''''' | |||
'''''Raid completion:''''' | |||
*'''Clovis Bray AI:''' Artificial Intelligence activated. Who in the hell do you think you are? | |||
*'''Ghost:''' Excuse me? | |||
*'''Clovis Bray AI:''' The Deep Stone Crypt has stood for centuries without intervention, and from the ether, you appear and destroy it all in one fell swoop. | |||
*'''Ghost:''' This is the same AI that spoke to us in the crypt, and tried to kill us. | |||
*'''Clovis Bray AI:''' I'm more than just an AI, thank you. I am an extra replica of Clovis Bray I's consciousness. And for the record, you were intruders. | |||
*'''Ghost:''' That's not entirely true. The Fallen had invaded and we tried to stop them. | |||
*'''Clovis Bray AI:''' Fallen? | |||
*'''Ghost:''' An alien race that appeared after the Collapse. | |||
*'''Clovis Bray AI:''' The Collapse…? Sounds like I have much to catch up on. I suppose I should offer some gratitude for reviving me. But in the meantime, perhaps you can ensure the further destruction of my life's work, hm? | |||
'''''Raid not yet completed:''''' | |||
*'''Clovis Bray AI:''' Artificial Intelligence activated. Who in the hell do you think you are? | |||
*'''Ghost:''' Excuse me? | |||
*'''Clovis Bray AI:''' The Deep Stone Crypt has stood for centuries without intervention, and from the ether, your people swoop in and destroy my work without thought. | |||
*'''Ghost:''' "Your work?" Are you — | |||
*'''Clovis Bray AI:''' More than just an AI? Indeed. I am an extra replica of Clovis Bray I's consciousness, woken thanks to the intruders in the Crypt. | |||
*'''Ghost:''' Those Guardians weren't the intruders. They were trying to protect it from the Fallen. | |||
*'''Clovis Bray AI:''' Fallen? | |||
*'''Ghost:''' An alien race that appeared after the Collapse. | |||
*'''Clovis Bray AI:''' The Collapse…? Sounds like I have much to catch up on. I suppose if you're telling the truth, I should offer my gratitude to your kind. In the meantime, perhaps you can… refrain from further destroying my life's work, hm? | |||
===Exo Stranger logs=== | |||
{{Tabcontainer | |||
|title1='''DSC-777-ALB''' | |||
|content1= | |||
'''''The Guardians discover the first log recorded by the Exo Stranger located behind boxes in the hallway before Crypt Security.''''' | |||
*'''Exo Stranger:''' And so, here I am again — in this damn crypt I told myself I would never return to. But I have to do it. I have to. | |||
|title2='''DSC-777-WIB''' | |||
|content2= | |||
'''''The Guardians discover the second log recorded by the Exo Stranger hidden on a pipeline above Clarity Control.''''' | |||
*'''Exo Stranger:''' Turns out, he had plans of his own. To keep running it himself. Because of course he did. | |||
|title3='''DSC-777-ANB''' | |||
|content3= | |||
'''''The Guardians discover the third log recorded by the Exo Stranger on a walkway located at the orbital station.''''' | |||
*'''Exo Stranger:''' Not to worry. I'm taking care of it now. In your memory. | |||
|title4='''DSC-777-SCB''' | |||
|content4= | |||
'''''The Guardians discover the fourth log recorded by the Exo Stranger at the end of an alcove across the edge of the station's hanger.''''' | |||
*'''Exo Stranger:''' I activate this… and it all goes away. [sniffles] Cheers to that. | |||
|title5='''DSC-777-CLB''' | |||
|content5= | |||
'''''The Guardians discover the fifth log recorded by the Exo Stranger located atop a massive pipeline inside the station.''''' | |||
*'''Exo Stranger:''' I'll set whispers on the wind for any future generations. Tales of the evil Clovis Bray brought forth. | |||
}} | |||
==Gallery== | ==Gallery== | ||
'''The Deep Stone Crypt''' | |||
<gallery perrow=3> | <gallery perrow=3> | ||
File:Restricted1.jpg|The Deep Stone Crypt. | |||
File:Restricted11.jpg|The Deep Stone Crypt shadowed by the ruins of the Morning Star. | |||
File:Restricted12.jpg|The debris covered arena of Restricted. | |||
</gallery> | </gallery> | ||
'''Crypt Security ''' | |||
<gallery perrow=3> | |||
File:Restricted2.jpg|House Salvation banner in Restricted | |||
File:Restricted3.jpg|Another view of Restricted | |||
File:Restricted4.jpg|Hallways of Restricted | |||
File:CryptSecurity1.jpg|Crypt Security "light" side | |||
File:Restricted9.jpg|Crypt Security "dark" side | |||
File:Restricted7.jpg|Basement "light" side | |||
File:Restricted5.jpg|Basement "dark" side | |||
File:Restricted8.jpg|Panel on server wall | |||
File:Restricted6.jpg|Basement room | |||
</gallery> | |||
'''Clarity Control''' | |||
<gallery perrow=3> | |||
File:Clarity Control1.jpg|Elevator down to Clarity Control | |||
File:Clarity Control2.jpg|The Winnower Statue | |||
File:Clarity Control3.jpg|Another view of the Winnower Statue | |||
File:Clarity Control4.jpg|Atraks awaking Taniks | |||
File:Clarity Control5.jpg|Laboratory Control Room | |||
File:Clarity Control6.jpg|Crypt Laboratory | |||
File:Clarity Control7.jpg|Laboratory "Red" Room | |||
File:Clarity Control8.jpg|Laboratory "Yellow" Room | |||
File:Clarity Control9.jpg|Lifts to the Morning Star | |||
</gallery> | |||
'''Morning Star''' | |||
<gallery perrow=3> | |||
File:Morning Star1.jpg|Morning Star arena | |||
File:Morning Star2.jpg|Another view of the arena | |||
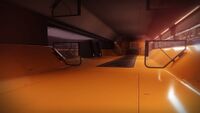
File:Morning Star3.jpg|Corridors of Morning Star | |||
File:Morning Star4.jpg|Another pathway | |||
File:SpaceWalkEntrance.jpg|Entrance to the Space Walk. | |||
File:SpaceWalkMaintenance.jpg|A maintenance platform in the Space Walk. | |||
File:DestinyMorningStar2.jpg|Atraks-1's Ketch from the Space Walk. | |||
File:SpaceWalkMorningStar.jpg|The Morning Star station from the Space Walk. | |||
File:Morning Star5.jpg|Entrance to Rapture | |||
</gallery> | |||
'''Rapture''' | |||
<gallery perrow=3> | |||
File:Rapture1.jpg|A corridor in Rapture. | |||
File:Rapture2.jpg|Another corridor in Rapture. | |||
File:Rapture3.jpg|Pathway to the Rapture bridge. | |||
File:Rapture4.jpg|Middle of the Rapture arena. | |||
File:Rapture5.jpg|Left of the Rapture arena. | |||
File:Rapture6.jpg|Right of the Rapture arena. | |||
</gallery> | |||
==Trivia== | |||
*This is the first raid to feature a returning character as the final boss. | |||
*This is the guardian's third "space walk" in Destiny. The first took place in the Taken King mission "The Dreadnaught" and the last took place in the mission "1AU". | |||
*This is the third raid that focuses on the Fallen, after [[Wrath of the Machine]] and [[Scourge of the Past]]. | |||
*During the Spacewalk encounter, most guardians traditionally mute their mics, due to the soundtrack that's being played, called Deep Stone Lullaby. | |||
==References== | |||
<references/> | |||
[[Category:Raids]] | [[Category:Raids]] | ||
Latest revision as of 22:01, October 28, 2024
|
Prev: |
|
|
Next: |
|
| Deep Stone Crypt | |
|---|---|
| |
|
Game: |
|
|
Player(s): |
1-6 |
|
Recommended Power Level: |
1220 |
|
Location: |
Rathmore Chaos, Europa/Morning Star, Europa Orbit |
|
Enemy faction(s): |
|
|
Hostile race(s): |
|
|
Objective(s): |
Purge the House of Salvation from the Deep Stone Crypt and prevent Europa's destruction from Clovis Bray's final contingency. |
| “ | The chains of legacy must be broken. | ” |
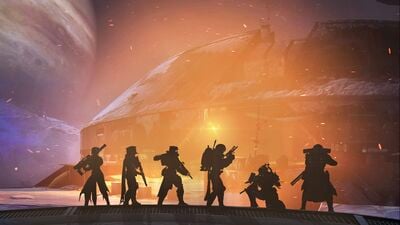
Deep Stone Crypt is a Raid in Destiny 2, released in the Beyond Light expansion on November 21st, 2020.
The Guardians must secure the Deep Stone Crypt from the House of Salvation as they attempt to use its secrets to unleash a new army of Darkness-powered Fallen. In doing so, they must face a familiar, unstoppable nemesis and save Europa itself from nuclear destruction by a descending space station.
Objectives
- Locate the Deep Stone Crypt
- Survive the cold while locating the Deep Stone Crypt.
- Disable Crypt Security
- Destroy the Crypt's power system to disable security.
- Locate Eramis's Followers
- Push deeper into the Crypt and locate Eramis's followers.
- Defeat Atraks-1
- Take down the Fallen Exo Atraks-1.
- Locate the Nuclear Contingency Chamber
- Reach the nuclear contingency chamber.
- Prevent Europa's Destruction
- Disarm the Nuclear Descent Protocol.
- Emerge from the Wreckage
- Make your way out of the wreckage of the Morning Star.
- Defeat Taniks, the Abomination
- Defeat Taniks for good.
Unique enemies
Bosses
- Crypt Security
- Atraks-1, Fallen Exo
- Taniks, the Abomination (Final Boss)
Walkthrough
Surviving the Blizzard
The Raid begins with a cutscene showing the Guardians landing on top of a building at Eventide Ruins. Players then encounter Dark Council Guards guarding the entrance to the Deep Stone Crypt, and they need to be defeated to open the doorway to the next encounter.
After traversing through the icy tunnels, players reach another doorway, which they must enter as a whole to proceed to the next area, called Desolation.
There, the Fallen have constructed a series of platforms encased with heat bubbles to shelter them from the ongoing blizzard. The first shelter bubble contains six Fallen Pikes and players can either complete a triumph by transporting all the pikes to the last shelter bubble or use their Sparrows to traverse through the storm.
Exiting the shelter bubble will give players a debuff called "Frostbite" and if the number reaches ten, they will die. To avoid this players need to locate the next shelter to remove the Frostbite and gain "Shelter from the Storm". To guide them, a series of Lamps and Web Mines are scattered across the area to help players follow the correct path.
As they continue to further shelter bubbles, Dark Council Guards armed with Molten Welders will spawn with other Fallen reinforcements. By defeating all of the enemies in a shelter, the area becomes a checkpoint where a Guardian's ghost will be upon death. Therefore, Guardians are highly encouraged to work together to clear out shelters as they go, saving themselves from respawning all the way back to the first shelter.
Players are required to traverse through a total of six shelter bubbles to reach the end. On the final shelter, a couple of Brigs and Council Guards are deployed to defend the exit. After defeating the Salvation troops and possibly retrieving the hidden chest nearby, players can then travel to the next location called Restricted and start the Crypt Security encounter.
Breaching Crypt Security
Upon arrival, players enter an area with three cylindrical containers both at the center of two rooms. One room is well-lit with white lighting, while the other is dimmed with darker lighting. The cylinders can be labeled as right, middle, and left. The objective of the encounter is to damage the shields of the six fuses inside the cylinders to disable the Crypt's security systems.
Within the two rooms are white stations that emit a yellow light named Augment Terminals. Also in the rooms are four tall columns spread across. The columns in the light room are cylindrical in design, while the columns in the dark room are rectangular. Each column has plexiglass at the bottom and gives a limited view of the room below, allowing the sight of one panel on the wall. One column is unique and allows the viewing of two panels. These panels play an important role and players are advised to number them appropriately to help guide each other into shooting the correct panel from below.
Crypt Security also has a basement room with all the panels on the walls. It is also split into light and dark lighting, to help players differentiate the sides. Also in the room is another augment terminal and on the pillar behind it are three lights on each side that can glow yellow. These lights will help instruct players on which Crypt fuse to attack upstairs.
Players are advised to split up into two teams of three, with one team in the light room and another in the dark room as the doors will close in the middle.
To initiate the encounter, one player needs to pick up a red Operator Augment from the terminal and head downstairs to the basement by shooting the red glowing panels on the wall. They then need to wait for the players above to guide them to the correct panel. The Operator needs to shoot a total of four panels, two from the dark side and two from the light side to begin the damage phase.
In order to guide the Operator, players must wait for a Hacker Vandal to spawn to collect its yellow Scanner Augment. The player with the Scanner then needs to look through the column's glass and guide the Operator to the panel glowing yellow. They then need to pass the augment from the dark room to the light room through the augment terminal. This will allow the Operator to successfully shoot all four panels. The Operator must act quickly as they are given a minute before the Crypt initiates its defences and kills them with fire. If an Operator dies, players must wait for an Operator Vandal to spawn to reacquire the augment.
After the Operator successfully shoots the four panels, they must transfer the Operator augment above and then acquire the Scanner augment. Augment terminals are limited to holding one augment, so players must take Operator from above to transfer the Scanner below. Players are also limited to holding one augment at a time.
A Sentinel Servitor will spawn to prevent the transfer of augments by disabling the terminals. This Servitor needs to be defeated quickly to prevent delays. Overload Captains and Dark Council Guards armed with Shock Blades will also spawn alongside other Fallen reinforcements.
As previously mentioned, the lights near the basement terminal will randomly glow yellow when damage begins, to indicate what fuse to damage upstairs. The Scanner from below needs to guide the players above to the correct cylinder so they can shoot it. After dealing enough damage, the cylinder will be destroyed and its cover will close. Players need to destroy all six fuses to proceed. Shooting the wrong fuse when it isn't being indicated downstairs will cause a wipe to occur.
Upon completion, players are gifted with another raid chest and then need to traverse to the next encounter in Clarity Control.
Dueling the Fallen Exo
As Guardians make their way past the giant veiled statue, they reach a laboratory with Atraks-1, Fallen Exo inside.
Upon arrival, Atraks-1 will awaken Taniks, Reborn from his cryopod and point to the Guardians. Taniks reacts with anger as he begins to bash the laboratory glass in rage, then disappears by climbing the glass, with Atraks-1 following suit by teleporting away.
To initiate the encounter, players need to approach a purple glowing orb near the four space elevator pods in the back of the room. Atraks-1 will re-emerge with various duplicate clones spread across Clarity Control and Morning Star. She is immune to all damage and armed with an upgraded Shock Rifle. Getting near Atraks-1 will prompt a stomp attack.
The objective is to defeat Atraks-1 by locating the correct duplicate to attack through the use of a Scanner augment. It is advised players equip an appropriately rolled Sword for this encounter, perhaps relying on The Lament due to its high damage potential.
There are a total of eight Atraks-1 duplicates, with four in the laboratory and four in the orbital space station. In the laboratory, there is one duplicate by the middle space pods, one by the red room, and two by the yellow room; separated into upper and lower. While in the orbital station, there are two duplicates by the middle; front and back, one by the left and one by the right.
Also spread across both rooms are three augment terminals to help players transfer their augments between each other. These can be found by the middle, left and right portions of the room, the orbital station is unique for having an extra terminal near the space pods.
Players are advised to split into two groups of three to tackle Atraks-1 from both rooms. Using the space pods will help players enter the orbital station above and also travel to the laboratory below. They also need to acquire the yellow Scanner and red Operator augments to help defeat Atraks-1. The Operator Vandal will spawn in the laboratory, while the Hacker Vandal will spawn in the orbital station.
The Operator is able to launch elevator pods to and from the orbital station by shooting the panels near each pod. They also have the important role of shooting the "Atraks-1 Replication" debuff off players carrying the replication orb. The Scanner will be able to guide their teammates to the correct Atraks-1 to attack, as the duplicate will glow a distinct yellow.
To begin the damage phase against Atraks-1, players are required to destroy a total of six Sentinel Servitors that spawn near the Fallen Exo. Three will spawn in the laboratory and three will spawn by the orbital station, each spread across to the middle, left, and right. The Sentinel Servitors will also disable the augment terminals and need to be destroyed to grant access to it. Hacker and Operator Vandals will also spawn alongside the Sentinels. It is also possible to begin the damage phase by waiting for a prolonged amount of time, but with surviving Servitors, transfer of augments will not be possible and the fight may not be further possible without doing enough damage in the phase.
Following the destruction of all Servitors, Atraks-1 will initiate its "Extinction Protocol". This will first start at the orbital station above and then the laboratory below and will continue this process back and forth to a total of four damage phases. Failure to defeat the correct duplicate in time will result in a wipe mechanic called "Replicated Ruin". After defeating the duplicate in the orbital station, the Scanner then needs to pass their augment through the terminal to a player below so that they too can attack the correct Atraks-1. The Scanner augment will need to be juggled throughout the individual damage phases and players are advised to delegate Scanner roles accordingly.
When a duplicate despawns, it will drop a purple glowing orb named "Atraks-1 Replication". It is important to pick this orb up and dispose of replication by entering one of the four airlocks in the orbital station. The Operator has the added duty to first open their doors by shooting the red glowing panel and then shoot the replication off the players carrying it.
Players are given 45 seconds to hold the buff and this can be extended if the Operator shoots the orbs over their heads to reset the timer. If the replication isn't destroyed, a copy of Atraks-1 will spawn and eliminate everyone, resulting in death by "Replication". Players carrying the orb from the laboratory need to use the launch pods and travel to the space station and also enter the airlocks. If the Operator were to mistakenly pick up the orb, they have the option to transfer their augment and allow another player to shoot the orb off them, or commit self damage to knock it off that way. If a player stays in the airlock for too long, they risk death as it will eject them into space once the doors close.
If her health does not reach the final stand, Atraks-1 will spawn more Sentinel Servitors to initiate another cycle of damage phases until she reaches the final stand. In final stand mode, the whole team needs to gather in the orbital station and await the final Extinction Protocol. There, Atraks-1 will spawn a total of eight duplicates across the room and the Scanner will need to guide their team to the correct Atraks-1 to damage it. The duplicates will also drop more replication orbs that need to be sent to the airlock. However, if teams are fast enough, they can defeat Atraks-1 without destroying the orbs and collect the raid chest.
The Orbital Space Walk
After defeating Atraks-1, players need to complete a series of unique jumping puzzles by traversing through the platforms on the outside of the Morning Star orbital station.
On completion of the first few jumps, players can collect the next raid chest and by jumping further they can collect the last few logs belonging to the Exo Stranger.
To halt their progress, the House of Salvation will deploy numerous Shanks throughout the encounter. Upon reaching the end, players need to defeat a couple of Brigs and Dark Council Guards stationed outside the entrance of Rapture and proceed to the next encounter.
Surviving the Descent
After navigating through the Morning Star, Taniks can be found by the command deck of Rapture. If approached or shot, Taniks will begin the encounter and be immune to all damage.
Players are required to deposit nuclear cores into the correct boxes to disarm the Crypt's nuclear protocol. By picking up the yellow Scanner augment from a Hacker Vandal, players can guide each other to the correct boxes as two will glow yellow.
To collect the nuclear cores, a red Operator augment is required and can be gained by defeating an Operator Vandal. Upon hearing the sound of an alarm, the player with the Operator augment is required to shoot a glowing red panel near one of four of the nuclear core terminals across the room. These can be found by the far left and right walls of the room and the other two by the left and right side of the upper catwalk. Failure to shoot the panel in time will spawn three nuclear cores instead of two.
The cores will collect a "Radiation" debuff on their carrier that will kill them if the number reaches 10. To prevent this, players are advised to coordinate their radiation levels by passing the cores to one another by standing close by and using the Interact button. Failure to deposit the cores in time will also result in them exploding, eliminating the whole fireteam.
Taniks will attempt to suppress progress by turning the deposit boxes offline. This requires players to pick up a blue Suppressor augment from the Suppressor Vandal which allows them to stun Taniks. Players with the Suppressor augment need to stand beneath each of the three circular Security Drones in the room and then shoot Taniks. One is located in the middle, while the other two are elevated on a platform to the left and right. Once Taniks has been shot while under each of these, he will become stunned and the deposit boxes will be available for disposal.
Taniks will recruit reinforcements such as Overload Captains and Dark Council Guards to prevent the Guardians from depositing their cores and some players with an augment can become deactivated. This will require them to switch their augment with another player by using an augment terminal. After successfully depositing the cores six times, the Crypt AI will deactivate its nuclear protocol and open a hatch in the middle of the room. Players need to traverse the lower hallways of the Rapture to reach an escape pod before the orbital station crashes into Europa. Taniks will mercilessly follow the players and blast them with his Molten Welder. The escape room will close the doors eventually, trapping Taniks outside and the encounter will end when the orbital station crashes into Europa.
The Abomination
After surviving the crash into Europa, players will be dazed from the impact as they return to the entrance of Deep Stone Crypt. The crash site, now called Restricted, is littered with the remains of the Morning Star and most notably a pile of debris with Taniks beneath.
By approaching or shooting the wreckage, Taniks will re-emerge as a powerful monstrosity merged with a Heavy Shank, now known as Taniks, the Abomination. He is capable of flight and immune to damage, which allows him to relentlessly blast players with his Molten Welder and summon Fallen reinforcements in the form of Dark Council Guards and Vandals that have the Scanner, Suppressor and Operator augments.
After a short while, Taniks will position himself near one of the three major areas; the spawn area, a site with orange lighting and another site with blue lighting. There, Taniks' booster jets will become vulnerable to damage, dropping nuclear cores upon destruction. He will also summon meteor attacks called Turbulent Barrage, indicated by a column of purple light. Players are required to obtain two to four nuclear cores to stop his attack. Failure to shoot enough cores free will result in instant death as Taniks will unleash a wipe mechanic called Turbulent Detonation upon everyone.
Similar to his Reborn encounter, players are required to deposit the nuclear cores into two of the six deposit bins located near the major areas. Each area has two deposit bins and inserting the cores in the wrong bins will lead to instant death. To prevent this, players are required to acquire the Scanner augment by defeating a Hacker Vandal spawning out of the blue area. The Scanner can now guide their team to the correct deposit bins as they will glow yellow. It is advised that they number the bins from one to six either clockwise or anti-clockwise to the starting zone.
However, as players attempt to deposit their cores, Taniks will detain them in a sphere. This can result in death if players carrying the cores are trapped for too long, reaching radiation levels of 10. To prevent this, players are required to eliminate an Operator Vandal located near the spawn area and pick up its Operator augment. The Operator can then free their teammates from entrapment by shooting the spheres from outside.
While approaching the deposit bins, Taniks is capable of turning them offline similar to the previous Descent encounter. Players with the Suppressor augment need to stun Taniks as he glows blue. To gain this, they are required to defeat a Suppressor Vandal located near the orange site. However, this time there are three security drone locations by blue, orange, and spawn areas, with nine drones total. The Suppressor needs to pass through three of the drones in any given area. If they suppress Taniks too quickly, a player with an augment such as an Operator can become deactivated. It is recommended for the Suppressor to slow down their gameplay and wait for Taniks to encase players twice before stunning Taniks a final third time. If any players were to have their Augments deactivated, they can transfer it to another player by depositing their augment at one of the three augment terminals.
After depositing the four nuclear cores, Taniks will position himself in the middle of the crash site and release a blue Shock Field of swirling debris. Players need to carefully enter the field and position themselves within the two spheres, as standing too close will deal Arc damage, and too far will cause death from the rotating debris. During the damage phase, Taniks will send a gust of energy to push the fireteam out of the area, in which they must carefully re-enter his Shock Field to continue damaging Taniks.
If his health does not reach final stand, Taniks will repeat the nuclear cores segment until he reaches his final stand. Fireteams also have three damage phases until Taniks enrages.
Once Taniks reaches final stand, he will teleport across the crash site appearing either by the spawn, blue, or orange locations. Players need to continue their damage as he teleports around. If players fail to kill Taniks after five teleportations, he will instantly kill the group. After defeating Taniks, Guardians then can claim loot from the final chest and spend their Spoils of War on gear and weapons from the raid.
Rewards
Weapons
- Eyes of Tomorrow – Exotic
 Rocket Launcher
 - Heritage – Legendary
 Shotgun
 - Succession – Legendary
 Sniper Rifle
 - Posterity – Legendary
 Hand Cannon
 - Trustee – Legendary
 Scout Rifle
 - Bequest – Legendary
 Sword
Sword - Commemoration – Legendary
 Machine Gun
Armor sets
Miscellaneous Equipment
- Raid Armor Mods:
- Enhanced Operator Augment - With the Operator Augment, you gain periodic bursts of healing when your health is depleted. With no augment, collecting Orbs of Power causes you to periodically spawn Heavy ammo.
- Enhanced Scanner Augment - With the Scanner Augment, powerful targets are marked by precision shots and take increased damage for a short period. With no augment, you gain a bonus to Resilience and Recovery, and your class ability recharges faster.
- Enhanced Suppressor Augment - With the Suppressor Augment, you take decreased damage from powerful foes. With no augment, grenades temporarily stun your targets.
- Herd Thinner - Your weapons deal additional damage to non-powerful combatants.
- No Love Lost – Exotic Ghost Shell
- Retrocausality – Exotic Sparrow
- Emblems:
- Crypt Reawakened - Complete all encounters in the "Deep Stone Crypt" raid.
- Long Slow Whisper - Complete all encounters in the "Deep Stone Crypt" raid in the first 24 hours.
- Shaders:
- Cryptic Legacy - Complete all encounters in the raid without any member of your fireteam dying.
- Cryptic Insignia - Find all hidden chests in the raid.
Transcript
Raid
Mission begins
- Exo Stranger: Eramis found it. The Deep Stone Crypt. The birthplace of the Exo… an a prison for something sinister. Her followers intend to make use of it. To unleash a chaos they do not understand. Their success means untamed power beyond their wildest dreams. They must be stopped.
Two possible dialogues will play after the deactivation of Crypt Security, one with and one without an Exo Guardian present.
- Crypt AI: Crypt power systems compromised. Initiating emergency backup system. Crypt status: Active. Orbital status: Standby. Humanoid lifeforms detected approaching Clarity Control. Threat determined: Crypt compromised. Nuclear descent protocol recommended.
or if Exo Guardians are present:
- Crypt AI: Crypt power systems compromised. Initiating emergency backup system. Crypt status: Active. Orbital status: Standby. Humanoid lifeforms detected approaching Clarity Control. Exo lifeforms present. Welcome home. Threat determined: Crypt compromised. Nuclear descent protocol recommended.
The raid team reaches Clarity Control.
- Crypt AI: Clarity Control breached. A single unregistered Exo and a single lifeform of unknown biology detected in the Crypt Laboratory. Status: Disastrous. Notice: Vacate the premises immediately. This will be your only warning.
The raid team enters launch pods and ascends to the Morning Star.
- Crypt AI: Sector Assessment: Orbital platform active. Orbital platform breached. Status: Calamitous.
The team defeats Atraks-1, Fallen Exo.
- Crypt AI: Multiple hostile intruders detected within the orbital platform. Orbital confinement protocol initiating. Status: Pathway to nuclear cores obscured. You have no warnings left. Nuclear descent protocol: Initiated.
The team proceeds to the station's airlock and make their way across the spacewalk.
- Crypt AI: Artificial Intelligence activated. Enjoying yourselves, intruders? It's worth knowing the cataclysmic damage you will be responsible for today. Do not fool yourselves. This facility is not simply the fruitless work of some pathetic scientist. This house was built by the genius Clovis Bray I himself. Within lies humanity's salvation. La fontaine de jouvence. Made possible by Clarity Control. Magnificent, wasn't it? An entity from beyond our own dimension. And the answer to humanity's eternal struggle: mortality. Were it to fall intro the wrong hands, humanity, and the universe, would be utterly doomed. I have no reason to believe you are anything other than "the wrong hands." You now face godlike judgment. May it extend externally.
The Guardians reenters the station's interior through the hanger and proceeds to the nuclear contingency chamber. Taniks, Reborn appears.
- Crypt AI: Nuclear descent protocol: Active. Utter destruction of Europa: Imminent.
The raid team deactivates the nunclear descent protocol and escapes to shelter before impact.
- Crypt AI: Nuclear descent protocol deactivated. Orbital collision remains imminent. Clever little rats. I will not forget what you have done here today. Upon collision, the Crypt will be torn open, and all defenses will be destroyed. It is now open to all. Allies and enemies alike. If you do not defend it, the results could be world ending. Humanity's fate is now on you. Best of luck.
The raid team emerges from the crash site at the Crypt entrance and faces against Taniks in one final battle. The mission ends after his defeat.
Post-Raid Cinematic
A sketched reenactment of the orbital station reentering Europa's atmosphere is shown and the scene transits to a shot of Taniks and copies of Atraks-1 standing before Clarity Control.
- Exo Stranger: Sooner of later, we must all face the consequences of our struggle for power. For Eramis, the Deep Stone Crypt provided another grasp at Darkness.
The scene transits to another shot of the orbital station crashing onto the Europan surface in a violent explosion. The dust clears, showing the corpse of Taniks, the Abomination along with other deceased Fallen littering the ground.
- Exo Stranger: But firm it was not. Their loss is our gain.
The camera transitions to an exterior shot of Bray Exoscience.
- Exo Stranger: For the deepest secrets of Europa...
Zooms fowards and transits towards the Exo head of Clovis Bray I.
- Exo Stranger: are now within our grasp.
The eyes of Clovis Bray I lights up as the scene fades to black and ends.
Post-Raid Content
Speak to the Exo Stranger after the first raid completion.
- Exo Stranger: It's no longer a secret—what lies within the Deep Stone Crypt. The living embodiment of Darkness, shrouded in the DNA of the Vex. My grandfather desired eternal life. He searched and searched, but in the end, he created it instead. From his "Fountain of Youth," I... and every other Exo was born. This is a truth we cannot hide from—the Darkness within us—and so we must embrace it. The Guardians that entered Deep Stone Crypt brought new life to the long dormant machines of Europa. They carry with them knowledge long thought lost. Now is our chance to seize it.
After the first raid completion, the door leading to Clovis Bray I's Exo head in Creation was unlocked. Two dialogues are available, one for players who have completed the raid and another for those who have not.
Raid completion:
- Clovis Bray AI: Artificial Intelligence activated. Who in the hell do you think you are?
- Ghost: Excuse me?
- Clovis Bray AI: The Deep Stone Crypt has stood for centuries without intervention, and from the ether, you appear and destroy it all in one fell swoop.
- Ghost: This is the same AI that spoke to us in the crypt, and tried to kill us.
- Clovis Bray AI: I'm more than just an AI, thank you. I am an extra replica of Clovis Bray I's consciousness. And for the record, you were intruders.
- Ghost: That's not entirely true. The Fallen had invaded and we tried to stop them.
- Clovis Bray AI: Fallen?
- Ghost: An alien race that appeared after the Collapse.
- Clovis Bray AI: The Collapse…? Sounds like I have much to catch up on. I suppose I should offer some gratitude for reviving me. But in the meantime, perhaps you can ensure the further destruction of my life's work, hm?
Raid not yet completed:
- Clovis Bray AI: Artificial Intelligence activated. Who in the hell do you think you are?
- Ghost: Excuse me?
- Clovis Bray AI: The Deep Stone Crypt has stood for centuries without intervention, and from the ether, your people swoop in and destroy my work without thought.
- Ghost: "Your work?" Are you —
- Clovis Bray AI: More than just an AI? Indeed. I am an extra replica of Clovis Bray I's consciousness, woken thanks to the intruders in the Crypt.
- Ghost: Those Guardians weren't the intruders. They were trying to protect it from the Fallen.
- Clovis Bray AI: Fallen?
- Ghost: An alien race that appeared after the Collapse.
- Clovis Bray AI: The Collapse…? Sounds like I have much to catch up on. I suppose if you're telling the truth, I should offer my gratitude to your kind. In the meantime, perhaps you can… refrain from further destroying my life's work, hm?
Exo Stranger logs
The Guardians discover the first log recorded by the Exo Stranger located behind boxes in the hallway before Crypt Security.
- Exo Stranger: And so, here I am again — in this damn crypt I told myself I would never return to. But I have to do it. I have to.
The Guardians discover the second log recorded by the Exo Stranger hidden on a pipeline above Clarity Control.
- Exo Stranger: Turns out, he had plans of his own. To keep running it himself. Because of course he did.
The Guardians discover the third log recorded by the Exo Stranger on a walkway located at the orbital station.
- Exo Stranger: Not to worry. I'm taking care of it now. In your memory.
The Guardians discover the fourth log recorded by the Exo Stranger at the end of an alcove across the edge of the station's hanger.
- Exo Stranger: I activate this… and it all goes away. [sniffles] Cheers to that.
The Guardians discover the fifth log recorded by the Exo Stranger located atop a massive pipeline inside the station.
- Exo Stranger: I'll set whispers on the wind for any future generations. Tales of the evil Clovis Bray brought forth.
Gallery
The Deep Stone Crypt
Crypt Security
Clarity Control
Morning Star
Rapture
Trivia
- This is the first raid to feature a returning character as the final boss.
- This is the guardian's third "space walk" in Destiny. The first took place in the Taken King mission "The Dreadnaught" and the last took place in the mission "1AU".
- This is the third raid that focuses on the Fallen, after Wrath of the Machine and Scourge of the Past.
- During the Spacewalk encounter, most guardians traditionally mute their mics, due to the soundtrack that's being played, called Deep Stone Lullaby.
