Garden of Salvation: Difference between revisions
From Destinypedia, the Destiny wiki
m (→The Divinity Sidequest: link and phrasing corrections) |
(added objectives, and on-screen text to transcript with context) |
||
| (44 intermediate revisions by 13 users not shown) | |||
| Line 10: | Line 10: | ||
|image= [[File:VexSalvationGarden2.jpg|400px]] | |image= [[File:VexSalvationGarden2.jpg|400px]] | ||
|player= 1-6 | |player= 1-6 | ||
|light= | |light= 1600 | ||
|place=[[Black Garden|The Black Garden]] | |place=[[Black Garden|The Black Garden]] | ||
|objective= Track the source of the [[Unknown Artifact]]'s signal into the [[Black Garden]]. | |objective= Track the source of the [[Unknown Artifact]]'s signal into the [[Black Garden]]. | ||
|factions=[[Sol Divisive]] | |||
|races=[[Vex]] | |||
|nowalk=yes | |||
}} | }} | ||
{{Article quote|The [[Black Garden|Garden]] calls out to [[The Guardian|you]].}} | {{Article quote|The [[Black Garden|Garden]] calls out to [[The Guardian|you]].}} | ||
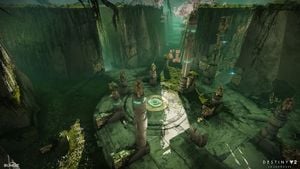
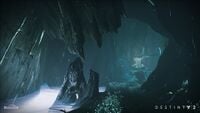
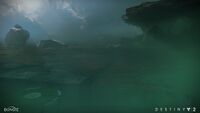
'''Garden of Salvation''' is a [[Raid]] in ''Destiny 2'', released in the ''[[Shadowkeep]]'' expansion on October 5th, 2019. | '''Garden of Salvation''' is a [[Raid]] in ''Destiny 2'', released in the ''[[Shadowkeep]]'' expansion on October 5th, 2019. | ||
When [[Vex]] from the [[Sol Divisive]] are [[Season of the Undying|drawn]] to the awakened [[The Lunar Pyramid|Pyramid]] beneath the [[Moon]], [[Eris Morn]] tracks a mysterious signal with the [[Unknown Artifact]] emitting from deep within the [[Black Garden]]. Now [[Guardians]] must enter the birthplace of the Vex as they trace the signal to its [[Darkness#Veiled Figures|source]] at the center of the garden, uncover [[Pyramid Scale|remnants]] of the [[Black Fleet]] and defeat the [[Consecrated Mind, Sol Inherent|Vex]] [[Sanctified Mind, Sol Inherent|Minds]] empowered by them. | |||
==Objectives== | |||
*'''Track the Unknown Artifact's Signal''' | |||
:''Enter the Black Garden to track the Unknown Artifact's signal.'' | |||
*'''Track the Unknown Artifact's Signal''' | |||
:''Evade the Consecrated Mind and continue tracking the Unknown Artifact's signal.'' | |||
*'''Track the Unknown Artifact's Signal''' | |||
:''Make your way through the Undergrowth to continue tracking the Unknown Artifact's signal.'' | |||
*'''Draw Out the Consecrated Mind''' | |||
:''Find a way to draw the Consecrated Mind out of hiding.'' | |||
*'''Subdue the Consecrated Mind''' | |||
:''Defeat the Consecrated Mind to continue tracking the Unknown Artifact's signal.'' | |||
*'''Track the Unknown Artifact's Signal''' | |||
:''Follow the Unknown Artifact's signal up to the Boundless Horizon to discover where it leads.'' | |||
*'''Conquer the Sanctified Mind''' | |||
:''Defeat the Sanctified Mind to discover the final destination of the Unknown Artifact's signal.'' | |||
==Unique enemies== | |||
*[[Angelic]]s | |||
*[[Barrier Hobgoblin]]s | |||
*[[Overload Minotaur]]s | |||
*[[Supplicant]]s | |||
==Bosses== | ==Bosses== | ||
*[[Consecrated Mind, Sol Inherent]] | *[[Consecrated Mind, Sol Inherent]] | ||
*[[Sanctified Mind, Sol Inherent]] | *[[Sanctified Mind, Sol Inherent]] {{C|Final Boss}} | ||
==Walkthrough== | ==Walkthrough== | ||
| Line 63: | Line 94: | ||
===Conquer The Sanctified Mind=== | ===Conquer The Sanctified Mind=== | ||
[[File: | [[File:SanctifiedMind.jpeg|thumb|300px|The Sanctified Mind]] | ||
For the final boss of the raid, players will be split into three teams of two. Two teams will collect motes and one team will stay behind. There are two [[Vex]] confluxes or "banks", one blue and one red. An [[Angelic]] will spawn, which must be killed. Once this is done, the first team will either shoot the Mind's left shoulder | For the final boss of the raid, players will be split into three teams of two. Two teams will collect motes and one team will stay behind. There are two [[Vex]] confluxes or "banks", one blue and one red. An [[Angelic]] will spawn, which must be killed. Once this is done, the first team will either shoot the Mind's left shoulder, dropping a teleportation portal to the Red zone, or its right knee to go to the Blue zone. | ||
Once they | Once they jump in either portal, players must kill [[Goblin]]s, [[Harpy]]s, and a [[Minotaur]] in order to get 15 Voltaic Motes (Tainted Voltaic Motes in the Red zone) in total, with a maximum of 10 per player. Once they have collected all Motes, they must call out to the players left behind who will shoot the same area of the [[Sanctified Mind, Sol Inherent]] that was used to drop the portal, so right knee for Blue, left shoulder for Red. This will teleport the two collectors back at the start point of the encounter, and they will need to bank their Motes at the appropriate conflux (blue on the left, red on the right). | ||
This will give both players the Enlightenment buff, which must be used to prevent Vex from sacrificing | This will give both players the Enlightenment buff, which must be used to prevent Vex from sacrificing both confluxes. | ||
As soon as the first collector team comes back, the second team must depart for the same zone from which the first team came | As soon as the first collector team comes back, the second team must depart for the same zone from which the first team came and repeat the process. When the second team returns, the first team will teleport to the other zone, collect Motes, bank, and protect the confluxes while the second team goes to the same zone and does the same. | ||
When the second team banks for the second time, both banks should be full and the Sanctified Mind will make a big cross appear and spawn an [[Angelic]] which must be killed. Once the [[Angelic]] is dead, three or four players (four recommended for comfort) will need to start a tether chain of the same color as the boss's cross, starting at one of the banks and linking to the cross. The Sanctified Mind's core will then be vulnerable, and the damage phase will be started | When the second team banks for the second time, both banks should be full and the Sanctified Mind will make a big cross appear and spawn an [[Angelic]] which must be killed. Once the [[Angelic]] is dead, three or four players (four recommended for comfort) will need to start a tether chain of the same color as the boss's cross, starting at one of the banks and linking to the cross. The Sanctified Mind's core will then be vulnerable, and the damage phase will be started. | ||
Once the damage phase is over, players will need to repeat the whole process again. It is worth noting that [[Cyclops]] will spawn on pillars and can one-shot a player with their powerful [[Void]] attack, so it is highly suggested to kill them as soon as they are spotted. | Once the damage phase is over, players will need to repeat the whole process again. It is worth noting that [[Cyclops]] will spawn on pillars and can one-shot a player with their powerful [[Void]] attack, so it is highly suggested to kill them as soon as they are spotted. | ||
== | ==Transcript== | ||
*[[ | {{Verbatim}} | ||
''Loading screen'' | |||
*'''[[Eris Morn]]''': They take us for fools. The [[Unknown Artifact|artifact]] you [[Beyond_(mission)|brought back]] from the [[Pyramid]] began emitting a signal. One that reaches deep into… the [[Black Garden]]. Once again, we are beckoned into their trap. [[The Witness|They]] expect us to follow the signal. To discover where it leads. Fine. We will play their games. But this time, with caution… not curiosity. | |||
''Mission begins'' | |||
'''[[Looking Glass]], The [[Moon]]''' | |||
::''The fireteam lands in the Looking Glass on the Moon where they find a [[Transfer Gate]] into the Black Garden. As they approach, [[Sol Divisive]] [[Vex]] arrive to waylay their entrance. The fireteam defeats them and enters the Black Garden.'' | |||
:'''The Unknown Artifact's signal resonates deep within the Garden…''' | |||
'''[[Embrace]], Black Garden''' | |||
::''The fireteam comes upon a [[Vex Mind]], the [[Consecrated Mind, Sol Inherent]], siphoning from a [[Minotaur]] unit. Finding their attacks futile, the fireteam attempts to unlock the nearby barrier. They connect a tether from a Vex Lens to the barrier, unlocking it.'' | |||
::''Their machinations alerts the Consecrated Mind which begin to engage the Guardians, abundant with '''Voltaic Overflow'''.'' | |||
:'''Voltaic Overflow created''' | |||
::''The fireteam gather the excess Voltaic energy, lest it fatally detonates the arena.'' | |||
''If the Volatic Overflow is not gathered, it will detonate killing the whole fireteam.'' | |||
:'''Voltaic Overflow detonated''' | |||
::''Meanwhile, the Guardians escape the currently immune Consecrated Mind by unlocking more barriers and evading the onslaught of Sol Divisive Vex.'' | |||
::''The fireteam successfully evade the Vex Mind by entering the [[Undergrowth]].'' | |||
:'''The Consecrated Mind retreats into the ether…''' | |||
:'''The Unknown Artifact's signal strengthens…''' | |||
'''Undergrowth, Black Garden''' | |||
::''The fireteam attempt to use the relays to draw the Consecrated Mind into a vulnerable position.'' | |||
:'''Undergrowth defenses deployed''' | |||
::''Periodically, [[Angelic]]s and other Vex arrive to stop their attempt. The fireteam defeat the Angelic to allow a tethered connection to the relay.'' | |||
:'''Undergrowth defenses subsided''' | |||
''If the Vex are not stopped, they will detonate the assaulted relay; killing the entire fireteam with '''Volatile Penitence'''.'' | |||
:'''Alcove relay detonated''' | |||
''Or'' | |||
:'''Hedges relay detonated''' | |||
''Or'' | |||
:'''Pavilion relay detonated''' | |||
''Or'' | |||
:'''Thicket relay detonated''' | |||
''Or'' | |||
:'''Underbrush relay detonated''' | |||
::''As more Vex arrive, they become immune to the Guardians' attacks. The fireteam become '''Enlightened''' through the tethered relays which allows them to break through their shields.'' | |||
::''The fireteam successfully powers all five relays and draws out the Consecrated Mind.'' | |||
:'''The Unknown Artifact's signal sharpens…''' | |||
::''One of the previously powered relays begins to resonate.'' | |||
:'''The Alcove relay resonates with energy''' | |||
''Or'' | |||
:'''The Hedges relay resonates with energy''' | |||
''Or'' | |||
:'''The Thicket relay resonates with energy''' | |||
''Or''' | |||
:'''The Underbrush relay resonates with energy''' | |||
::''The fireteam collects '''Voltaic Motes''' from defeated foes; depositing them in the now-resonating relay.'' | |||
::''Meanwhile, the Consecrated Mind continues to create Voltaic Overflow. As they are collected, the Mind detains the Guardian. Their fireteam members release them from the prison by damaged the Mind's eyes.'' | |||
''If the detained Guardian is not released, they will be '''Desecrated'' by the Vex Mind; killing them.'' | |||
::''With enough Volatic Motes, the relay becomes overloaded; attracting the Consecrated Mind to it.'' | |||
:'''The Consecrated Mind is drawn to the overloaded relay''' | |||
::''As the Vex Mind resets the relay, the fireteam takes advantage to damage it.'' | |||
::''The fireteam defeats the Consecrated Mind, Sol Inherit.'' | |||
:'''The Unknown Artifact's signal intensifies…''' | |||
'''[[Boundless Horizon]], Black Garden''' | |||
::''The fireteam travels up a stump-like structure to find another Vex Mind, the [[Sanctified Mind, Sol Inherent]], swirling in white and orange energy.'' | |||
::''As the fireteam engages the Vex Mind, they shoot its shoulder and leg to force portals into nearby islands. At these islands, the Guardians gather '''Voltaic''' or '''Tainted Voltaic Motes'''.'' | |||
::''The motes are deposited in the nearby relays.'' | |||
::''With the relays charged, they tether its energy to the Sanctified Mind to break its defenses and stop its '''Sacred Dematerialization'''.'' | |||
:'''The tether is pulsing with Light energy…''' | |||
''Or'' | |||
:'''The tether is pulsing with dark<small>{{sic}}</small> energy…''' | |||
''If the assaulted relay is not defended against incoming Vex, they will sacrifice themselves to it; detonating and killing the entire fireteam with '''Volatile Penitence'''.'' | |||
:'''Vex sacrificed''' | |||
''Then'' | |||
:'''The relay pulsing with light energy detonated''' | |||
''Or'' | |||
:'''The relay pulsing with dark energy detonated''' | |||
::''The fireteam defeat the Sanctified Mind, Sol Inherit. A platform behind the arena, [[Pyramid]] technology shifts a [[Pyramid Scale|Scale]] and opens a pathway underneath.'' | |||
:'''The Unknown Artifact's signal ends here…''' | |||
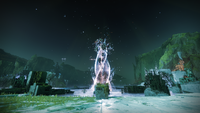
::''The fireteam finally reaches the signal's source where they find a [[Veiled Statue]] like that first encountered in the [[Lunar Pyramid]].'' | |||
== | ===Divinity Exotic Quest=== | ||
::''With the [[Divine_Fragmentation#4._Key_to_Divinity|Empowered Decryption Core]] in hand, the Guardian presents it to a module in the Black Garden.'' | |||
:'''INITIATED: Security bypass protocol''' | |||
::''Afterwards, the fireteam tethers a dark energy to hidden relays found throughout the Black Garden.'' | |||
:'''ACCEPTED: Singular security bypass''' | |||
:'''COMPLETED: All security bypassed''' | |||
::''After tracing the source of the signal, the Guardian finds the Exotic [[Trace Rifle]], [[Divinity]].'' | |||
After | ===Post-Raid Content=== | ||
'''After the raid's first completion, speak with Eris Morn at [[Sanctuary]] to get the following dialogue.''' | |||
*'''Eris Morn''': All this time, they've been closer than we ever knew. First, the Pyramid on the Moon. Now, a team of Guardians finds remnants of their presence in the Black Garden. Upon this discovery, the artifact came to life. From it, we received another vile [[Lore:Unveiling|attempt at manipulation]]. They show us only what they want us to see. As if we're to act the part of puppets and nothing more. Any further communication they send, we must discard. The moment we let them turn our gaze from the truth... is the moment we lose.<ref>'''Bungie (2019/10/1)''', ''[[Destiny 2]]: [[Shadowkeep]] - [[Eris Morn]]: [https://www.youtube.com/watch?v=LzZRZz6su8U Post-Raid Dialogue]''</ref> | |||
==Rewards== | |||
===Weapons=== | |||
*'''[[Divinity]]''' – [[Exotic]] {{icon|Arc}} [[Trace Rifle]] | |||
*[[Accrued Redemption]] – Legendary {{icon|Kinetic}} [[Combat Bow]] | |||
*[[Ancient Gospel]] – Legendary {{icon|Void}} [[Hand Cannon]] | |||
*[[Omniscient Eye]] – Legendary {{icon|Solar}} [[Sniper Rifle]] | |||
*[[Prophet of Doom]] – Legendary {{icon|Arc}} [[Shotgun]] | |||
*[[Reckless Oracle]] – Legendary {{icon|Void}} [[Auto Rifle]] | |||
*[[Sacred Provenance]] – Legendary {{icon|Kinetic}} [[Pulse Rifle]] | |||
*[[Zealot's Reward]] – Legendary {{icon|Void}} [[Fusion Rifle]] | |||
=== | ===Armor sets=== | ||
*[[Kentarch 3 Suit (Hunter)]] - [[Hunter]] Armor set | |||
*[[Kentarch 3 Suit (Warlock)]] - [[Warlock]] Armor set | |||
*[[Kentarch 3 Suit (Titan)]] - [[Titan (class)|Titan]] Armor set | |||
===Miscellaneous=== | |||
*'''Raid Armor Mods''': | |||
**Relay Defender - Gain an increase to weapon damage while within 5 meters of an active Vex Relay. Multiple copies of this mod stack to increase this benefit. | |||
**Enhanced Relay Defender - Gain a powerful increase to weapon damage while within 5 meters of an active Vex Relay. | |||
**Resistant Tether - Gain damage resistance while part of a tether chain. | |||
**Enhanced Resistant Tether - Gain powerful damage resistance while part of a tether chain. | |||
**Voltaic Mote Collector - Gain an overshield after you collect 10 Motes. | |||
**Enhanced Voltaic Mote Collector - Gain an overshield after you collect 5 Motes. | |||
**Voltaic Ammo Collector - Increases the chances of finding Heavy ammo while you have the Voltaic Overflow buff. | |||
**Enhanced Voltaic Ammo Collector - Greatly increases the chances of finding Heavy ammo while you have the Voltaic Overflow buff. | |||
*'''[[Emblem]]s''': | |||
**'''[[Lightgg:298334059|Inherent Truth]]''' | |||
**'''[[Lightgg:298334058|Dive into Darkness]]''' | |||
*'''[[Shader]]s''': | |||
**'''[[lightgg:3996862462|Ancient Believer]]''' | |||
**'''[[lightgg:3996862463|Ancient Defender]]''' | |||
==Trivia== | ==Trivia== | ||
| Line 130: | Line 302: | ||
*There are several motionless Vex Goblins that will awaken when approached and die after a brief moment, one can be encountered as soon as the first encounter is completed after the big drop, on the right side. | *There are several motionless Vex Goblins that will awaken when approached and die after a brief moment, one can be encountered as soon as the first encounter is completed after the big drop, on the right side. | ||
*After defeating the [[Sanctified Mind, Sol Inherent]], a [[Pyramid Scale]] is formed by the remnants of a [[Pyramid]]. This marks the first appearance of [[Pyramid Scale]]s, 248 days before they would reappear during the [[Season of Arrivals]] | *After defeating the [[Sanctified Mind, Sol Inherent]], a [[Pyramid Scale]] is formed by the remnants of a [[Pyramid]]. This marks the first appearance of [[Pyramid Scale]]s, 248 days before they would reappear during the [[Season of Arrivals]] | ||
* Garden of Salvation is the only raid in Destiny history that doesn't have any Heavy Weapons in its loot table (including exotics). | |||
==Gallery== | ==Gallery== | ||
| Line 145: | Line 318: | ||
File:GoS skybox4.jpg | File:GoS skybox4.jpg | ||
</Gallery> | </Gallery> | ||
==References== | |||
<references/> | |||
[[Category:Raids]] | [[Category:Raids]] | ||
Latest revision as of 12:51, January 8, 2025
|
Prev: |
|
|
Next: |
|
| Garden of Salvation | |
|---|---|

| |
|
Game: |
|
|
Player(s): |
1-6 |
|
Recommended Power Level: |
1600 |
|
Location: |
|
|
Enemy faction(s): |
|
|
Hostile race(s): |
|
|
Objective(s): |
Track the source of the Unknown Artifact's signal into the Black Garden. |
| “ | The Garden calls out to you. | ” |
Garden of Salvation is a Raid in Destiny 2, released in the Shadowkeep expansion on October 5th, 2019.
When Vex from the Sol Divisive are drawn to the awakened Pyramid beneath the Moon, Eris Morn tracks a mysterious signal with the Unknown Artifact emitting from deep within the Black Garden. Now Guardians must enter the birthplace of the Vex as they trace the signal to its source at the center of the garden, uncover remnants of the Black Fleet and defeat the Vex Minds empowered by them.
Objectives[edit]
- Track the Unknown Artifact's Signal
- Enter the Black Garden to track the Unknown Artifact's signal.
- Track the Unknown Artifact's Signal
- Evade the Consecrated Mind and continue tracking the Unknown Artifact's signal.
- Track the Unknown Artifact's Signal
- Make your way through the Undergrowth to continue tracking the Unknown Artifact's signal.
- Draw Out the Consecrated Mind
- Find a way to draw the Consecrated Mind out of hiding.
- Subdue the Consecrated Mind
- Defeat the Consecrated Mind to continue tracking the Unknown Artifact's signal.
- Track the Unknown Artifact's Signal
- Follow the Unknown Artifact's signal up to the Boundless Horizon to discover where it leads.
- Conquer the Sanctified Mind
- Defeat the Sanctified Mind to discover the final destination of the Unknown Artifact's signal.
Unique enemies[edit]
Bosses[edit]
Walkthrough[edit]
Evade The Consecrated Mind[edit]
Players will enter an arena containing an Ultra Harpy named the Consecrated Mind, Sol Inherent. However the boss will not initially attack; to start the encounter, look for a Vex box floating in the air. The box can spawn randomly in several different spots around the arena upon entering. If you fire at the box, it will project a tether to the nearest player. The tether can chain to multiple Guardians near each other. The goal is to lead the tether chain to a barrier at the back right-hand corner of the arena to get it to open. Once this is done, the Consecrated Mind will become active.
Players must split into two teams of three: one stays behind in the same area as the boss, and the other moves into the next area that was beyond the barrier. The first team must kill multiple waves of enemies while the boss roams around, occasionally firing at players. The Consecrated Mind is completely invulnerable to all damage during this phase. After some time the boss will spit a Voltaic Charge onto the ground, and one of the three team members must run over to it. The charge will resemble a Vex Conflux. Once they have done this, they will be afflicted with the 'Voltaic Overflow' debuff, lasting for two minutes and thirty seconds. If one player collects multiple Overflow debuffs, they will die, so it must be split evenly between the three team members. If nobody interacts with a Voltaic Charge to acquire the debuff in time, it will explode, wiping out the entire fireteam.
The other team, the one that proceeded into the next room, must make their way forward through several waves of enemies, including Champions. Players must kill every single enemy in their way to progress. At the end of the room, there will be another barrier, and a unique Hydra called an Angelic will spawn. Destroy it to spawn another tether box, and guide the tether to the barrier to unlock it. Once this is done, the Consecrated Mind will teleport into the room where the team that killed the Angelic was in, and the two teams must swap roles; one stays behind to collect the Voltaic Overflow, the other moves forward. This process is repeated several times with alternating roles before all six players finally reunite at the penultimate room for this encounter.
The team must connect three different tether boxes to the next barrier. Once it is open, the team can proceed into the final room for the first encounter. The boss will reappear at the final area, which will also have several Cyclopses. Run through them while the boss continuously moves forward and spits Voltaic Charges which players must collect. When the team has made it to the end of the area, the Consecrated Mind will retreat and the reward chest will spawn, thus ending the first encounter.
Summon The Consecrated Mind[edit]
The fireteam will arrive into a large diamond-shaped map, with a relay at each corner of the map. These relays contain Vex confluxes in the center, as well as Warp Gates on either side. Close to each conflux is also a tether box, however normally they will be shielded. At the start of the encounter, Angelics will spawn near the relays. Players must destroy them to lower the shields around the boxes so they can shoot the box to activate the tether, then guide the tether to the conflux, which will give them the 'Enlightenment' buff for forty-five seconds. The Warp Gates will only activate when the tether has been guided to the conflux.
The objective will be to defend each of the confluxes from waves of Vex. They will head for the confluxes in order to sacrifice themselves to them. If enough sacrifices are made, the entire fireteam will be wiped. The Enlightenment buff is essential for this encounter; The Vex will spawn with immunity shields, and only buffed players will be able to break through them and kill the Vex. The buff must be constantly reapplied to get through this encounter.
For this encounter, the team will be split into three groups of two: the first team will defend the southern relay, the one in front of the team when they first enter the map. The second team will head down the left path to the western relay, while the third team moves to defend the eastern relay. The east and west teams will have to face Barrier Hobgoblins upon arriving to their respective relays, so seasonal anti-barrier mods are recommended. Once the left and right relays are cleared, one player from each team will meet at the north relay at the top of the map.
From there on, the team roles will change; four players will defend one of the relays, while the two remaining players will have to cycle through the relays to refresh the buff and to assist in killing the enemies. Three Angelics will eventually spawn once in each of the relays, which need to be cleared out. Once they all have been killed, all players must regroup at the center of the map, where there will be another relay and tether box. Players must tether the relay to acquire the buff, and defeat all incoming enemies, with Angelics included among them. Once this has been completed, another chest will spawn, signifying the end of the second encounter.
Defeat The Consecrated Mind[edit]
Before the encounter can start, players must first link the tether to the conflux at the center of the map. When this is done, the Consecrated Mind will appear.
Players must split into two teams of three; one will stay with the boss, and the other will defend one of the four relays at the beginning of the second encounter. The relay the second team must defend will be identified with a beam of light shooting upwards into the sky from it. When the encounter starts, a Major Minotaur will spawn, which the second team must kill. Upon death the Minotaur will drop five Voltaic Motes, akin to Motes of Dark from Gambit. One of the players must collect the five Motes and bank them at the conflux. It is recommended that only one player pick up all five motes.
Like before, the Vex enemies will attempt to sacrifice themselves at the conflux and will be surrounded with immunity shields. The player who banks the motes will receive the Enlightened buff needed to break the shields and kill the Vex. The second team must wait for another Minotaur to spawn, kill it, and one player from that team will collect and bank the Voltaic Motes. Over thirty motes in total need to be banked.
It should be noted that Supplicants will also spawn from the side pathways, and should be cleared out as quickly as possible or they will swarm players.
Meanwhile the Consecrated Mind, after some time shooting at players, will float over to one of four platforms located to the north, south, east and west when the encounter first starts, and the first team must follow it to whatever direction it goes. When the boss reaches the platform, it will spit out a Voltaic Charge. One player must run into the charge, but unlike in the first encounter, they will be Detained as soon as they step into it. After a few seconds of detainment, the boss will open up, revealing two pairs of red glowing eyes on each of the three fins. On each fin, one of the eyes will be closer to the center of the boss while the other will be located further from it. When the boss opens up, the eyes must be shot at. Players who are not detained will be able to see all six eyes lit up, while the player who is detained will only be able to see the outer or inner circle of eyes lighting up. This is important, for if the wrong circle of eyes are shot at, the detained player will die. The detained player must call out which circle of eyes to shoot at, either inner or outer. When the eyes have been fired at in time, the boss will head back to the middle of the arena and the process will repeat. Players will acquire the Voltaic Overflow debuff after going into the Charge, and thus cannot enter it again for as long as they have the debuff.
Once all 30 motes have been banked, the Consecrated Mind will go over to the overloaded conflux, and all six fireteam members will once again reunite to its location. Once it has reached the conflux, it will open up once more, and all six eyes will be visible on its fins. Players must quickly shoot all of the eyes, and once this is done, the damage phase will activate.
Once the boss becomes susceptible to damage, it will retreat to the center area. It is recommended that players follow after the boss, for eventually a barrier will appear between the relay and the boss. However they must not get too close; if they do, the boss will wipe the entire fireteam.
When the boss reaches the center of the arena, it will become immune again, and the encounter will repeat. The two teams complete their tasks until the damage phase until the Consecrated Mind has been defeated.
Conquer The Sanctified Mind[edit]
For the final boss of the raid, players will be split into three teams of two. Two teams will collect motes and one team will stay behind. There are two Vex confluxes or "banks", one blue and one red. An Angelic will spawn, which must be killed. Once this is done, the first team will either shoot the Mind's left shoulder, dropping a teleportation portal to the Red zone, or its right knee to go to the Blue zone. Once they jump in either portal, players must kill Goblins, Harpys, and a Minotaur in order to get 15 Voltaic Motes (Tainted Voltaic Motes in the Red zone) in total, with a maximum of 10 per player. Once they have collected all Motes, they must call out to the players left behind who will shoot the same area of the Sanctified Mind, Sol Inherent that was used to drop the portal, so right knee for Blue, left shoulder for Red. This will teleport the two collectors back at the start point of the encounter, and they will need to bank their Motes at the appropriate conflux (blue on the left, red on the right).
This will give both players the Enlightenment buff, which must be used to prevent Vex from sacrificing both confluxes.
As soon as the first collector team comes back, the second team must depart for the same zone from which the first team came and repeat the process. When the second team returns, the first team will teleport to the other zone, collect Motes, bank, and protect the confluxes while the second team goes to the same zone and does the same.
When the second team banks for the second time, both banks should be full and the Sanctified Mind will make a big cross appear and spawn an Angelic which must be killed. Once the Angelic is dead, three or four players (four recommended for comfort) will need to start a tether chain of the same color as the boss's cross, starting at one of the banks and linking to the cross. The Sanctified Mind's core will then be vulnerable, and the damage phase will be started.
Once the damage phase is over, players will need to repeat the whole process again. It is worth noting that Cyclops will spawn on pillars and can one-shot a player with their powerful Void attack, so it is highly suggested to kill them as soon as they are spotted.
Transcript[edit]
Loading screen
- Eris Morn: They take us for fools. The artifact you brought back from the Pyramid began emitting a signal. One that reaches deep into… the Black Garden. Once again, we are beckoned into their trap. They expect us to follow the signal. To discover where it leads. Fine. We will play their games. But this time, with caution… not curiosity.
Mission begins
Looking Glass, The Moon
- The fireteam lands in the Looking Glass on the Moon where they find a Transfer Gate into the Black Garden. As they approach, Sol Divisive Vex arrive to waylay their entrance. The fireteam defeats them and enters the Black Garden.
- The Unknown Artifact's signal resonates deep within the Garden…
Embrace, Black Garden
- The fireteam comes upon a Vex Mind, the Consecrated Mind, Sol Inherent, siphoning from a Minotaur unit. Finding their attacks futile, the fireteam attempts to unlock the nearby barrier. They connect a tether from a Vex Lens to the barrier, unlocking it.
- Their machinations alerts the Consecrated Mind which begin to engage the Guardians, abundant with Voltaic Overflow.
- Voltaic Overflow created
- The fireteam gather the excess Voltaic energy, lest it fatally detonates the arena.
If the Volatic Overflow is not gathered, it will detonate killing the whole fireteam.
- Voltaic Overflow detonated
- Meanwhile, the Guardians escape the currently immune Consecrated Mind by unlocking more barriers and evading the onslaught of Sol Divisive Vex.
- The fireteam successfully evade the Vex Mind by entering the Undergrowth.
- The Consecrated Mind retreats into the ether…
- The Unknown Artifact's signal strengthens…
Undergrowth, Black Garden
- The fireteam attempt to use the relays to draw the Consecrated Mind into a vulnerable position.
- Undergrowth defenses deployed
- Periodically, Angelics and other Vex arrive to stop their attempt. The fireteam defeat the Angelic to allow a tethered connection to the relay.
- Undergrowth defenses subsided
If the Vex are not stopped, they will detonate the assaulted relay; killing the entire fireteam with Volatile Penitence.
- Alcove relay detonated
Or
- Hedges relay detonated
Or
- Pavilion relay detonated
Or
- Thicket relay detonated
Or
- Underbrush relay detonated
- As more Vex arrive, they become immune to the Guardians' attacks. The fireteam become Enlightened through the tethered relays which allows them to break through their shields.
- The fireteam successfully powers all five relays and draws out the Consecrated Mind.
- The Unknown Artifact's signal sharpens…
- One of the previously powered relays begins to resonate.
- The Alcove relay resonates with energy
Or
- The Hedges relay resonates with energy
Or
- The Thicket relay resonates with energy
Or'
- The Underbrush relay resonates with energy
- The fireteam collects Voltaic Motes from defeated foes; depositing them in the now-resonating relay.
- Meanwhile, the Consecrated Mind continues to create Voltaic Overflow. As they are collected, the Mind detains the Guardian. Their fireteam members release them from the prison by damaged the Mind's eyes.
If the detained Guardian is not released, they will be 'Desecrated by the Vex Mind; killing them.
- With enough Volatic Motes, the relay becomes overloaded; attracting the Consecrated Mind to it.
- The Consecrated Mind is drawn to the overloaded relay
- As the Vex Mind resets the relay, the fireteam takes advantage to damage it.
- The fireteam defeats the Consecrated Mind, Sol Inherit.
- The Unknown Artifact's signal intensifies…
Boundless Horizon, Black Garden
- The fireteam travels up a stump-like structure to find another Vex Mind, the Sanctified Mind, Sol Inherent, swirling in white and orange energy.
- As the fireteam engages the Vex Mind, they shoot its shoulder and leg to force portals into nearby islands. At these islands, the Guardians gather Voltaic or Tainted Voltaic Motes.
- The motes are deposited in the nearby relays.
- With the relays charged, they tether its energy to the Sanctified Mind to break its defenses and stop its Sacred Dematerialization.
- The tether is pulsing with Light energy…
Or
- The tether is pulsing with dark[sic] energy…
If the assaulted relay is not defended against incoming Vex, they will sacrifice themselves to it; detonating and killing the entire fireteam with Volatile Penitence.
- Vex sacrificed
Then
- The relay pulsing with light energy detonated
Or
- The relay pulsing with dark energy detonated
- The Unknown Artifact's signal ends here…
- The fireteam finally reaches the signal's source where they find a Veiled Statue like that first encountered in the Lunar Pyramid.
Divinity Exotic Quest[edit]
- With the Empowered Decryption Core in hand, the Guardian presents it to a module in the Black Garden.
- INITIATED: Security bypass protocol
- Afterwards, the fireteam tethers a dark energy to hidden relays found throughout the Black Garden.
- ACCEPTED: Singular security bypass
- COMPLETED: All security bypassed
- After tracing the source of the signal, the Guardian finds the Exotic Trace Rifle, Divinity.
Post-Raid Content[edit]
After the raid's first completion, speak with Eris Morn at Sanctuary to get the following dialogue.
- Eris Morn: All this time, they've been closer than we ever knew. First, the Pyramid on the Moon. Now, a team of Guardians finds remnants of their presence in the Black Garden. Upon this discovery, the artifact came to life. From it, we received another vile attempt at manipulation. They show us only what they want us to see. As if we're to act the part of puppets and nothing more. Any further communication they send, we must discard. The moment we let them turn our gaze from the truth... is the moment we lose.[1]
Rewards[edit]
Weapons[edit]
- Divinity – Exotic
 Trace Rifle
 - Accrued Redemption – Legendary
 Combat Bow
 - Ancient Gospel – Legendary
 Hand Cannon
 - Omniscient Eye – Legendary
 Sniper Rifle
 - Prophet of Doom – Legendary
 Shotgun
 - Reckless Oracle – Legendary
 Auto Rifle
 - Sacred Provenance – Legendary
 Pulse Rifle
 - Zealot's Reward – Legendary
 Fusion Rifle
Armor sets[edit]
- Kentarch 3 Suit (Hunter) - Hunter Armor set
- Kentarch 3 Suit (Warlock) - Warlock Armor set
- Kentarch 3 Suit (Titan) - Titan Armor set
Miscellaneous[edit]
- Raid Armor Mods:
- Relay Defender - Gain an increase to weapon damage while within 5 meters of an active Vex Relay. Multiple copies of this mod stack to increase this benefit.
- Enhanced Relay Defender - Gain a powerful increase to weapon damage while within 5 meters of an active Vex Relay.
- Resistant Tether - Gain damage resistance while part of a tether chain.
- Enhanced Resistant Tether - Gain powerful damage resistance while part of a tether chain.
- Voltaic Mote Collector - Gain an overshield after you collect 10 Motes.
- Enhanced Voltaic Mote Collector - Gain an overshield after you collect 5 Motes.
- Voltaic Ammo Collector - Increases the chances of finding Heavy ammo while you have the Voltaic Overflow buff.
- Enhanced Voltaic Ammo Collector - Greatly increases the chances of finding Heavy ammo while you have the Voltaic Overflow buff.
- Emblems:
- Shaders:
Trivia[edit]
- Garden of Salvation is the first Raid in Destiny history to take place in the Black Garden. It is also the second full Vex raid in the series, following the Vault of Glass, as well as the first raid to include Champions.
- Garden of Salvation only features Vex of the Sol Divisive collective while it is a pure Vex raid like Vault of Glass
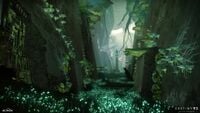
- The community have nicknamed Garden of Salvation the "Vault of Grass" (a pun on "Vault of Glass") due to its unusually lush environment for a Vex-related location, and the "Garden of Energy Weapons" due to the frequency of Energy weapon drops.
- This Raid seems to be a crossover between Shadowkeep and Season of the Undying, as it uses events from both releases.
- There are several motionless Vex Goblins that will awaken when approached and die after a brief moment, one can be encountered as soon as the first encounter is completed after the big drop, on the right side.
- After defeating the Sanctified Mind, Sol Inherent, a Pyramid Scale is formed by the remnants of a Pyramid. This marks the first appearance of Pyramid Scales, 248 days before they would reappear during the Season of Arrivals
- Garden of Salvation is the only raid in Destiny history that doesn't have any Heavy Weapons in its loot table (including exotics).
Gallery[edit]
References[edit]
- ^ Bungie (2019/10/1), Destiny 2: Shadowkeep - Eris Morn: Post-Raid Dialogue
