Salvation's Edge
From Destinypedia, the Destiny wiki
|
Prev: |
Root of Nightmares (Raid) |
|
Next: |
Excision (Story) |
| Salvation's Edge | |
|---|---|
| |
|
Game: |
|
|
Player(s): |
1-6 |
|
Recommended Power Level: |
1965 (Launch) |
|
Location: |
|
|
Enemy faction(s): |
|
|
Hostile race(s): |
|
|
Objective(s): |
Assemble your fireteam, ascend the Witness's monolith, and confront oblivion. |
| “ | Free the Light. | ” |
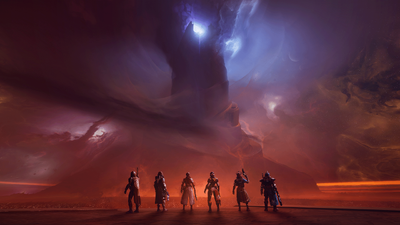
Salvation's Edge is a Raid in Destiny 2, released in the Final Shape expansion on June 7th, 2024. At the Pale Heart of the Traveler, Guardians must face oblivion in one epic confrontation with the Witness and break its hold on the Traveler's Light before it imposes finite salvation in the final shape upon all existence.
Objectives[edit]
- Approach Finality
- Discover a way into the monolith and stop the Witness.
- Gain Access to the Monolith
- Operate the inscrutable machinery to enter the monolith's core.
- Enter the Monolith's Core
- Find a way to ascend the monolith.
- Defeat the Herald
- Remove the Herald of Finality from your path.
- Ascend the Monolith
- Progress up the monolith and stop the Witness.
- Carve A Path
- Gain access to the Witness.
- Ascend the Monolith
- Continue to ascend the monolith.
- See Beyond
- Find a path to ascension.
- Make Your Final Ascent
- Climb to the summit and confront the Witness.
- Stop the Final Shape
- Free the Traveler's Light and thwart the Witness's plans.
Unique enemies[edit]
- Devotee of the Witness
- Keeper of the Monolith
- Threshold Sentinel
- Splintered Curator
- Trammel of Conflict
- Trammel of Demise
- Trammel of Time
Bosses[edit]
- Herald of Finality
- The Witness (Final Boss)
Walkthrough[edit]
Substratum[edit]
Once all players have reached the end of the opening transition encounter, a door will open, allowing the fireteam ingress into the first encounter of the raid. As the players enter, the door behind them should close and a rally flag can be placed. Players are free to explore the area to get a feel for the pathways that they may need to explore throughout the encounter, but all players should ultimately enter the center room to begin starting it. As soon as the players rendezvous in the middle, a "chest" should spawn alongside a triangular shaped resonance (Pyramidal Resonance). While the shape is not important now, it soon will be for the encounters ahead. Regardless, a player should pick up the resonance and dunk it into the chest to begin the encounter. Once it begins, a fluxing hand of The Witness should emerge from the ceiling, a wipe timer called Final Shape Looming should be visible to all players and two doors should open up next to each other, thus starting the encounter.
The team should mainly always be split into two teams of three, as each team splits off into the freshly opened rooms. Players must enter them and kill all Sol Divisive Vex and even Dread units on each side, although Hydra Keepers of the Monolith and Overload Minotaurs known as the Devotees of the Witness should take priority if the chance is given. Be warned that each time the two doors are opened allowing exploration into the peripheral rooms, a swarm of Supplicants will spawn, so rushing into rooms is highly advised against. Additionally, the spawned Witness hand from the ceiling should also be seen swirling into a manifold hand, as it is now casting a triangular Area of Effect attack that can instant kill low resilience players, so all Guardians should be on their toes to avoid this attack. Each time a Keeper is eliminated, a door progressing further into the side rooms is opened until the team encounters a Devotee of the Witness and eliminates them. Once so, all players are called to middle to eliminate an Ultra Tormentor called a Threshold Sentinel; as soon as players start converging on the main rooms and while the Tormentor is alive, the recently opened doors into the side rooms will close, either trapping players inside or crushing them in the doors themselves, so players are advised to enter the center room with haste. Once the Tormentor is eliminated, two more doors will open and players must repeat the process of clearing out the rooms.
However, while progressing through the rooms, the teams should notices a glowing plate on the ground and an obelisk-shaped object in a connecting room with a glowing central piece. These are the main mechanic for this and the following two encounters: circuit plates and a Resonant Conductor. As soon as the players have made their rounds and eliminated their second Threshold Sentinel, players are safe to begin bouncing the charges between the plates as soon as they are located. Once the glowing plate is stepped on, a glowing bolt of light should be seen traversing one of the orange lines connected between the rooms, heading towards the room with the powered conduit. Players in both rooms should be coordinating bouncing these charges to not only keep the charge on, but also spawn resonances in the plate rooms and the center. So, the two teams should also break down into two of the players dealing with the plates, one of which deals with the conductor itself, while the other one deals with add clear and also picking up resonances that will spawn in middle. To maintain the charge, plate players should step on their plates when they see the charge enter their plate or, more safely, wait to see when a rapidly shrinking circular aura spawns on it while the plate itself also glows. While waiting for the charge to bounce back to them, the plate players should be collecting the resonances that have spawned in their rooms while add clear should be picking up resonances in the center room when their sides don't need help dealing with reinforcements. It should be noted that Guardians can only hold a maximum of 3 resonances, any more and they will be killed instantly. Additionally, the stacks also have a timer that will also kill the wielder if the timer hits zero. While bouncing charges, teams of Goblins and Weavers should be spawning. While Goblins don't pose as much of a threat, Weavers should take priority as their ![]() Transverse Reed ability can disrupt plate charges and stall time. If by any chance a charge is lost when a player doesn't step on their plate in time, they can reset without a hitch once. If the players miss bouncing a charge again, a Subjugator will lock down the plates and conductors, and must be eliminated as quickly as possible. To lock down a conductor, the player in the room with it must gather their resonance, shoot the center of the device (it should start to generate a rippling resonant aura once done so) and then step on their plate when the charge enters it. Once done, the player should lose one of their resonance stacks while the entire conductor should close and glow brightly. However, once a conductor is closed, the resonances that spawned on their corresponding sides will despawn, so Guardians should have all the resonance they can gather from their rooms and the center before powering the conductors up.
Transverse Reed ability can disrupt plate charges and stall time. If by any chance a charge is lost when a player doesn't step on their plate in time, they can reset without a hitch once. If the players miss bouncing a charge again, a Subjugator will lock down the plates and conductors, and must be eliminated as quickly as possible. To lock down a conductor, the player in the room with it must gather their resonance, shoot the center of the device (it should start to generate a rippling resonant aura once done so) and then step on their plate when the charge enters it. Once done, the player should lose one of their resonance stacks while the entire conductor should close and glow brightly. However, once a conductor is closed, the resonances that spawned on their corresponding sides will despawn, so Guardians should have all the resonance they can gather from their rooms and the center before powering the conductors up.
When both conductors are powered, the team should rendezvous in the center to eliminate the Vex and a Subjugator before a chest spawns. All players should start to gather around the chest to activate it as these chests are proximity activated, and only can be interacted with once everyone is around it. After a player with stacks of resonance interacts with it, they should lose the resonance entirely and the Final Shape Looming wipe timer should visibly increase back up again. All players should dunk their resonances to spare them of the after-effects of the resonance itself and give them more time for another round, which should increase back to the original timer of 4+ minutes if done properly. Note that the Witness will continue to harry the team with the Resonant Gaze attack, which can also be troublesome once the team starts to deposit their resonances in the center chest. The players then repeat this process two more times until the enemies retreat and a staircase leading further into the monolith unfurls from the ceiling.
Herald of Finality[edit]
Before starting the encounter the fireteam should divide themselves into three teams of two, each assigned to either the left, middle or right side; it is recommended that the most skilled of the fireteam be assigned to the left side considering its difficulty regarding terrain. Once the teams have made it to their sides, they should destroy the blight in the middle of the arena, thus summoning the Herald of Finality into the fray and activating the Final Shape Looming wipe mechanic. The team should immediately start eliminating the Ravenous Taken Knights and Attendants on their side and their respective Trammels: Trammel of Demise on left, Trammel of Conflict in middle and Trammel of Time on right. Once at least one of the Trammels are eliminated, the Herald of Finality will summon a player from each side to the center of the arena. Guardians can deal with this in one of two ways, either dealing with the Herald first, gaining the Stolen Favor they need to read immediately, but can be risky with little time to activate plates or dealing with plates first, having the resonances on standby, but having to deal with another Trammel. Either way, the teams have to deal with the circuit plates and answer the Herald in conflict.
The players with the visible Called to Reckoning buff should enter the center part of the arena with the Herald and shoot the glowing spot on their head to try and gain the Stolen Favor buff. However, the team should notice that an orb of blight will spawn around the Herald and immediately negate all damage to the spot on the head. To remove it, the entire fireteam should look around the arena for blights that will have spawned around the sides of the arena and destroy them. Once so, the engaged team should focus fire on the critical spot and gain the Stolen Favor buff. Players in the center arena should also now notice a new Witness hand attack, this time, sprouting from the floor. Once it spirals, it will launch a barrage of Resonant Seekers that will target a circular area within the arena, and can burn away health nearly instantly, so players should avoid this attack whenever possible. Additionally, if the Called team is eliminated, the Herald will "celebrate your failure" and immediately invoke a wipe.
Once the Called Guardians have gained their Stolen Favor buff, they should immediately head to their side and read the conductor; now, a new mechanic is added to the circuits and conductors. Instead of just triangle (Pyramidal Resonance), players should now notice a circular resonance (Spherical Resonance) spawning around their side. Additionally, the Guardian with stolen favor should also notice the center of the conductor contains either a glowing triangle or circle inside it; if a Guardian assigned to sending a charge was called to reckoning received this buff, they should either call it out to the conductor player or swap places with them. If the wrong shaped resonance is deposited into the conductor, it will immediately invoke a wipe, so the Guardians should be picking up the correct shaped resonance. Players can pick up any resonance, but the last one picked up immediately overrides the last one picked up. For example, if the conductor needs a circle, the player locking it down can pick up two triangles, and finally pick up a circle, overriding the Pyramidal Resonance and replacing it with a Spherical Resonance. All players should be collecting as much resonance as they can with the same principle as last time, extending the wipe timer for next phase. If a charge is lost, the players may either need to start again without much issue or have to deal with another trammel. Once all conductors are locked down, the players should head towards the vista of the arena, in the shadow of the Witness hand and deposit all their resonance into the chest that has spawned there. Once done, the timer should extend and the edges of the arena should glow, indicating that the Herald is damageable. Players should unleash all matter of attacks into the Herald while the boss itself is still vulnerable. Players should repeat this process until final stand, where the Herald will reset the timer to thirty seconds and summon all the Trammels within the arena; players should keep all focus on the Herald itself until it is hopefully eliminated within the narrow timeframe.
Repository[edit]
Much like Substratum, Repository is mainly about locking down conductors in each room with little concern for any other pressing gameplay mechanic. However, this encounter introduces a new resonance, Hexahedron resonance which is acquired from a resonance spot with a cube shape at its center. Additionally, a new Witness hand will emerge from the walls to unleash a beam of searing energy at players from the side. Before starting, the fireteam should split into three teams of two, which should stick together throughout the encounter and should have their plates connected.
After depositing the resonance into the chest, the encounter will begin as Threshold Sentinels will spawn on each side. When these Tormentors are eliminated, the person that landed a killing blow on the Ultra unit will acquire the Stolen Favor buff which will allow them to see what resonance is needed for their conduit. Preferably, the player locking down the conductor should have this buff. However, once all Tormentors are eliminated on each side, a bunch of Honored Scorpius turrets will spawn on elevated platforms all over the arena, pelting the fireteam with a constant hailstorm of bullets until they or their targets are eliminated. After any pressing threat is eliminated, the teams should start to bounce charges between each other until all resonance is spawned. Unlike the previous encounters, however, the resonances will spawn only on certain sides, with Hexahedron spawning on right, Spherical in middle and Pyramidal on left, so once the conduit is read and the charges are bounced, the players should seek to acquire as much resonance as possible, with the conductor players acquiring the resonance they need for last. Again, like Substratum, once a plate loses its charge, the team has a single grace period before a Subjugator will spawn on future failures or a prolonged wait, which will lock down the conductor and plates as long as they are alive. Once the resonances are acquired and the subjugators eliminated, the team should then work on locking down the conductors and all rendezvous in the direct middle to deposit their resonances into the chest to extend the wipe timer; Honored Scorpii will spawn once the conductors are locked down as well, so Guardians should also eliminate them with haste. After depositing all their resonance, hopefully capping the timer back up to 3:30, the fireteam should eliminate all Shadow Legion forces, as well as an Unstoppable Incendior whom has joined the fray. Once the Unstoppable has been eliminated, the fireteam should advance to the next room ahead and repeat the process.
However, the main caveat with this encounter is that, as the rooms progress, the circuits between plates should overlap and switch sides. For example, in the first room, the plates go straight to each other: left to left, mid to mid, and right to right. The next room, however, alters this slightly, with left going to middle, and middle going to left; right still goes to right. In the final room, however, all sides are changed, with left going to middle, middle going to right, and right going to left. While players can simply go to their respective sides, it is recommended that the fireteam keeps the three team strategy to better coordinate bouncing charges and prevent snags with having to either restart the plates or deal with another Subjugator.
Verity[edit]
Upon entering Verity, the fireteam should first see six statues, each accurately showing themselves and changing whenever a player either swaps gear or fashion. It is extremely important to have each player AND their Ghosts as distinct from one another as possible, as distinguishing players from one another is essential for the encounter ahead. Additionally, the team should see three glowing statues deeper into the room, each rapidly changing, in front of a "projector screen" constantly changing 2D shapes, from circle, square and triangle. Upon interaction with the glowing statues, the encounter will begin and the fireteam will be randomly divided and a wipe timer with three and a half minutes, called Imminent End, will begin counting down.
While Verity is infamous for screening multiple fireteams during the raid race, the premise is quite simple: make sure the Guardians do not have the shape their statues are holding on the inside. The fireteam will be randomly divided in two, inside players and outside players. Inside players will be trapped in an alternate realm of the room by their lonesome while outside players will be together. Inside players will see their and two other players' statues on the inside holding a shape. Inside players should announce to the team, primarily to the Outside team, the order of the shapes from left to right facing the projector wall. The inside team should endeavor to remove the shape assigned to their statue. To do so, first, they can look at the projector wall, which will be fluxing between two shapes, which will either be a shape their statue is holding and another shape they don't, or two of the shapes their statue has. To remove any shapes from their room, they must eliminate Hive Knights called Splintered Curators that will spawn in the room. Once done, the knight will drop a shape that is being projected on their wall. The guardian can pick up this shape and deposit it on any of the statues except their own or a guardian they've already interacted with in a rotation. If a guardian receives a shape or loses one on the ground, a Revenant Ogre will spawn and will respawn the knights once eliminated. In order to escape the realm, the inside team needs two shapes that are not the ones their statues are holding to form a 3D object or a key to escape the realm by exiting through the glass wall behind them. Players should note the following buffs on their screen:
- Trigon -> Triangle
- Quadrate -> Square
- Orbicular -> Circle
- Pyramidic -> Pyramid (Triangle + Triangle)
- Trilateral -> Prism (Triangle + Square)
- Cuboid -> Cube (Square + Square)
- Cylindric -> Cylinder (Square + Circle)
- Spheric -> Sphere (Circle + Circle)
- Conoid -> Cone (Circle + Triangle)
A strategy to make inside team's shape depositing easier is to, first, have all of the shapes their statue is holding by keeping the symbol their statue is holding and give the other shape they have to the other guardian statue holding that very shape. For example, if the guardian is triangle, and they have a triangle and square, they should keep their triangle and give the square to the square statue, while the circle guardian, who already has their circle will give their triangle to the triangle guardian. Second is to then give the two similar shapes to the other two inside players so that the player no longer has their two same shapes and, ideally, by next round, have the two shapes their statue is not holding. Thus, on the second rotation, the triangle guardian should give their triangles to the other two guardians and the other two should give their pair of shapes to their peers. Finally, they should collect the two shapes to form the 3D key to finally escape the realm. Finally, triangle guardian should now have a 3D object that doesn’t have a triangle; thus they must create either a cylinder, a prism, or a cone to escape. These players should not pick up more than two shapes until they are ready to escape the realm, else they will hold a 3D object containing the shape their statue is holding, making escape impossible. To form the 3D shape, the player simply needs to acquire both shapes at once without depositing one or the other.
Once at least one of the inside teams have removed their designated shapes, however, the Witness will "notice the fireteam's progress", and freeze the inside team through Catatonic Decimation; however, this is not a true death. Upon this happening, the inside team will be frozen in place and see the Verity arena for what it truly is, a desiccated, tainted place, as well as the statues in the spawn, with three glowing pedestals, one of which containing one of their trapped peers. Outside team will notice the vacancies, as well as three of the trapped team's ghosts on the outside. The outside team must collect the Ghosts and head to spawn to aid the trapped team. The trapped guardians should spectate the outside team to guide them to the statues of their peers. Upon depositing the ghost to their respective Guardian, the player should be "revived" and can continue to engage through the encounter. If a ghost is deposited to the wrong guardian, that depositing player will be killed instantly.
Meanwhile, outside team has the same goal of ensuring inside team statues are not holding the shape they are holding on the inside. However, instead of seeing a two dimensional object like inside team, they instead see 3D objects in their hands. The goal remains the same and is quite easy when broken down. Unlike inside, who is merely giving shapes to one another, outside team is swapping shapes between statues. For example, if a guardian picks up a square and deposits it into a guardian holding a cylinder, and then picks up a triangle and deposits it into a guardian holding a prism, the square is transferred to the prism guardian and the triangle is transferred to the cylinder, changing the shapes to a cone and cube respectively. Thus, outside team must exercise a bit of logic to ensure the inside team can safely escape their realm to form shapes their trapped peers are not holding, which should be done within two dissections, if not three if all statues are holding 3D objects containing two of the shapes the inside is holding such as a sphere for circle, a pyramid for triangle and a cube for square. Unlike inside team, outside team have access to all shapes, but have to deal with two Unstoppable Ogres after dealing with a dissection. It is recommended to bring weapons with Anti-Unstoppable properties.
For example, the inside team read their statues left to right, seeing that the order is triangle, circle and square in that order, while the outside compares that to the statues on the outside, which see that the order of objects is a cone, cylinder and prism. One of the guardians should eliminate the three knights to have access to all shapes, and begin logically moving shapes around. After picking up a triangle, for example, they should take that to the cone, because they know that the cone player should not have a triangle at the end of the rotation, and after picking up a square, they should take it to the player holding a prism, because they know they shouldn't have a square. Once the dissection is complete, the cone is changed to a cylinder and the prism into a pyramid. Now, the player should take the circle to the cylinder and should seek a triangle to swap with the pyramid, changing the two shapes into a prism and cone respectively. Outside player should now see insider statues holding a 3D object which do not contain a triangle, circle and square in the 3d object respectively.
Once both teams have done their jobs correctly, inside team can escape the realm and converge with outside team in the real realm, and the Imminent End timer will temporarily vanish. Once the fireteam is reunited, they all must deal with an onslaught of Grim, Thrall and Unstoppable Ogres. After chiefly eliminating Unstoppable Ogres and much of the attacking forces, all of the fireteam but one are afflicted with Catatonic Decimation and must be freed within the span of one minute or face the Imminent End wipe mechanic. Thus, the team should scatter as much as possible without being unreachable so that their ghosts can be easily traced back to their guardians and the Decimated players should coordinate with the survivor to allow their peers to be freed, reading the empty pedestals left to right to better organize freeing them all. Once the Ghosts are taken back to the correct statues and all players are freed from their Catatonic prisons, the wipe timer should dissipate and the team should repeat this process twice more until the arena shows its true corruption and the lift in the middle allows them progress further up the monolith.
There is a method to influencing the random selection of players who are taken inside during Verity, which can help if players are not knowledgeable about or capable of completing dissections. If you consider the room as two halves, one half being where inside players are locked into by the wall of shattered glass, and the other half being where the six statues are located, where players stand determines if they will be taken inside or not, to a certain degree. If two fireteam members stand in the "inside" half of the room prior to people being chosen for teleportation to the inside, they will always be guaranteed to be taken inside. The other four fireteam members should remain at the six statues half of the room, of which one will be randomly chosen to be taken inside. Using this method, you can assign roles so as to reduce the complexity and workload of individual members of the fireteam.
The Witness[edit]
Once beginning the encounter, the Witness will start to unleash the Final Shape, summon its Scorn forces to the arena, as well as unleash it's hand attacks it has been showing throughout the raid, the hanging triangular blast attack, the floor-firing seeker swarm attack and the horizontal beam. It is here where learning the shapes of each attack comes in handy, as it is essential to defeating the Witness. The team should be divided into two teams, one prioritizing add clear and the other assigned to breaking the Witness's glyphs. Regardless of how fireteams want to divide themselves, the goal ultimately remains the same. Beforehand, players who stand in the projected attack zone of one of the Witness's hands long enough should notice a droning sound before their Guardian acquires a shaped resonance in their buff section above their super. If they stand in the Witness's triangular attack (Resonant Outburst) for long enough, they'll pick up Pyramidal resonance, if they stand in the imminent impact zone of the Resonant Seeker swarm, they'll acquire Spherical Resonance and it they stand in the beam attack's projected firing zone (Wrathful Disarray), they'll pick up Hexahedral resonance.
In order to reach a damage phase, the Glyphbreaker team should organize themselves into dealing with specific attacks. If there are three in glyphbreaking, one should deal with the Witness's hanging hand, another deals with the floor hand and the other deals with the horizontal hand. To deal with these hands, these players must stand in the projected attack area and shoot the glowing armband on the attacking hand, which should show a different color underneath. This color corresponds to the correct resonance needed to destroy it. A green armband requires Pyramidal resonance to destroy, a yellow armband requires Spherical resonance to destroy and a red armband requires Hexahedron resonance to destroy. For example, if the Witness's horizontal beam hand's armband shows it's Glyphbreaker a green armband, that player must stand in the attack zone of the Witness's sky-suspended hand's triangle attack to acquire Pyramidal resonance to destroy the horizontal beam-firing hand they read. Once that Guardian acquires the Pyramidal resonance needed to destroy that arm, they must return to the projected attack site of the horizontal hand and shoot the armband again, which should destroy the hand itself and give that player Glyphbreaker; they should do this as quickly as possible as to avoid accidentally picking up the attacking hand's resonance. It should be noted that the player will not lose the resonance and thus, it they do not remove it, they will die. To address it, that player must head to the circular, organic and light-charged platform in the center of the arena and shoot one of the glowing glyphs on the Witness to both cleanse themselves of the resonance and get closer to a damage phase. It should also be noted that if either an add clear member accidentally acquires resonance or if one of the Glyphbreakers accidentally picked up too much of the wrong resonance, they can also be cleansed through this method.
During Glyphbreaking, however, one might find their hand glowing and hear a screaming in the distance after destroying it. This indicates that the Witness is now testing the fireteam, and will spawn a collection of large Pyramid spikes in front of it. If these spikes are not addressed or are destroyed the wrong way, the team will lose all ability to jump and will face a wave of energy that will instantly kill all on the ground. To deal with this test, players must remember what kind of attack glowed and attempt to make a similar shape from the spikes. For example, if the attacking hand that glowed was the Witness' hanging triangle attack, the team must try to make a triangle out of the spikes, or if the attacking hand that glowed was the one that created Resonant seekers, the team must try to make a circle (though it will look a lot more like a diamond) or if the hand was the beam, the team must try to make a square. If done quickly, the Witness will still try to unleash the wave of energy, but the team is free to jump and avoid the attack entirely.
Once all six of the Witness' glyphs are broken, the central, organic platform will rise and a glowing, writhing attack point will emerge in the Witness' heart, thus starting a damage phase. To better coordinate it, once the Witness has only one Glyph left and one of the Glyphbreakers has their buff, all members should converge on that central plate before the Glyph is destroyed; the fireteam should still be on the move on the plate so to avoid the Witness' hand attacks. Once damage phase has begun, the team can unload everything they can into the Witness. However, they should be in no measure remain still, as the Witness will try to retaliate against its attackers, unleashing powerful blasts of resonance and waves of fatal energy on the floor. So while damaging the Witness, some of the fireteam should keep an eye out for the Witness’ hands and see where they are attacking. If a hand is moving to attack the front right corner of the plate, they should tell the team to fall back to the back left and vice versa once the pattern attacks back left. These callouts, then would be "Back left, front right, jump" The Witness will sometimes combine both resonant blast and ground attack on the second attack during a rotation, which is visible by the Witness glowing and pulling back for a second, so callout players should alert their peers to both move out of the way of the Wrathful Disarray and jump to avoid being killed by the ground energy. After three pairs of attacks the Witness will pull back and slam down the central plate, ending the damage phase and either outright killing or sending remaining players flying, so players should leave beforehand. The Guardians will repeat this process until final stand is reached.
Once players reach final stand, the Witness will become temporarily immune as it recoils in pain and glares at the team menacingly. After which, the Witness glowing damage spot will reappear and it will attempt to expedite the deployment of the Final Shape wipe. Players have almost no time to do damage here, no more then a single set of attacks, so players are advised to save their supers and burst damage weapons for this phase. After avoiding the Witness' attacks and greatly wounding it, the Witness will then retreat, one of it's arms will appear on the platform and the team will reap the rewards of finally completing Salvation's Edge.
Secret Deepsight Puzzle[edit]
After defeating the Attendants and Sol Divisive Vex upon entering the monolith, look up at a wall displaying 8 columns of 5 shapes corresponding to the type of resonance you pick up throughout the raid. Specifically, you will want column 3 and the order it is displayed from bottom to top. Type in the order shown in that column into the text chat, but ignore the second and fourth shapes inside that column, for they are reserved for a puzzle to unlock the raid mods and the remaining entries of the Rubicon lore book. The first hidden conductor can be found during the traversal to the first encounter. Players will know they have locked down the conductor with the correct type of resonance when the following text is displayed: "Energy flows deeper into the monolith…". Locking down the conductor with the incorrect type of resonance will have the following text displayed: "Energy retreats from your grasp…". After completing the first encounter, the second hidden conductor can be found by going past a grate on the wall instead of jumping up the green-colored blocks leading to the second encounter. After completing the second encounter, the third hidden conductor can be found after triggering a dialogue from the Witness revealing itself to be the Winnower's first knife, then jumping up some red-colored blocks. Once all 3 hidden conductors have been locked down with the correct type of resonance, the following text will be displayed: "A boon will be granted…", and a reward chest will spawn containing a weapon with guaranteed Deepsight Resonance once the final encounter is completed.
Raid Mod Puzzle[edit]
Before players can solve the puzzle, they must have completed 5 of these 10 specific triumphs: Touch and Go, Changing Tactics, Singular Torment, Equal Distribution, Careful Calculation, Scenic Route, At Capacity, Balanced Diet, Varied Geometry, and/or Coordinated Efforts. Otherwise, the following text will be displayed when attempting to interact with a box where you would normally deposit resonance in the raid: "You are found lacking." Once those specific triumphs are completed, type in the order shown on column 3 from bottom to top into the text chat, but this time ignore the first, third, and fifth shapes shown in that column, as they are reserved for the secret deepsight puzzle. The fourth hidden conductor can be found underneath a pair of staircases; approaching the box will give you a prompt to unlock it and then the following text will be displayed once players interact with the box: "Energy flows into the architecture." Once again, players will know they have locked down the conductor with the correct type of resonance when the following text is displayed: "Energy flows deeper into the monolith…". Locking down the conductor with the incorrect type of resonance will have the following text displayed: "Energy retreats from your grasp…". After completing the first 2 encounters, the final hidden conductor can be found in the outside area where pillars of unstable resonance will flow into the floor and kill players that attempt to pass through them, but instead of jumping onto the ledges to the right, jump to the left towards a room separated by an impassable grate in the middle. Approach the box on the right side of the room to unlock it and complete the puzzle. Once both of the final 2 hidden conductors have been locked down with the correct type of resonance, a reward chest will spawn containing a mod that is only active while in the raid, 5 Spoils of Conquest, and an entry of the Rubicon lore book once the final encounter is completed.
Rewards[edit]
Weapons[edit]
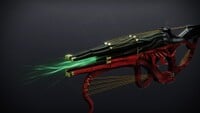
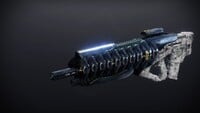
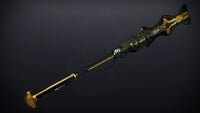
- Euphony - Exotic
 Linear Fusion Rifle
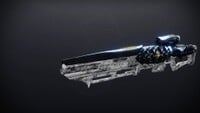
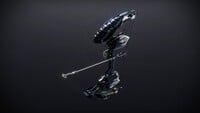
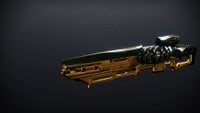
 - Critical Anomaly - Legendary
 Sniper Rifle
 - Forthcoming Deviance - Legendary
 Glaive
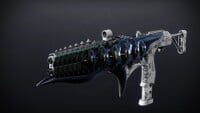
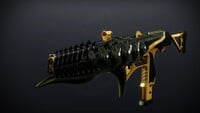
 - Imminence - Legendary
 Submachine Gun
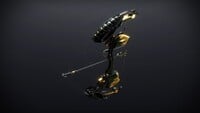
 - Non-Denouement - Legendary
 Combat Bow
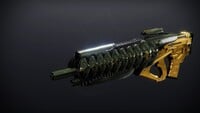
 - Nullify - Legendary
 Pulse Rifle
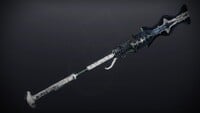
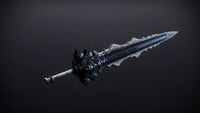
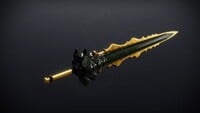
 - Summum Bonum - Legendary
 Sword
Sword
Armor sets[edit]
- Promised Reign Suit - Hunter Armor set
- Promised Victory Suit - Warlock Armor set
- Promised Reunion Suit - Titan Armor set
Miscellaneous Equipment[edit]
- Raid Armor Mods:
- Electrified Conductor - In "Salvation's Edge," receive a large amount of Special ammo when charging a conductor.
- Stacked - In "Salvation's Edge," final blows have an increased chance of spawning Heavy ammo while in possession of Resonance.
- Persistent Resonance - In "Salvation's Edge," create orbs when depositing Resonance.
- High-Tier Elimination - In "Salvation's Edge," gain bonus ability energy when defeating challenging combatants or higher.
- Arm's Reach - In "Salvation's Edge," gain bonus Super energy when defeating a combatant near a limb of the Witness.
- Turmoil Engine - Exotic Sparrow
- Timeless Bond - Exotic Ghost shell
- Emblems:
- Edification - Complete all encounters of the Raid.
- Hunker Down - Complete all encounters of the Raid within the first 48 hours of release (June 7th - June 9th, 2024)
- Shaders:
- Resonant Cellweave - Find both hidden chests within the Raid.
- Diametric Crush - Complete all encounters in the "Salvation's Edge" raid without any member of your fireteam dying or returning to orbit.
- The Rubicon lore book
Transcript[edit]
Mission Starts
- The Witness: [whispers] Still here. Struggling against the cosmic tides, compared to which you are so... small.
The fireteam progresses further into the Substratum, overlooking a vast pit with looming statues holding up the Monolith.
- The Witness: [whispers] We sought an end to suffering—the tyranny of a universe that doesn't feel. The audacity of that frightens you.
The fireteam completes the Substratum encounter, progressing further into Dissipation and approach the Herald of Finality's arena.
- The Witness: [whispers] So confused... to find meaning in this pain. Fall upon our knife. Accept stillness... As Riis, as Fundament, as so many before you were ALLOWED to do. We are not bound by logic. We define its shape. We offer salvation from this... futile struggle.
The Guardians eliminate the Herald of Finality and progress through the Warren.
- The Witness: [whispers] Illogical obstinance. Pain can be fleeting. It can also be eternal.
The team draws closer to the Repository.
- The Witness: [whispers] You fear answers. Fear the truth you claim to seek. Look beyond this dying garden... or rot in entropy. Each child we save from the game, you again force to play. You call us "Winnower." We are not... but the first knife clutched in its hand. Gods forged us both. But they cannot tell the knife what shape to carve.
The Guardians bypass the Repository and escape Verity, progressing up to the Zenith.
- The Witness: [whispers] Is this the chaos you so cherish?
The fireteam comes face-to-face with the Witness.
- The Witness: One final act of entropy!
The Witness has a chance to say one of the following lines after each damage phase.
- The Witness: You are insignificant.
- The Witness: Why won't you yield?
- The Witness: Is that all?
- The Witness: You made your choice!
- The Witness: This will be DONE!
- The Witness: Eons of progress will not be stalled by you.
- The Witness: We are so close to perfection!
- The Witness: The Traveler's Light... wanes.
- The Witness: See how your Traveler gifted you only violence!
- The Witness: The Final Shape still has a place for you.
- The Witness: There are no alternatives!
- The Witness: A Gardener's trough? Traded for a blade?
The following usually plays following a second damage phase.
- The Witness: What... what... what is this...
The fireteam critically wounds the Witness
- The Witness: Impossible. We are... We are in control!
Trivia[edit]
- Salvation's Edge has the longest time to a first clear at 18 hours, 59 minutes, and 41 seconds beating out Last Wish by 10 minutes.
- Salvation's Edge also had the longest single encounter clear time, with the Verity encounter alone taking 9 hours.
- Salvation's Edge also has the lowest day one first clear rate out of any other raid in Destiny 2, with only 1 clear in the first 24 hours, beating out Last Wish, which had 2 in the same timespan.
- The Raid includes all enemy species, except for the Fallen.
- During the raid, players notice 4 symbols from Vow of the Disciple through each of the encounters, the Give symbol is in a box where you dunk the resonance buffs to extend the looming timer before you wipe, and they can see the finalized statues of Rhulk, Nezarec, and Calus in the second encounter, and in the stairway to the final boss encounter, they also appear in 6 columns by the stairs but their poses have their arms up like the Worship symbol as if they worshiping the Darkness. And finally, the Guardian's symbol is somewhat different, instead of the arms down and being overshadowed by the Traveler, it has become overshadowed not just by the Ghost, but also by the Witness. And considering the prophecy wall in Vow is missing the final symbol, it may be time for the Guardians to make their own fates.
- Despite the different types of Champions that are seen in the Raid itself, there are no Barrier Hobgoblins, Unstoppable Taken Phalanxes, Barrier Colossi, Barrier Knights, Overload Chieftains and Unstoppable Abominations seen in the first, second third, fourth, fifth encounters on Master Mode.
- Salvation's Edge is the first raid where the final boss does not die, instead being killed in the Excision mission.
- The Excision mission can be accessed from several locations in the Pale Heart, including at the end of the raid itself.
- The Verity encounter is the only time in Destiny history where the death mechanic is mandatory.
Gallery[edit]
Intro
A lone Guardian within the Substratum
Weapons
Euphony, Salvation's Edge's Exotic linear fusion rifle
Critial Anomaly, the sniper rifle
Forthcoming Deviance, the glaive
Imminence, the submachine gun
Non-Denouement, the bow
Nullify, the pulse rifle
Summum Bonum, the sword
Adept Weapons
Armor
The Promised Reunion armor for Titans
The Promised Victory armor for Warlocks
The Promised Reign armor for Hunters
