Spoilers — Please keep the spoiler policy in mind while editing the wiki.
Citations — Please cite your sources when adding information to the wiki! Use our handy guide for assistance.
The Shattered Throne
From Destinypedia, the Destiny wiki
|
Prev: |
N/A |
|
Next: |
|
| The Shattered Throne | |
|---|---|
| |
|
Game: |
|
|
Player(s): |
1-3 |
|
Recommended Power Level: |
1150 |
|
Location: |
|
|
Objective(s): |
|
|
Destinypedia has a walkthrough guide for this level; see The Shattered Throne/Walkthrough. | |
- "Strike back at the curse that plagues the Dreaming City."
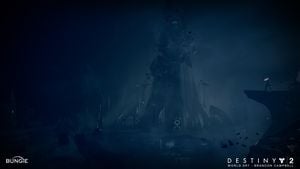
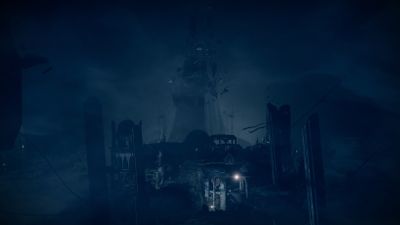
The Shattered Throne is a Dungeon that was introduced in Forsaken, and released on the 25th of September, 2018. It requires Guardians to enter Eleusinia, Queen Mara Sov's Throne World, where they fight their way past a horde of Taken, in order to uncover the source of the Dreaming City's Taken corruption following the Last Wish Raid. Before Shadowkeep was released, and during the Forsaken expansion, it was available every three weeks during the full curse week in the Dreaming City, and upon the release of Shadowkeep, it is now available at any time from an icon in the Director. It should be noted that the dungeon has checkpoints, so if you need to rest or go do something else, you are able to leave and return to your last checkpoint.
Walkthrough
Erebus
To reach the entrance to the Shattered Throne, you must use one of the portals scattered around the Dreaming City to enter the Confluence. Follow the path to the central room and you should see a giant Taken gateway in a large room, with a Techeun standing in front of it. Approach the gateway and follow the prompt it gives you to enter the Shattered Throne. As of Shadowkeep, this is no longer required as you can enter the dungeon directly from the Director.
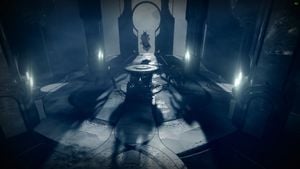
When you enter Mara Sov’s throne world, you will see a large door in front of you. Have your fireteam go through that door, and enter the labyrinth. Continue to advance until you enter a restricted zone. It should be at one end of a broken bridge. On the other side of the chasm, you'll see a group of Taken Acolytes and a Taken Knight called a Labyrinth Architect. Kill them, but be wary of the Acolytes. They will constantly spawn numerous Acolyte's Eyes until they are defeated. Once you kill all the enemies (which doesn't have to include the acolyte eyes, but is recommended) and the miniboss, a symbol will pop up.
Travel to the location with the corresponding symbol. There you will find another Taken miniboss, along with a group of Acolytes. Kill them. Once all the enemies are dead, another symbol directing you to somewhere else in the map will appear. Go there. Repeat this process until you have to go back to where you came from. While on the way from destination to destination, various Taken enemies will spawn to block your path, such as Phalanxes, Captains, and hordes of Thrall. There will also be Taken Hobgoblins sniping you from above. It is not required to kill them, but it is highly recommended as it will make this entire section easier.
Once you have gone to every location, you will be directed to go back to the start, where you will face one final group of Acolytes and a Labyrinth Architect in the form of a Taken Captain. Kill them and jump down the hole that will open up. Keep following the path.
After you get far enough, you should trigger a checkpoint. Jump down, kill the enemies below, and at the end of the path, there will be a boss that you need to kill named Asterion, Set Apart. There will be snipers during this portion as well. Kill the enemies and move on to the next part.
You'll find yourself in a long hallway. On the sides are Taken Hobgoblins sniping you, along with Taken Phalanxes and Knights. Carefully take them out one by one, so that they don't trouble you as you make your way across the hall. Be especially wary of the Knights, as their fire attack can deal serious damage. When you reach the end, turn left. You'll enter a wide-open room with catwalks and a few pillars with platforms here and there. Your goal is to make it all the way to the left side. Taken Ogres and obstacles will spawn on the platforms as you progress. Be careful and take out the Ogres as quickly as possible from a distance. Their eye blasts can easily knock you off the catwalks, which will kill you. Jötunn is excellent for this encounter, as it kills the Ogres in two shots each. Once you make it all the way to the left side of the room, you will find yourself in front of a barrier.
When you reach the barrier, go through it and you'll see that you are slower and you cannot double jump/glide/lift. There will also be a never-ending swarm of Shadow Thrall spawning around the room. Go through the maze and avoid the Shadow Thrall or dispatch as much as you can (there is an orb on a pedestal to the right of where you enter. If you jump, then melee, and do this to travel throughout the hall, you will be able to avoid a lot of damage from the Thrall). At the very end, drop down into the next area.
Follow the path. You will eventually be met with a choice: follow the outside of the rock face or go inside. Both paths take you to the same place. Either way, once you make it to the other side, you will find a large group of Taken Phalanxes. Kill them all to get to the next encounter.
Vorgeth, the Boundless Hunger
Here you arrive at the first boss, Vorgeth, the Boundless Hunger. This encounter has a special type of Taken Wizard known as the Keeper of Petitions. In order to do damage to Vorgeth, you will need to kill the Wizards and pick up the orbs they drop. You will receive a buff called “Petitioner's Mark" that stacks three times. There will also be a 45-second timer on the buff. If it reaches zero, the holder of the buff will die and you'll have to kill however many Wizards you've defeated again. Once you collect the fourth orb, the buff will change to “Petitioner's Burden,” which also has a 45-second timer. Extinguish the buff at one of the 4 pillars in the center of the room to start the damage phase.
Once the damage phase is over, the Wizards and ads will respawn. Repeat this process as many times as it takes to kill Vorgeth. A recommended strategy for this encounter is to use a long-range primary weapon like a Scout Rifle or a Bow to kill all the ads in the room from the safe areas near the entrance. Once all of them are dead, bring all four Wizards to very low health without killing them. Then kill all four Wizards in rapid succession and extinguish the buff to start damaging Vorgeth. While immune, Vorgeth will attack with powerful eye blasts that knock you back and deal severe damage. During the damage phases, he attacks with swarms of Axion Darts. Shooting the darts will destroy them and keep you safe from damage.
Once Vorgeth is dead, go through the door in the center. If this is your first time in the dungeon or you simply haven't done so before, interact with the statue. Next, jump down a series of platforms and ascend a gravitational lift. The path from there is fairly straightforward. If you get confused, just go to where the enemies are.
At some point, you'll be given a new objective - "Ascend." You have two options: either go up the stairs, go forward, and then jump to the ending right away (the harder path) or turn right and then go through a series of jumping puzzles. Stick to the wall and ascend the lifts to get to the last encounter.
Dûl Incaru, the Eternal Return
Dûl Incaru, the Eternal Return is the final boss of The Shattered Throne. Once you start the encounter, two fairly large groups of Taken Psions will spawn on either side of the room. Eliminate them as fast as possible, then kill the three Darkblades. Each one you kill will drop an orb. Pick them up. This is the start of the damage phase and you only have 45 seconds until you have to cleanse yourself in the middle of the room (the purple orb on the pedestal) or fail the encounter and have to start over again. Dul Incaru will occasionally summon a crystal near where she spawns at the encounter beginning. This will make any living Knights immune. Destroying it will revive any dead Knights at full health. Once your buff runs out, you will have to break the crystal to revive the Knights and get your buff back. Repeat this process until Dul Incaru is dead.
Wish-Ender Guide
After you beat Vorgeth and step through the door, you are going to see a statue. Talk to the statue and give it your Awoken Talisman. This starts the Wish-Ender questline.
Once you're done in the Shattered Throne and have interacted with the Sjur Eido statue to get the three tokens, go to Thieves' Landing on the Tangled Shore and take the lift to Four-Horn Gulch. There, you'll find a floating white orb. Interact with it to initiate the "???" mission.
This mission is fairly straightforward. Follow the white orb as it travels around, slaying the enemies that spawn along the way. Once absolutely everything is dead, you will receive three tokens. After completing the ??? Quest players must then return to Eleusinia to kill 3 hidden bosses found in the Shattered Throne.
To find Querim, the Waking, the team must find a blue orb hidden atop the Tower of the Deep and bring it to the roof of the center building. There, a Siren of Riven will speak to the team. The orb must be placed in the empty hands of one of the statues. Once done, the fight begins. First, a Taken Minotaur named Theratos, Archersbane will spawn. Once you get Theratos's health low enough, Querim will spawn. To complete the fight, both the Minotaurs must be disposed of, regardless of time apart. From here, continue into the dungeon as normal until you reach the Ogre catwalks.
Next is to find Eriviks, the Waking, whose arena must be unlocked with 2 orbs instead of 1. The first orb will be found in the Ogre catwalk area, where it is found behind the first pillar to the right of the beginning, and the orb is to be placed somewhere along the right side of the room (from the perspective of the first pillar to the Shadow Thrall room), where one of the statues will be missing the orb. The second is located in the "Thrallway" to the right of the entrance. The orb is to be placed at the end of this room, where the team jumps from the "Thrallway" into a chamber with a bunch of the statues along the sides. Just like before, you will find one statue that isn't holding an orb. Place it there. If both are placed, then a door at the other end of the room will open, revealing a hidden area where the Boss lurks. Once the team rendezvous in the room and one player investigates the center, the door will close and the fight will begin. A bunch of Taken Psions will spawn to attempt to inconvenience the players, and then the boss will spawn in the aforementioned center. Once Eriviks is killed, the encounter will end and the door will reopen. Again, continue through the dungeon as normal until you make it to the Vorgeth fight.
Lastly is Xavoth, the Waking, who is, inconveniently, located with Vorgeth. To summon Xavoth, players must cleanse one of the sigils, getting rid of Vorgeth's shield. In the back of the room by the exit, a Taken Minotaur will spawn; killing it will drop an orb, which must be placed at one of the statues hidden along the side of the room. Then, Xavoth will spawn; however, unlike Vorgeth, Xavoth is easy to kill, but can and will be a problem if not dealt with quickly enough. Once Xavoth is dead, continue the Vorgeth fight as normal.
Once all enemies are eliminated, and the tokens are filled, the players can turn in those tokens to Sjur Eido's statue and claim the Wish-Ender bow.
Bosses
- The Labyrinth Architects
- Asterion, Set Apart
- Vorgeth, the Boundless Hunger
- Dûl Incaru, the Eternal Return
- Querim, the Waking (Hidden)
- Eriviks, the Waking (Hidden)
- Xavoth, the Waking (Hidden)
Rewards
Rewards that drop here will be the normal Dreaming City gear, such as the Reverie Dawn Armor and other Dreaming City-themed weapons. Drops from Shattered Throne are powerful and will increase a player's Power Level unless they are already at the soft cap for the current season. There will also be a chance for the rarer Dreaming City Ship, which is a required collection item for the Cursebreaker Seal.
Weapons
Trivia
- The Shattered Throne is the first Dungeon in the Destiny series.

