We Found a Rifle: Difference between revisions
From Destinypedia, the Destiny wiki
No edit summary |
No edit summary |
||
| Line 46: | Line 46: | ||
{{quote|A fitting tribute to those old weaponsmiths and the newest Iron Lord.|<ref>https://www.ishtar-collective.net/cards/khvostov-7g-0x?highlight=Khvostov</ref>}} | {{quote|A fitting tribute to those old weaponsmiths and the newest Iron Lord.|<ref>https://www.ishtar-collective.net/cards/khvostov-7g-0x?highlight=Khvostov</ref>}} | ||
====Step 1: A Khvostov Rising==== | ====Step 1: A Khvostov Rising==== | ||
Having collected all ten manual pages and recovered all three weapon parts, Shiro will suggest that the player return to the Cosmodrome and search for the final piece. Not nearly as simple as it sounds, the player is required to complete the quest, '''A Khvostov Rising'''. The objective is to recover a firing pin from Kaviss, a powerful Splicer Captain with a large health pool. A more detailed walkthrough can be found [[A Khvostov Rising | Having collected all ten manual pages and recovered all three weapon parts, Shiro will suggest that the player return to the Cosmodrome and search for the final piece. Not nearly as simple as it sounds, the player is required to complete the quest, '''[[A Khvostov Rising]]'''. The objective is to recover a firing pin from Kaviss, a powerful Splicer Captain with a large health pool. A more detailed walkthrough can be found [[A Khvostov Rising|here]]. | ||
Nevertheless, once Kaviss has been dealt with, he will drop an exotic [[engram]]. The Khvostov 7G-0X is immediately placed in the player's inventory, and they are prompted to complete the rest of the mission. | Nevertheless, once Kaviss has been dealt with, he will drop an exotic [[engram]]. The Khvostov 7G-0X is immediately placed in the player's inventory, and they are prompted to complete the rest of the mission. | ||
Revision as of 04:37, October 20, 2019
|
Prev: |
|
|
Next: |
|
| We Found a Rifle | |
|---|---|

| |
|
Game: |
Rise of Iron expansion |
|
Player(s): |
1 - 3 |
|
Location: |
|
|
Objective(s): |
collect pages and parts |
|
Destinypedia doesn't currently have a walkthrough for this level; could you write one? | |
- "Your first rifle, right? Got you out of a tough scrap back in the day."
- — Shiro-4, to the Guardian[1]
We Found a Rifle is a quest featured in Destiny's fourth and final expansion, Rise of Iron, of which completion of the main story is necessary to receive this quest. Comprised of two lengthy objectives and a standalone mission ended off by a brief final step, the quest rewards the player the Khvostov 7G-0X, an exotic auto rifle and throwback to the original weapon found during the base game's inaugural mission.
Prelude
In order to begin the quest, one must collect a Khvostov 7G Schematic from one of two sources, albeit one is more elaborate than the other. For the more sentimental players who kept their original Khvostov rifle, the first method is incredibly straightforward if not emotionally conflicting; Simply dismantle the rifle, and the schematic will show up in the player's inventory.
If the player either never held onto their original Khvostov or couldn't bring themselves to dismantle it, the second method is available. While on Patrol in the Plaguelands, a journey awaits. The player must encounter and kill a special Hive enemy called a Brood Mother, resulting in a chance to drop a Splicer Intel Relay. After collecting the mentioned consumable, the player will need to make their way to the Breach, travelling through the reduxed portions of the Cosmodrome. The intel relay is used on a terminal to deactivate a laser wire grid barring passage through the wall.
Once beyond the wall, the player will arrive at the location of their first steps, now infested with Fallen Splicers and a an idle Ketch. Fight your way onto the Ketch until the area is completely devoid of hostilities. A chest located in the back right corner awaits. After opening, the player is given the Khvostov 7G Schematic and an armour piece of Legendary rarity[2].
Visit Shiro-4 at the Iron Temple to commence with the quest.
Quest Steps
Part 1
- "You have to haul on the line to catch a fish from a pond."
- — Russian Proverb[3]
Step 1: Collect pages and parts
This is where the grind begins. After speaking to Shiro-4, he will direct you back into the Plaguelands, where you must now collect ten pages from an old field manual and three weapon parts, all pertaining to the Khvostov. The pages themselves are random drops from Devil Splicers situated all over the SIVA-fied region. Collecting all ten pages should be a lengthy process, but not a difficult one[4].
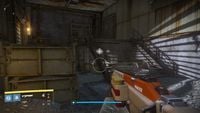
The parts, on the other hand, are not so random. This portion of the quest step takes the player on a nostalgic tour of the Cosmodrome portion of the Plaguelands. The first part is located under a set of stairs on your way into Dock 13, where players will recall the retrieval of the Arcadia-class jumpship.
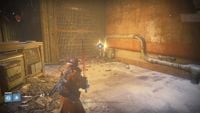
For the second and third parts, double back through The Divide and the Rocketyard to make your way to the Refinery, as if you were completing the Devil's Lair Strike, the part is nestled in a corner of the hallway travelled through after deactivating the laser grid.
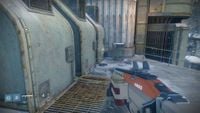
If you have stayed true to the path, the third and final part is located in The Blast, the area in which Guardians had to destroy a Fallen Walker to progress into the Devil's Lair. The part is resting on a weathered walkway on the other side of the main building seen just as you enter the area.[5]
Step 2: Talk to Shiro
Return to the Iron Temple to speak with Shiro-4. He will commend your progress and explain to you that he lacks the means to manufacture a firing pin for the weapon, stalling completion. He will then direct you to the next step.
Part 2
- "A fitting tribute to those old weaponsmiths and the newest Iron Lord."
- — [6]
Step 1: A Khvostov Rising
Having collected all ten manual pages and recovered all three weapon parts, Shiro will suggest that the player return to the Cosmodrome and search for the final piece. Not nearly as simple as it sounds, the player is required to complete the quest, A Khvostov Rising. The objective is to recover a firing pin from Kaviss, a powerful Splicer Captain with a large health pool. A more detailed walkthrough can be found here.
Nevertheless, once Kaviss has been dealt with, he will drop an exotic engram. The Khvostov 7G-0X is immediately placed in the player's inventory, and they are prompted to complete the rest of the mission.
Step 2: Talk to Shiro
Self-explanatory. Return to Shiro so that he may commend you and your new weapon; Enjoy.
Bosses
Gallery
References
- ^ https://youtu.be/QLEkDwK07iA?t=15
- ^ https://www.primagames.com/games/destiny/tips/destiny-rise-iron-find-khvostov-7g-0x-exotic-assault-rifle
- ^ https://youtu.be/QLEkDwK07iA?t=15
- ^ https://www.primagames.com/games/destiny/tips/destiny-rise-iron-all-khvostov-weapon-part-locations
- ^ https://www.primagames.com/games/destiny/tips/destiny-rise-iron-all-khvostov-weapon-part-locations
- ^ https://www.ishtar-collective.net/cards/khvostov-7g-0x?highlight=Khvostov


