The Shadow Thief: Difference between revisions
From Destinypedia, the Destiny wiki
No edit summary |
No edit summary |
||
| Line 10: | Line 10: | ||
|player= 1 - 3 | |player= 1 - 3 | ||
|date= | |date= | ||
|place= [[ | |place= [[Ocean of Storms]], [[Moon]] | ||
|objective= | |objective= | ||
}} | }} | ||
Revision as of 16:16, August 15, 2016
 This article is a stub. You can help Destinypedia by expanding it.
- " Taniks has no House. He kneels before no banner, owes allegiance to no Kell. He is a murderer, and very good at what he does. I have been tracking him since Wolves broke their chains, yes? Now Taniks works for Wolf pack ...but not for long."
- — Variks, The Loyal
| The Shadow Thief | |
|---|---|
|
Game: |
|
|
Player(s): |
1 - 3 |
|
Location: |
|
|
Destinypedia has a walkthrough guide for this level; see The Shadow Thief/Walkthrough. | |
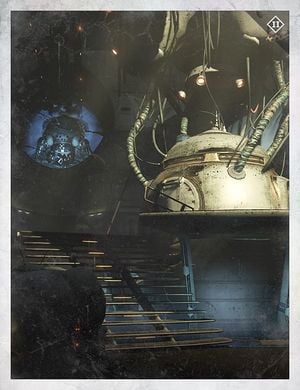
The Shadow Thief is a Level 20 Strike added by House of Wolves that takes place in the Ocean of Storms. Variks has tasked Guardians with stopping the infamous Fallen mercenary, Taniks, the Scarred, before he can loot the Hellmouth and share its secrets with the House of Wolves.
Enemies
Fallen
Hive
Walkthrough
Temple of Crota
Players appear outside the Temple of Crota. There's a pair of Shriekers outside, but these can be ignored if the team runs straight past them. Inside, a small group of Hive await inside. The real fight begins further in the temple near the Seeder Ship, where Hive and Fallen are fighting each other. There are also one or two Ogres nearby. Once again, if the players feel confident, they can run right past the enemies to enter the Dusk Warren.
Dusk Warren
Fallen will start deploying from the gravity lift in the center of the room. Among the waves of enemies are Stealth Vandals, Shrapnel Launcher Dregs, Sniper Vandals, and Captains. Once all enemies have been defeated, Taniks will appear and start firing on Guardians. He is armed with a Scorch Cannon and will do a power smash attack if Guardians get too close. Once Guardians have chipped away about a quarter of his health, Taniks will retreat. Follow him up the gravity lift.
Traitor's Ketch
Inside, Taniks will appear again, supported by more waves of Fallen. And once again, he will retreat if the players take away enough of his health. Focus on attacking him once any nearby enemies have been dealt with; Stealth Vandals, Dregs, and Captains will attempt to rush you periodically. Once the room is clear, head into the next room.
Mini-Boss: Fallen Walker
The next room will pit the fireteam against a Fallen Walker. The Walker itself is pretty standard, but the main issue is that the room is fairly small and cover is limited. Be careful not to stand too close to cover as splash damage can still kill you. On top of that, every so often waves of Stealth Vandals, Captains, and Exploder Shanks appear. There are also a group of sniper Vandals in the back of the room. Enemies may try to flank you from the corridor to the left, so make sure it is well guarded.
Once the Walker is defeated, head inside the final set of corridors. Taniks will appear once more; as the hallways are far more cramped, it is easy for Taniks to hit you, so keep your distance and force him back. Small groups of Dregs, Vandals, and Repeater Shanks will also appear. Damage Taniks to force him into the final room.
Boss: Taniks, the Scarred
The final room is fairly open but also empty; Taniks will appear on top of the platform in the center. If you force him off of the platform he will start appearing in one of the corners of the room. It will also trigger the room to start filling with enemies of all types through every doorway. As such, be sure to thin enemy resistance before engaging Taniks, as enemy fire can come from any angle in this room. Taking the center platform is not desirable as it offers zero cover, so stay near the edges, and regroup in different parts of the room if one area starts to be too hostile.
When Taniks is killed, he will drop his Scorch Cannon. This can only be used on the Dregs that start appearing at the end of the fight.
