Resonant Warder: Difference between revisions
From Destinypedia, the Destiny wiki
VoidShadow (talk | contribs) No edit summary |
(These Abilities doesn't belong the Darkblade Variant!) |
||
| (4 intermediate revisions by one other user not shown) | |||
| Line 1: | Line 1: | ||
{{Tabbed infobox | {{Tabbed infobox | ||
|title1= Heavy Shank | |title1= Heavy Shank | ||
| Line 8: | Line 7: | ||
|sectionBG=#003399 | |sectionBG=#003399 | ||
|lineBG=#003399 | |lineBG=#003399 | ||
|image= | |image= {{Tabcontainer | ||
|title1= Salvation| content1= [[File:Resonant Warder Salvation.jpg|300px]] | |||
|title2= Dusk |content2= [[File:Resonant Warder Dusk.jpg|300px]] | |||
}} | |||
|species= [[Fallen]] | |species= [[Fallen]] | ||
|rank= [[Ultra]] | |rank= [[Ultra]] | ||
| Line 24: | Line 26: | ||
|sectionBG=#466D1D | |sectionBG=#466D1D | ||
|lineBG=#466D1D | |lineBG=#466D1D | ||
|image= | |image= [[File:Resonant Warder Wyvern.jpg|300px]] | ||
|name= Resonant Warder | |name= Resonant Warder | ||
|species= [[Vex]] | |species= [[Vex]] | ||
|type= [[Wyvern]] | |type= [[Wyvern]] | ||
|collectives= [[Sol Divisive]] | |collectives= [[Sol Divisive]] | ||
|rank= [[Major]] | |rank= [[Elite]] <br> [[Major]] {{C|Legendary}} | ||
|mission= [[Ascent]] | |mission= [[Ascent]] | ||
|weapon(s)= {{icon|Void}} [[Warp Lance]] | |weapon(s)= {{icon|Void}} [[Warp Lance]] | ||
| Line 42: | Line 44: | ||
|lineBG=#637830 | |lineBG=#637830 | ||
|name= Resonant Warder | |name= Resonant Warder | ||
|image= | |image= [[File:Resonant Warder (Darkblade).jpg|300px]] | ||
|species= [[Hive]] | |species= [[Hive]] | ||
|type= [[Darkblade]] | |type= [[Darkblade]] | ||
| Line 49: | Line 51: | ||
|mission= [[Iconoclasm]] | |mission= [[Iconoclasm]] | ||
|weapon(s)= {{icon|Kinetic}} [[Hive Axe]] | |weapon(s)= {{icon|Kinetic}} [[Hive Axe]] | ||
|abilities= | |abilities= High Durability <br> Teleportation <br> Conceal Glyphs | ||
}} | }} | ||
}} | }} | ||
| Line 59: | Line 61: | ||
===Requiem=== | ===Requiem=== | ||
The Resonant Warders, particularly the Heavy Shank variants, are encountered during Requiem when the Guardian eliminates hordes of | The Resonant Warders, particularly the Heavy Shank variants, are first encountered during Requiem when the Guardian eliminates hordes of Fallen. To bring down the resonance barrier around a Veiled Statue, they must first destroy a Darkness spike to summon a Resonant Warder. Once the Warder is defeated, the Guardian can interact with the Glyphs to lower the barrier. | ||
At the mountain with a closed gate, the Guardian must defeat hordes of incoming Fallen to bring fourth a Resonant Warder. Once it is defeated, they must defeat the Dread units before interacting with the Glyph to lower the gate. | At the mountain with a closed gate, the Guardian must defeat hordes of incoming Fallen to bring fourth a Resonant Warder. Once it is defeated, they must defeat the Dread units before interacting with the Glyph to lower the gate. | ||
| Line 74: | Line 76: | ||
During the encounter against [[Dolgith, Blade of Reasoning]] which bears an Immuniy Shield, the Guardian must destroy the Taken Blights to reveal a spike of Darkness alongside seeds. Once the spike is destroyed, a portal will manifest for the Guardian to enter. Upon entering, they will find themselves in a room with two Warders and toxic air. As the Guardian slays the Warders, they must enter the portal to return to Dolgith. Upon returning, they must activate the Glyphs to lower Dolgith's shield. When Dolgith's shield returns after losing half of it's health, they must repeat this process one more time until the encounter is complete. | During the encounter against [[Dolgith, Blade of Reasoning]] which bears an Immuniy Shield, the Guardian must destroy the Taken Blights to reveal a spike of Darkness alongside seeds. Once the spike is destroyed, a portal will manifest for the Guardian to enter. Upon entering, they will find themselves in a room with two Warders and toxic air. As the Guardian slays the Warders, they must enter the portal to return to Dolgith. Upon returning, they must activate the Glyphs to lower Dolgith's shield. When Dolgith's shield returns after losing half of it's health, they must repeat this process one more time until the encounter is complete. | ||
==Trivia== | |||
{{Expand-section}} | |||
==Appearance== | ==Appearance== | ||
Latest revision as of 01:28, June 24, 2024
| Resonant Warder | |
|---|---|
| Biographical information | |
|
Species: |
|
|
Type: |
|
|
House: |
|
|
Rank: |
|
|
Mission: |
|
| Combat information | |
|
Weapon(s): |
|
|
Abilities: |
High Durability |
| Resonant Warder | |
|---|---|

| |
| Statistics | |
|
Species: |
|
|
Type: |
|
|
Collectives: |
|
|
Rank: |
|
|
Mission: |
|
| Combat information | |
|
Weapon(s): |
|
|
Abilities: |
Fan Shield |
Resonant Warders are a variant of enemies encountered within the Pale Heart.
Gameplay[edit]
Basis[edit]
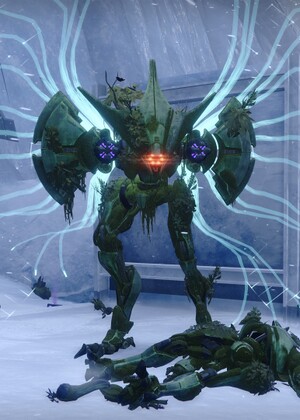
The Resonant Warders are first encountered during Requiem. When they are summoned fourth, the Guardian must slay them to reveal a pair of four Glyphs each representing the Witness, a severed Ghost, Pyramid ship, and a triangle respectively. The correct Glyph that must be interacted with will be revealed specifically where the Warder was slain. Once the Guardian walks on the correct Glyphs, they will be able to continue the objective. This specific core mechanic will remain for all three missions.
Requiem[edit]
The Resonant Warders, particularly the Heavy Shank variants, are first encountered during Requiem when the Guardian eliminates hordes of Fallen. To bring down the resonance barrier around a Veiled Statue, they must first destroy a Darkness spike to summon a Resonant Warder. Once the Warder is defeated, the Guardian can interact with the Glyphs to lower the barrier.
At the mountain with a closed gate, the Guardian must defeat hordes of incoming Fallen to bring fourth a Resonant Warder. Once it is defeated, they must defeat the Dread units before interacting with the Glyph to lower the gate.
When they are within the cave at the Seclusion, they must kill the Dread forces to lower the barrier around the Darkness spike. Shooting it will bring fourth the Resonant Warder and swarms of Fallen. This time however, there will be two Glyphs that must be correctly interacted with. Once the first Warder is slain, another one will spawn on the other side of the room and must be slain to reveal the next Glyph. After defeating the enemy forces, they must interact with the two identical Glyphs to lower the barrier blocking the entrance.
Ascent[edit]
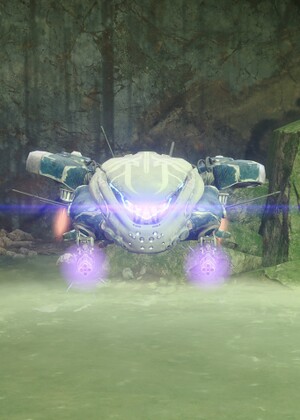
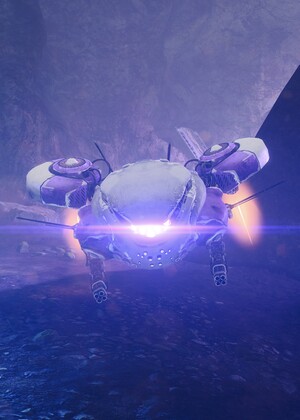
During their navigation across the mountain, the Guardian will eventually discover a Darkness spike. Once they destroy it, hordes of Vex will be summoned fourth. When enough Vex are slain, two Wyvern Resonant Warders will appear. After the Guardian defeats them, they can interact with the two identical glyphs to lower the barrier and continue their journey.
When the Guardian damages half of the Unwaking Mind's health, it will utilize Immunity, thus making it immune to any damage. The Guardian must use the Volatile Darkness to destroy the Taken Blights blocking the entrance to the left and right rooms. Within the rooms they must slay the two Warders to manifest and interact with the Glyphs to dissipate the Unwaking Mind's shield.
Iconoclasm[edit]
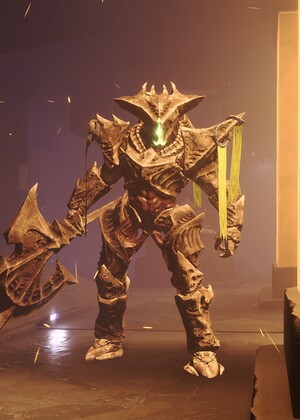
When the Guardian defeats the Dread units within a Pyramidal room, they must then shoot a spike to conjure seeds of Darkness. Interacting with these seeds will give the Guardian the Shielded from Darkness buff, which lasts for 44 seconds, allows them to pass through resonance barriers, and gives them immunity from the toxic air. They must then go down through one of the trapdoors to the lower floor where the two Darkblade Warders reside. Slaying them and activating the Glyphs will summon Eshkin'tuk, Witness's Blessed at the top floor, who must be defeated to continue further.
During the encounter against Dolgith, Blade of Reasoning which bears an Immuniy Shield, the Guardian must destroy the Taken Blights to reveal a spike of Darkness alongside seeds. Once the spike is destroyed, a portal will manifest for the Guardian to enter. Upon entering, they will find themselves in a room with two Warders and toxic air. As the Guardian slays the Warders, they must enter the portal to return to Dolgith. Upon returning, they must activate the Glyphs to lower Dolgith's shield. When Dolgith's shield returns after losing half of it's health, they must repeat this process one more time until the encounter is complete.
Trivia[edit]
- This section needs expansion. You can help Destinypedia by expanding it.
Appearance[edit]
- Destiny 2: The Final Shape (First appearance)


